Downtown Tea Party - Coming to a scrapbook space near you!

Yay! The new kits are shipping out on Monday and there's loads of lovely to look forward to this month.
Like these yummy scrummy alphabets:

And how about some funky twine:

 More lush patterned fabric:
And these super fun papers:

And you've never seen cardstock like this:

And loads of sweet little embellies:
Super yum!
Look out for our guest designer Julie popping up around here. If you're a Scrapbook Magazine reader the guys over there have been having a play with this months kit too. You can check out what they've been up to in issue 56 and I've just been looking at an early peek so I'll share a smaller sneak peek with you, shhhh!


xx Leo

Creating with the new kits

I've been busy coming up with some page ideas mixing up the upcoming kits for May/June 'Glastonbury Fields' and Downtown Tea Party'. The kits will work great  individually as well as mixed up together. If you're getting both kits you'll get more paper to play with which I personally love because it gets you out of the umming and arring about what paper to cut into first! :)

For this page I grabbed.....
from the 'Glastonbury Fields kit:
  • Kesi'art Tutti Frutti 'Betise' paper
  • Pink Paislee Soiree 'Floral' paper
  • Sassafras blue linen alphabet stickers

from the 'Downtown Tea Party kit:
  • Shabby chic crafts fancy frame journal spot
  • Cosmo Cricket Heart in the Dark Chipboard alphas
  • Kesi'art Script mini alpha stickers
  • Soiree mini cards x 2
  • Butterfly embellishment
  • Pink Paislee twine
  • Pin stripe ribbon
  • White cardstock

from my stash:
  • black drawing ink
  • Black fine liner pen
  • date stamp
  • Feather
Here's what I came up with:
Ideas to try:
Layer the Pink Paislee cards with other similar shaped pieces of paper and use them to highlight a title:

Mix up the different alphabet stickers from both kits on one layout:

Sketch on pencil lines to mark out where your journalling will go on your layout then stitch over the lines with sewing machine or hand stitching:

Cut some of the flowers from the Soriee 'Floral' patterned paper and add them to your page using 3D foam pads to add dimension:
I loved the hand drawn look to the flowers so I echoed this and added some hand drawn doodling around edges and on the alphabet stickers.

Keep a peek out for more ideas soon & let me know what you're looking forward to playing with from the new kit the most.
xx Leo

Photo Oppotunity

Hi!
This was the double layout I was going to post the other day. Remember before I was saying about a fun photo idea to do with the family, well here it is...
We all love cute kids photos but how about mixing them with photos from their viewpoint too? It makes for a fun different double layout! Take a few snapshots then let someone else have a go and maybe turn the camera on you too - especially if you're always the one behind the camera.
Have a go, take a few snaps then let the kids or other family members/friends have a go too and mix the results up on a layout. It's also fun trying to guess what the photos are when they're on your camera too, lol!


I took some snaps of the layouts before adding the photos and titles too so you can copy just the layouts if you prefer. I made use of off cuts I had left and matted some of them onto black cardstock and then inked the rest around the edge with a black inkpad. It helped to make all the individual papers stand out against one another.


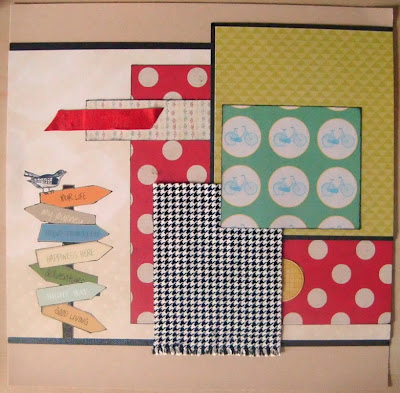
Here's the basis of the second layout.


Almost everything I used was from the Spring in Your Step kit. I used some extra alphabet stickers from my stash because I'm trying to use more of my older stash, there's no reason why you can't mix in old stash with your kits it's a great push to get older stuff used. I used some very old Heidi Swapp patterned chipboard, a few Echo Park stickers and some American Crafts Thickers.
xx Leo

Scrappy Ideas

I was going to add a double layout today but it's just gone ominously dark, think it might finally be going to rain! Ekk just heard a big rumble of thunder too. So anyway not good for photo taking but I do have some other projects to share already pre-photoed.

When I'm working with I kit I tend to keep all the pieces together in one box and in that box after I've finished cutting and sticking is usually a big old pile of small squares and off cuts so I put together a couple of little books to make use of the small scrappy bits and pieces.

To make the pages of the book I used plain A5 paper and cut out a 6cm strip off the short side. You end up with a square size piece and a long thin size piece. I made a large pile of the paper pieces for my pages. You can stack a wedge of paper together and trim them at once to save time. Having the two piles of paper meant I could make two books, one square for a sketch book and one long and thin for a list book.


Square Book
For the covers I used some card from a pizza box and covered the front and back of each piece of card with plain cardstock. I found out some of the leftover pieces of patterned paper and some of the netting and fabric from the Spring in Your Step kit. To begin with I added a layer of drawing ink sprayed on with a Mini Mister.

Then added a layer of netting fixing it in place with a couple of staples.


Then I added a square of paper and a sticker. I had these stickers (Crate Paper ones) on my desk from making cards so I just grabbed them to use.


Then I added another slightly smaller square of paper.


Then something else that was hanging around my desk, a lovely feather just glued on. I love adding in bits of ephemera to projects so I'm always collecting bits and pieces.


Next I added another small square of paper and some of the ribbon from the kit. I love this ribbon, I've been hoarding it!


Then another little sticker, I'm trying to use these up!


Then finally a small square of fabric from the kit and one of the rose brads. The 'ideas' title I hand stitched onto a scrap of canvas. When the cover was finished I fixed the whole book together with my Bind-it-All.


List Book
I already had a scrap of paper with a butterfly punched out of it so I cut out a rectangle around it and use a boarder punch on one edge. I used a small scrap of card and a bit of netting fabric to fix the netting behind the punch out.


Like this!


To make the cover I use just scraps of patterned paper cut to the same size as the plain paper pieces. To the front cover piece I added a bit of fabric, love the frayed edge so I kept that on.

Then the butterfly piece just went over the top along with a some of the alphabet stickers.
Again the whole book was fixed together with my Bind-it-All.


So what are you doing with your kit bits and pieces?
xx Leo