New Kits Are Out!

The new Quirky Kits are being sent out this week so look out for them arriving on your doorstep! This month we're taking a nostalgic trip to the seaside. The main kit is 'The Milk Bar'. It's named after an ice cream parlor I used to visit when I was growing up during the summer holidays. I picked out ice cream colours & kitschy seaside motifs and the whole kit has an overall nostalgic/vintage summer feel.

I love the kitschy Thickers and the glitter 'ideas' sticker which I thought would be great for an ideas book or maybe a page about what your idea of a perfect summer is? The map paper would be great to plot your adventures of where you've been this summer or where you spent your favourite summer or perhaps where you would like to go in the future?
You'll also find some seam binding trim. This is great to alter and I've seen this use a lot lately with distressing  techniques for shabby chic style projects.


As always I like to add in some unexpected details. These cute little pin badges have been designed just for this kit. There's also a blank watercolour paper postcard that you can use as part of a scrapbook page for your journalling or use to make a postcard size piece of art or as a page in a minibook or even send as a postcard to yourself while you're on holiday so you can collect it when you get home to put in your scrapbook or mini book or smash book!


The Quirky Kit Lite this month, 'Ice Pops' also has a summer holiday feel but I've added in some more modern feeling detailing to this one with more bright colours and fun patterns.
The fun swirly bright Thickers add a different dimension to the peachy toned papers.

There's a little bit of vintage with the Elle's Studio handmade layers pennants and then back to the modern with the bright coloured washi tape and the hot pink seam binding. Look out for a fun little technique touch with your Quirky Kit Lite this month too - we'll be going all cross stitch!


This month we'll be joined by guest designer Daphne who'll be sharing some fun techniques and project ideas with us throughout August.

Have fun with your kits!
xx Leo

Fabric Inspiration - Home Decor Fun!

Hi!
It's Leo back with the last of this weeks look at using kit leftovers. I've been specifically asked for ideas on using the fabric in the Quirky Kits so today I've combined the idea of scraps with using the fabric. Everything I've used is from the Downtown Tea Party Quirky Kit.
As a lover of pattern I'm forever gravitating towards pretty patterns to use in crafting and fabric is right up there as a must have (to me) in your craft stash. It's naturally lignin free so you don't have to worry about it ruining your photos and you can do so much with it from making your own ribbons, making book covers to using it just like pattern paper to making fun 3D projects like the one I'm going to have a go at today.....

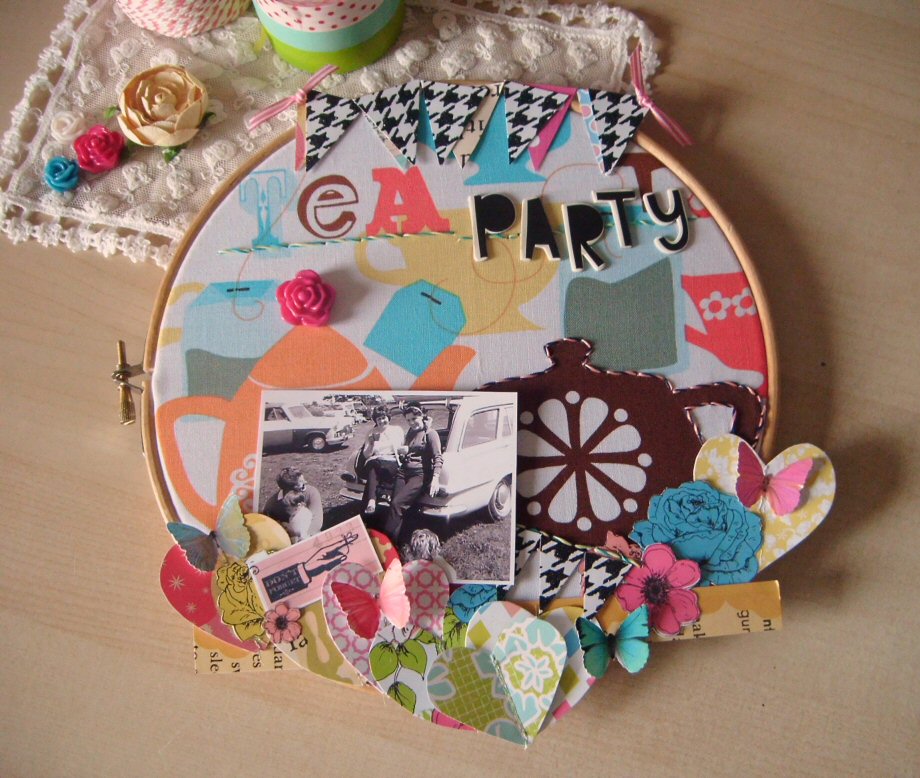
Embroidery Hoop Wall Hanging


 OK to begin with I'm using an embroidery hoop. The one I've got here is a vintage one but you can get them new in haberdashery stores. I'm going to get some for the shop in my next wholesale haberdashery splurge so look out for them popping up there, should be next week. This one is 8 inches but you can get them in lots of different sizes.

Take the fabric piece and the hoop and using the inside hoop frame the area of fabric you like.

 Place the fabric over the hoop then push the other hoop over the top of it. Tighten it up with the screw till it's nice and tight and all the wrinkles are gone.

Trim the edges of the fabric off to make it nice and neat.


Now you can start decorating. I started by stitching around some of the details on the fabric with the Pink Paislee twine. I've also used off cuts of patterned paper from the kit cutting out strips and some of the flowers. I've also glued one of the resin flowers on there. With all the elements I'm using my glue gun to glue them on.

I'm carrying on layering on more patterned paper pieces. I've made a mini banner with the glitter cardstock.

And one for the top too using more off cuts of patterned paper. I've added some of the alphabet chipboard stickers too.


Across the bottom I've layered some cut out heart shapes that have been made from paper scraps and some cut out from the little Pink Paislee cards. The hearts have been made by folding the paper in half then cutting out half the heart shape and opening it out then I've added some machine stitching down the centers. When I've glued them on I've added the glue along the fold on the back of the hearts to give them more of a 3D look.


I want to make a little 'pocket' to tuck a photo inside so it can be changed around so I've not glued these embellishments on the fabric just on top of the paper hearts so there's a gap underneath.


As a final touch I've added some more hand stitching around some of the embellishments.


There we have the finished wall hanging. The photo can be changed around or you could use it as a place to tuck in little keepsake bits and pieces.


 So what have you been making this week? Have you got a scraps project to share?
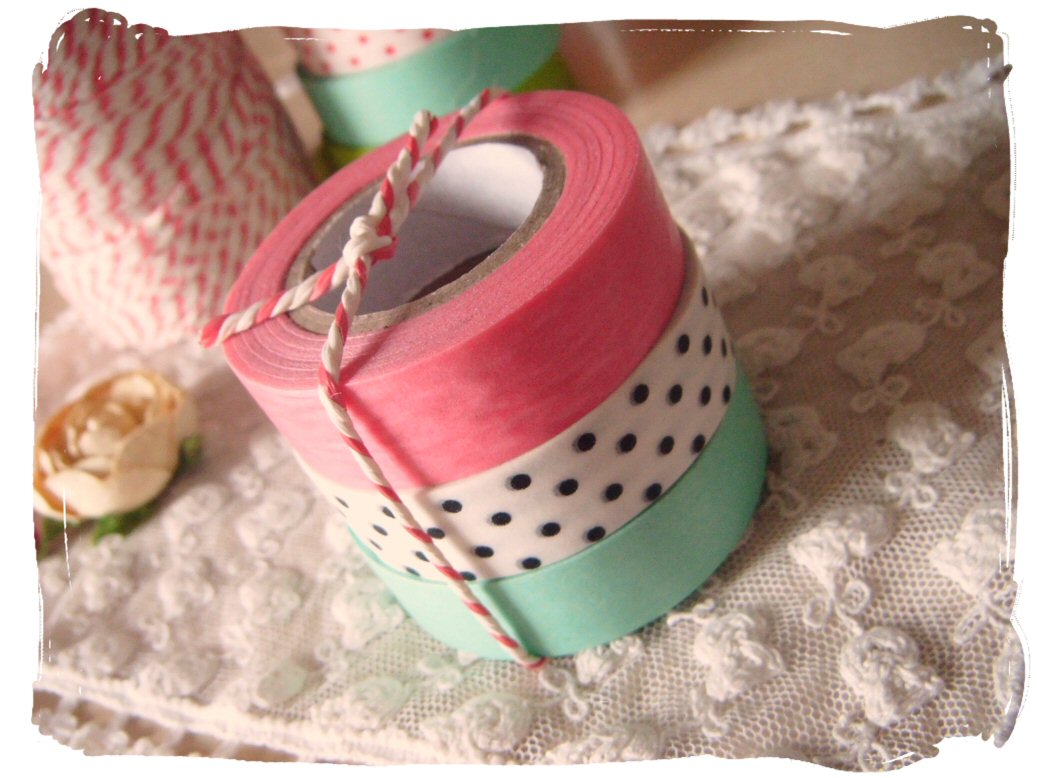
I've got a lovely washi tape bundle to give away so why not have a play this weekend and show me what you've made. Add the link to your project in the comments or you can email it to me at enquiries@craftyprincess.co.uk  or add it to the Facebook wall and I'll pick out a winner. I'll extend the deadline till next Wednesday (20th July 2011) to give you a chance to play along. I'll announce the winner on Wednesday evening here on the blog and on the Facebook page too, (you can play along there and add your projects to the wall too).


Have fun!
xx Leo

'Sew Simple' to make embellishment with scraps!

Hi Leo here!
All this week we're looking at using small amounts of kit and giving our pages and projects big impact. Today I've got a fun simple way to make stitched embellishments using scraps of card and your twine from this months Quirky Kit.....


Stitched Embellishments
First take a scrap of white card and write your word on there in pencil. It can be part of a title on a layout or a greeting on a card or just a word that works with the project you're making. I'll be using this one on a recipe layout so I've gone with the word 'yum'.

Next take a pin and punch holes along your word, leave a gap of around 1cm between the holes, you might have to make them smaller to go around parts of the letter.

Use an eraser or something else squidgy underneath the piece of card as you punch through it with the pin, (into the eraser) to make it easier punching though the card.

Thread a darning needle with a long length of the twine from your kit and tie a knot in the end of it. Thread the twine up through the first hole and back down through the next to make your first stitch. After the first stitch come up through the next hole and go back down through the one behind it to make your stitches close together with no gaps. This will give the impression you have written the word with your twine.


Carry on stitching through the holes until you've finished your word. Knot the end of the twine to finish and trim it off at the back.

Finally cut out around your word leaving a boarder all the way around. You can draw around the word first in pencil and then cut it out if you need a line to follow. Erase any of the pencil lines still showing when you've finished your embellishment.

And here's the layout I've added the embellishment to:

I've used a mix up of both the main Quirky Kit and the Quirky Kit Lite.

These embellishments are also perfect to use as a greeting on cards. Here's a quick card idea....

Card instructions

Take the Kesi'art fuchia dot cardstock and cut out a piece 8x6 inches and fold it in half to make a 4x6 inch card blank. Cut a strip of the Soiree floral patterned paper to 5.5x1/5 inches, (or use a scrap!) and sew around the edge with a sewing machine, (optional). Glue the strip to your card blank on the left side. Use a die or punch to cut out a fancy shape from the Kesi'art cardstock and turn it over to the plain side. Cut the same shape from the Kesi'art Tutti Frutti patterned paper, (or another scrap of paper) and layer the two shapes together. Glue them to your card blank in the center of your card. Add the stitched embellishment to it and add a banner sticker from the Sassafras stickers, (in the Quirky Kit Lite) to your card. Make a paper bow by using two strip off cuts of paper folding them around to make the bow shape. Add it to your card to finish.

How to make a paper bow


Use a thin paper scrap and bend one end over then bend the other end over to make two loops


Staple the center of the loops to keep them in place


Take another thin scrap of paper and fold it aound the middle of the loops.


Glue it down at the back and cut off the excess to complete your paper bow.


Hope you're getting lots of ideas this week using your scraps! Pop back on Friday to see another project & don't forget to get playing with your scraps this week and leave a link on the blog in the comments showing what you've made. On Sunday I'll pick out a winner at random who'll win a selection of scrummy washi tapes!

Use it up wear it out!

Hi Leo here again with another idea using the main Quirky Kit 'Downtown Tea Party'.

Today I'm sharing an idea using up scraps of patterned papers from the kit. You can also use the idea just as a way of mixing up lots of patterns on one page. Ok here's my page..........


I used on of the Cosmo Cricket papers for my background:


I started building up the layers of patterned paper cutting some out in rectangles and some into strips then sprinkles over some of the embellishments from the kit. I really like some of the strips along the bottom of some of the papers so incorporated some of them leaving them on the edges of papers in some cases and cutting them off the bottom of the papers to use on their own.


 The title I added as the last layer sprawling it across all the layers including the photo.


I love the dotted colour strip along the bottom of the Kesi'art paper so I kept that on there to use.


Some of the pieces I've cut out of the patterned paper the date piece in the corner is cut out from the Pink Paislee Daily Junque paper.


 This little scissors is on the Kesi'art card strip I liked how it kind of went with the background paper - it could make a cool theme for a page about scrapbook or paper crafts too?

I used the Pink Paislee twine from the kit across the top to give the impression the rectangles of paper in the background were taped to the line of twine kind of like a washing line! This tape is not in the kit but you can get it's from the Vintage Indie card kit I was playing with this kit at the same time I made the page and I couldn't put the washi tape down!


I glued the twine down using a Pritt glue stick just dabbing it on the paper first then pressing the twine onto it - it sticks it down really well and quick too.

So what are you waiting for? Grab those scraps and get to work, share what you've made with your kit scraps in the comments and I'll pick out one at random to win a washi tape goody pack!

xx Leo

Thrifty Layering Ideas using the Quirky Kit Lite

Hi Leo here again!
Today I've got some ideas for using small amounts of kit but give the impression of lots of layers and details. I'll be using just the Quirky Kit Lite and some mist sprays from my stash to create this layout:

To start with I've taken a piece of kraft cardstock and cut out a 8x10 piece. I've placed my two photos on the card positioned how I would like them and drawn around the edges with pencil. I've then added some stickers - the alphabet stickers from the kit to make the first half of my title and one of the leftover sticker bits from the banner sticker sheet. I'm going to use them as masks and spray mist over the top so I've not pressed them hard down onto the card because I want to peel them back off.


I've used a light and a dark mist spray (silver grey and white) to create depth and interest. Once the mist has dried a little I've peeled off the stickers. I'm going to re-use the alphabet stickers to create the second half of my title - 'Tiger Tiger'.


Next I want to build up the background of my layout so I've started with a white sheet of 12x12 cardstock and glued two 1x12 inch strips of the kraft cardstock leftover from earlier down the left and right sides.

Using the Soiree paper I've cut out  four 1 inch wide strips and laid them along side the kraft card strips and across the top and bottom. This will create the look of a layer of paper behind and a layer of cardstock but in reality I've only used a small amount of paper and leftover pieces of cardstock.


To add a little extra detail I've stitched around the boarder with my sewing machine.


On top of the frame I've also stitched on the piece of kraft card I sprayed earlier and is now nice and dry. I've then added some more of the flag stickers and a button. Here's what I've got so far:


The pencil lines where the photos are going to go are still on the card so I'm working with those and building up some more embellishments around the edges of where the photos will go. Very simple embellishments we can make from small amounts of patterned paper are leaves. Here I've cut out some varying sizes of leaf shapes from little bits of the papers and cardstock in the kit.


Using the pencil lines as guides I've built up the leaf embellishments around the edges of the photos.


 Again as an extra finishing touch I've stitched some leaf veins on the leaves with my sewing machine. You could also doodle some veins on the leaves or just leave them plain.


Along with the leaves I've also added some more of the flag banner stickers. Because we have the pencil lines on there showing the position of the photos I can just use small pieces of the banner stickers and not waste any of the sticker that won't show under the photo.


Once I was happy with the embellishments around the outside of the photos I've glued the photos onto the layout and then built up a couple more of the banner sticker pieces over the top of the photos. To finish off the layout I've added on some of the Sassafras Paper Whimsies embellishments and some of the buttons from the kit.
Lots of layers and details but I've only used a small amount of patterned paper and a few embellishments. Hope you've enjoyed these thrifty ideas!
xx Leo