Altered project, quirky Style

Hi There!

I promised you cards didn't I? Well I'm afraid those will have to wait as I was casting my eyes over my craftroom and they alighted upon a UFO (that is, an unfinished object) that had been unloved and unfinished for quite some time. It was something I picked up from a cheapie homeware shop with the intention of prettying it up and using to store my scraps. I had started it's makeover but had got stuck for inspiration once I'd completed the main background so I was happy to startover with some lovely Quirky PPs!
It was very easy to pull apart this item, cover it with pretty papers and put it back together, I made sure I filed the edges of the PP covering the hearts, pegs and background for a more professional finish. I made the straws by rolling scraps of PP round a piece of dowling, using a strong glue (like glossy accents) to secure, leaving it on the dowling and holding the join together with more pegs along the length of the straw until it dried. I made my own embellishments out of more scraps but everything you see, apart from the letter stickers are from the current kits.

I'm so looking forward to using this now I have finally finished it. I can use the pegs to hold paper scraps, the hooks to hang ribbon or embellishment packs from so all I have to do now is see if I'm allowed to bang a nail in the wall to hang it up! ;)

Oh, and if you have any ideas on what to call this quirky item, please let me know, I'm stumped! Here's another look, to help you decide...

See you soon!

Nikki x


Quirky Christmas Kit Mini Album - Final part

Leo back again with the second part of the Quirky Christmas mini album ideas. I've finished my blank album now and it's all ready to start filling up throughout December. I've saved a little bit of the kit to embellish with some more as it gets filled.
Here's the finished mini album as it is now:

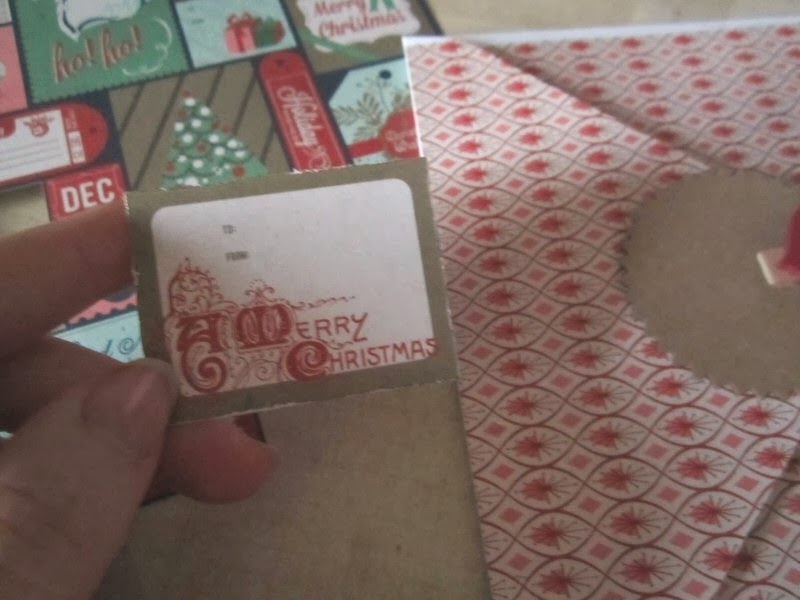
Last time I left it on this part with the little tag made from the flash card tags and the gilded brad:
 
 
On the next page, (this base page is part of the clipboard mini album) I've added one of the Pretty Little Studio diecuts and a little bit of one of the Maya Road kraft doilies both from the kit. The top edge of the deer diecut is not glued down just the bottom half so I can tuck a photo or memento behind it.
 
For the next page I've picked out one of the Maya Road kraft envelopes from the kit and opened up the top edge then punched in holes and covered some of the ring reinforcement stickers with glitter cardstock and added them to the holes.
 
Inside the envelope is a piece of paper ready to add a photo or memento to.
 
 
For the next page I've used one of the grid cards I included in the kit.

 These are really simple to customise with the patterned paper pad. Here's how I've done this one:
First I've cut out two pieces of the paper to 4 inches wide to fit the grid card then layered them up gluing them in place.

 
Finally I've trimmed down the top edge of the card using the edges as a guide and just added a little stamped message at the bottom. The blank space at the bottom edge will be perfect to add journaling to and then the top space a photo.
 
The next page in my album is another base page from the chipboard mini album and then all I've done is cut out one of the mini tags from the Basic Grey paper and attached some of the Lawn Fawn twine to it. the tag was then looped around the page and one of the little woodgrain tabs was glued to the page and then finally I added some sewing machine stitching to hold down the twine and keep it in place.
 
 
For the next page I've used one of the 5x5 inch sheets of card I cut out earlier and cut out a 4.5 x 4.5 inch square of paper to add to it fixing that down with a piece of the washi tape then I've added another of the cut out tags from the Basic Grey paper and one of the American Crafts pegs. The edge of the page has been finished with another one of the woodgrain tabs and some more sewing machine stitching.
 
 
The next page I've left as it is in the mini album blank as I quite liked this page just with the washi tape so my only plan is to add in the photos/mementos with the washi tape.
 
 
The next page is a little more complicated. I've a sheet of vellum to create an envelope. This is really easy to do all I did was to fold the sheet into three equal sections then trim the far end into a point and the near end with a slight dip in it then refold the sheet and stitch the open sides together.
 
I glued one of the Maya Road tags to the front and then used one of the Studio Calico Flair stickers on the flap.
 
 
The next page is another grid card but this time I've used a small scrap of the Basic Grey paper folded around the bottom edge and then glued down then added the Pretty Little Studio Poinsettia diecut on top and finished it off with a stamped message along the bottom.
 
 
The next page has one of the base pages already in the mini book as the base and then I've glued on the sequin pocket embellishment from the kit and glued one of the stamps from the Basic Grey paper and one of the Studio Calico Flair stickers.
 
 
The next page uses a grid card again.
 

For this one I've used up more of the paper scraps I had left over and added in a piece of the floral pattern. They're all cut to 4 inches wide with the floral bit 4x4 inches.
 
Then I've layered them up and glued them down to the grid card.
 
The next page is the Pretty Little Studio postcard.
 
 
On the back of the postcard there's a grid card and one of the Maya Road kraft envelopes with a little bit of the mini pompom trim. I've glued the pocket on upside down on the back of the postcard so when the page is flipped over the top is facing the viewer.
 
 
Next I've include some the die cuts from the kit, decorated with the Basic Grey paper and Studio Calico Flair. The page underneath is another base page already in the mini book and to that I've added one of the Websters Pages bags and a little stamped message.
 
The next page is an old 6x6 American Crafts page protector that I've customised.
 

I started off by slipping one of the 6x4 grid cards inside the page protector holding it so it was in the middle and so that the open edge was on the right. I then stitched along the top and bottom edge of the grid card.

I've also covered the top edge of the page protector, (where the holes are) with two pieces of patterned paper, (one on the front and one on the back, they're 1.5 inches wide strips).

Next I removed the grid card guide so I'm left with a 6x4 pocket ready for a photo to go inside.
 
The top and bottom spaces I've then filled with the veneer heart shapes and buttons from the kit. I've also added some star punch outs.

Once the pieces were inside I've sealed them in with machine stitching. Remember to leave the 6x4 space with an open edge though.

 
The next page I've used the base page already in the album and embellished it a little.
 

I've glued down some of the mini pompom trim along the left edge using some double-sided tape.

The bottom half I've added a piece of kraft cardstock cut into a pennant shape and then added a stamped message and a Flair sticker.
 
The last page is the envelope page from the mini album that I've embellished with the Pretty Little Studio Merry Christmas diecut and then one of the stamps from the Basic Grey paper.
 
 
For the back of the mini album I've made a large pocket page using a pocket envelopes. I did put one of these in the kits just in case you wanted to do the same page idea so if you were wondering what it was in there for! You could also use it as a gift card holder and decorate it the same way.
 
 
I started with the blank base and covered it on the inside with the Basic Grey paper. I've then glued down the flaps.


The top edge I've covered with another scrap of paper and then cut it to the shape of the edge.
 
Once it was covered inside I've folded up the bottom half and decorated the front with scraps of patterned paper, a kraft doily and a Websters Pages mini bag.

 
To add it to the album I've trimmed down the top edge and punched in the holes on the flap part at the top.
 
Back on the inside I've added one of the stamps cut out from the Basic Grey paper and then the glittery mini peg from the kit. The peg can be used to secure in any mementos and it also can be used as a handle to open down the pocket from the other side


That's the album in it's bare bones state complete! All that's left to do now is to fill it out through December. I'll add a couple of more posts through December to show you how I'm getting on with it. Look out too on 13th December for a special post teaming up with UK Scrappers where I'll be sharing some ideas for creating gift wrapping with your Christmas stash left overs. I'll be using my left over bits and pieces from the Quirky Christmas kit in the demo.

If you've made a mini album with the Quirky Christmas kit please let me know so I can pin them up on the kits Pinterest board. You can leave a link in the comments or email me at enquiries@craftyprincess.co.uk
 
x Leo


Homemade Scrapping

Hiya!

I went away in the van over October halfterm, I didn't get the chance to take many pictures but I managed to catch a nice snap of DS1 in between the usual gurning and posturing you get from a 7 year old!

I used the home made kit this time, I'm afraid the ledger paper isn't in the kit though, the original Cardstock that was part of the kit had to be retired after an unfortunate misting incident, the evidence of which you may very well spot around the egdes of my layout!
I layered up lots of PPs from the kit with the fab ribbon and some home die-cut speech bubbles, a few dolilies fom the embelishment kit and a bit of washi from a previous kit. A few stamped and doodled clouds help tie everything together.

Thanks for visiting today! I've really only got scraps left from my kits now so I thought I'd make a few cards for you next time, see if I can use uo those last few pieces!

See you soon!

Nikki

Quirky Christmas Kit - December Mini Book Ideas

Hi!
Do you have a Quirky Christmas kit? Looking for ideas to put together your December mini book? Well here we go with the next few steps. I did include a step earlier on where I cut up two sheets of cardstock into extra pages but you don't need to catch up with that just grab a couple of sheets of 12x12 cardstock to use. I used a white and a kraft colour sheet. OK here we go with the first few pages ideas I've put together for my December mini book. I've started with the cover piece.

  1. The cover base is a sheet of the silver foil cardstock from the kit cut to 5.5 inches square covered the back of it, (the grey board side) with a sheet of the Basic Grey paper.
  2. Take a piece of the silver foil cardstock and cut it to 1.5 x 5 inches then cut a V in the end to make a pennant piece. Glue this piece to the cover so it's about 3/4 of an inch away from the bottom edge.
  3. Cut a piece of the red mini pom pom trim and glue it underneath the silver pennant piece. Cut a piece of white pom pom trim and sew it down, (or glue it down if you don't have a sewing machine) to the bottom edge of the cover. While the sewing machine is out stitch around the edge of the cover.
  4. Next take the piece of gold trim and wrap it around your fingers to make a doubled up loop. Place it down carefully on your cover so it's over the top of the silver pennant strip of card then add a blob of glue to each of the left and right sides of the loops that are on the silver card.
  5. Take the 'December' fabric layer embellishment from the kit and glue it over the top of the silver pennant so it covers over where the gold trim is glued down too.

That's the cover complete! Don't forget to punch in the holes where you need them on your page.

Next I added one of the American Crafts tags to the front of the mini album. I first stamped 'TWENTY THIRTEEN' with a text stamp and then stitched around the edge of it.
The tag was then added to the ring on the album before the cover piece.

Here's what we've got so far when it's added to the clipboard mini album.


For the next page I've started with one of the 5x7 inch pieces of white cardstock I cut out in the earlier step on a previous post as well as one of the leftover strips, (cut it to 5x1 inch) with a sheet of the Basic Grey paper and the Santa belt ribbon.


Trim the paper to 5 inches wide and glue it to the back of the white cardstock. Glue the white card strip over the remaining space.

Glue the Santa belt ribbon across the join making it 1 3/4 inches from the bottom edge. Put more glue along the raw ends of the ribbon to seal it.


Next take some PVA glue or Glossy Accents and apply a line of it along the bottom edge of the page. Let the glue almost dry until it's still only just tacky, about 5 minutes drying time should do it.


Take a the sheet of gold leaf and very carefully press a piece of it to the glue. If it's sticking to your fingers too much put a little talc on them to stop it.


Let it dry completely and then rub the loose leaf off with a paint brush. Apply another little layer of glue over the top to seal it in place.


On to the next page and this time take the transparency page from the Clipboard mini album. If you're not using the mini album you could make your own page with a transparency or piece of acetate cut down to 5 1/4 x 7 1/4 inches. Peel the covering film from the transparency page.


Place a piece of the Basic Grey paper behind the transparency and trim it down so it's the same width. Make sure the top of the paper is aligned with the top of the transparency then take one of the large tags from the kit and apply glue to the back of it. Place it along the edge of the paper and place the transparency page back over the top just using it as a guide so you make sure the tag is placed so that the bottom edge of it matches up to the bottom edge of the transparency page.


Take the transparency away so you're left with just the tag and paper.


Cover the back of the paper and tag with a piece of kraft cardstock.


Take the transparency page again and attach one of the Flair embellishments from the kit to it so its above the printed message on the sheet.


To cover over the back of the Flair use the smaller card circle die cut from the kit and glue it with Glossy accents, (or Doublesided tape will work too) to the back of the transparency.


Next I've made a pocket page with one of the envelopes from the kit. First start out by taking two sheets of the same pattern from the Basic Grey paper pad in the kit. Cover both sides of the envelope flap with the paper, it's sligthly smaller than the envelopes so just make sure you glue it on so there's equal gaps at each side. Keep one of the off cut pieces if paper where you've cut out the flap.


Cut out a second piece of patterned paper so it fits inside your envelope and slide it inside.


Trim the edges off the leftover paper piece from earlier so it's the same width as the envelope.


Glue it over the top of the envelope making sure the edges of the paper match up to the edges of it on the envelope flap.

Take the larger diecut circle from the kit and glue it to the envelope flap. Place one of the American Crafts pegs from the kit over the edge. This looks decorative and makes a nice handle to use to open up the pocket on the page.

To add a little extra decoration I've cut out one of the tags from the patterned paper sheet and added a little glue to the back then tucked it underneath the circle.


To make the pocket into a page I've taken a sheet of 5x7 inch white cardstock and glued the envelope to it then punched in the holes in the top of the page. 


Finally in this session I've made another little tag embellishment to slot into the pages.
I've started out with the two Word Flash Cards from the kit.


Glue the cards together back to back then fix and eyelet to the top along with one of the Flair stickers.
Next I've gilded the eyelet just to make the colour more in keeping with the album. You could use up lots of embellishments from your stash this way giving them a completely new look.
First I've applied Glossy Accents to the eyelet and left it to dry until just tacky.

 I've applied the gold leaf in the same way as before, pressing a piece of it on with fingers and then letting it dry and then rubbing off the excess with a paint brush.


Finally I've sealed on the gold leaf with another coat of Glossy Accents.


 OK so here's what I've got so far for my mini album. Starting with the front cover page.

I'll pop back to upload the next page ideas on Sunday, (24th). 
x Leo