Sleepover Selfies!

Hello lovelys, I hope your all having a wicked time using this months kits, I mean how fantastic are all these papers and embellishments we have to play with!

As the kids have had time of school this meant my little cousin decided to move into mine for a week!. So while she has been here many pictures were take and using the snapchat app we had a right laugh with all the different things you could turn yourself into! 

For this layout I have used all red different kits so below I'm just going to list what I used so then I can get into how I created this look.

Hooray Main Kit:
BAZZILL Basics Roselle Cardstock (which is absolutely stunning!)
Pink Paislee Take Me Away Wooden Veneer Ephemera 
Freckled Fawn Acrylic Frames
Mint Wooden House Embeliishments
Tonic Nuvo Drops Midnight Blue

Cake Walk Lite Kit:
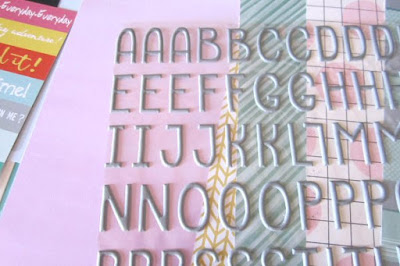
Freckled Fawn Puffy Alphas - Grey

Dancing On The Ceiling Embellishment Kit
Carpe Diem Expoxy Metal Clips


Oopps- sorry not sorry Leo! After I had backed my photos in the Roselle Cardstock I wanted to start creating my embelishment clusters and to do this I used the metal clips from the carpe diem collection. However I didn't want the clip part to cover my photograph so I cut it carefully and took the clip off, obviously saving that part later in case it came in handy.


Just above the image of me and my cousin being little cute animals I started my first cluster and as you can see I have used the freckled fawn acrylic frame in bright yellow, and I also snapped this frame in half so I can use it on my second cluster to bring them together. To finish of this embellishment bundle I used the Nuvo drops, which before this kit I haven't tried and I didn't know what to expect however there really easy to use I am investing and getting them in every colour! There perfect to add a little pop of colour to your page!


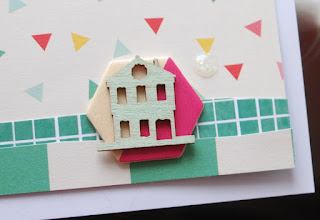
Cluster number 2 I couldn't wait to use these tiny little mint houses, There so cute and seen as though she slept at mine for the week I thought it was a brilliant opportunity to use it! The second half of the frame is again tucked under the photograph bringing both clusters together and finishing off with those Nuvo drops which again look great!, and not forgetting the arrow from the pink Paislee collection it not only points to title, and the fact I love using arrows colour is almost identical to the Roselle paper so once again for me it's about bringing the layout and the colours together.


Thickers and Alphabet stickers are my favourite thing to put onto a layout becuase a title for me is what makes the layout complete. Here I used the freckled fawn grey puffy alpha stickers and I have named it 'Snapchat selfies'. What I also liked about these is that they are repositionable and don't really make a mess of the paper if you haven't stuck it in the right place. There is noting worse that than trying to re-line up stickers that have jumped out of your hand and tearing the page, so these puffy alphas get a 10/10 from me.


An Ariel shot of my layout hopefully shows you how sometimes you don't need much to make an outstanding piece for your album. The background paper from dear lizzy Saturday I cut into four triangles and using my favourite side I used two and created a background that I've never tried before. 

Stick around for more uploads from me and the team! Have a nice day :) 

MelanieJoanne❤️


Using your kits and introducing some mixed media into your layouts

Hey everyone!
Can you believe we are a couple of days away from September? That's Crazy!

For my first layout from the July/August quirky kit I thought I'd mix things up a little bit (you may have noticed I like to do this)
Mixed media has taken the crafting world by storm whether it be simply using paints and inks or something a little more time consuming and messy, like using gesso and texture paste.
Now I am no expert by any means and still class myself as a noob when dabbling in mixed media..but every now and then I like to have a go (it is the only way to learn right?)
So here is my layout, what I used and how I came up with the end result.

Items Used

From the Main Kit:

  • Bazzill Roselle Cardstock
  • Pink Paislee Take Me Away #13 Patterned Paper
  • Pink Paislee Take Me Away Wood Veneer Embellishment Pack
  • Photoplay Fun with Friends Rosettes Patterned Paper

From the Lite Kit:

  • Kaisercraft Butterfly Stickers Pack

From the Embellishment Kit:

  • Freckled Fawn 32 Puffy Star Stickers
  • MAMBI Sticks My Life stickers
  • Dear Lizzy Good Vibes Thickers
 How I created my layout
I started by using a rose heart stencil I had cut from my Silhouette onto card. You can find the stencil here: I then used some of my liquitex texture paste and a plastic art spatula and scraped the texture paste over the stencil picking up the excess paste with the spatula scraping it a few times. I then picked up the stencil and repeated the process in a diagonal pattern. Once this had dried I made up a couple of mists using Martha Stewart pearlescent paints and water in a small mini mister bottle and sprayed over the hearts. I picked up the excess paint by dabbing it with a paper towel and then using the hairdryer (because I'm impatient) to dry the rest. Please note this does warp your paper a little bit and I should have used some gesso first. When I had got my desired look I set about adhering the butterflies where I wanted them. I folded the butterflies in half and used a tiny bit of super strong red liner tape just on the thorax so the wings were dimensional and stood off the paper somewhat.
I then set to work matting and laying my photo. I wanted to make a colourful layout and I find a black and white photo always stands out more when doing this.
I first matted my photo onto the Bazzill Roselle Cardstock then onto the Photoplay Fun with Friends Rosette patterned paper and finally I cut apart the pink and yellow part of the Pink Paislee Take me Away #13 patterned paper (B side)
I then began to embellish. I started with my title. I used the Pink Paislee Take me Away wood veneer arrow and heart embellishments, putting the heart on the rosette paper and drew around it and adhered it to the heart (I love to paper piece) Then using the Dear Lizzy Good Vibes thickers I spelled out my Love Us title, loving the way the bold black letters help to bring in the black butterflies too.
Finally using some more of that gorgeous rosette paper I cut 3 strips and attached one of the Freckled Fawn puffy star stickers to the end of each one.
TA DAAAA! Layout complete!
I panicked with my stencilling and texture paste a bit whilst I was doing it and messed up a little in the bottom right hand corner, but you can't see it cause that's where my photo went (even I mess up lol) but remember we can always cover it up and sometime our mistakes can be happy mistakes...meaning they could actually improve our layouts in a way we hadn't intended.

I hope you like my layout and feel adventurous enough to try your hand at using some mixed media with your quirky kits.
Until my next post, Happy Scrappin Everyone x

Creative Class #1 - Featuring Cake Walk and Dancing on the Ceiling Quirky Kits

Hi Leo here.

From this month I'll be uploading some free creative classes you can download and keep on your device, (smart phone/tablet/Kindle etc) or print out. I've set them to the same size as the Simple Sketches booklets so if you do print them off at home you'll be able to store them with your booklets.

You can use as much or as little of the class to create with as you want to take away. There's some tips in the steps you'll be able to take away and use as basic principles to build other pages too. In this first class items from the Lite kit 'Cake walk' and the embellishment kit 'Dancing on the Ceiling' have been used.

Here's the finished sample layout:


And here's the step by step to download in PDF format: http://www.craftytemplates.co.uk/JulyAugust2016QuirkyKitCreativeClass1.pdf

If you play along leave a link to what you make on the Quirky Kits Facebook Group, (for subscribers only) or via Instagram tagging @craftytemplates or upload your page to UK Scrappers and leave a link in the comments bellow.

Made for each other

If I am honest when I first saw the Pink Paislee Take Me Away #13 paper in the Hooray Main Kit I was completely stumped as to what to do with it. The other side was usuable but the houses seemed too pretty to ignore. And yet what would be the right photo to use? When I am ready to scrap I print out at least 6 sets of photos and then see where inspiration strikes. I was thumbing through the photos when I gasped, because behind 4 of us sitting on a boat were houses almost identical to those on the paper. Just look!
 Isn't that amazing! I trimmed one row of the houses and decided to use the warm Roselle cardstock as my base. Once the houses were done everything else came together really quickly.

 I matted the photo with a yellow block from the other side of the #13 paper then I cut a few strips of other papers to give my photo something to rest on. When that was all stuck down I dotted some of the Nuvo drops underneath. Its always a bit of a risk using this sort of product in a long line like this as sometimes one blobs bigger or not at all, but I am impressed with the consistency of the drops. I then decided to add a white border around my cardstock and to write my journalling in white pen. I thought black might be too heavy.

I love the Freckled Fawn Resin Doodle Frames and tried one out at first circling the pasty but that cut off my mother in law's head and I didn't want that! So instead I traced it on white paper, cut that out and stuck the two together as an anchor for my title. I used some old thickers but I might still change them out for something with a lighter look in due course (sometimes it is good that Thickers don't always stick so well!)


Some of those lovely wood veneer shapes,  a big label and some puffy hearts from an old Quirky Kit came next (Fancy Pants Happy Place Words & Shapes Puffy Stickers. I've used them on so many layouts and still loads left!). And finally the journalling and some more Nuvo drops round the edge. Notice I didn't dare go all the ways round.


I'm glad that I have scrapped this photo but unexpectedly finding the perfect paper makes me even more happy!   

Not the easiest page

Not because it was difficult to choose the papers and embellishments - as ever Quirky Kits made that easy.
But because I wanted a page to pay tribute to our dog who died at the beginning of June (wow, over 2 months ago already)
Here is my tribute to our loveable, annoying dog


I used the Hooray main kit. I love the My Minds Eye Hooray paper so used that as my main focus, cutting it to 11 1/2 square so I could also use a little of the stripe on the other side. To rest the photos on the busy paper I made a mat from the American Crafts Dear Lizzy Saturday Bagels. To add detail to top and bottom I trimmed the detail strip from a few of the papers. The pom pom ribbon was too much fun not to use (although Lucky never knew what to do with a ball. Sigh) and I adhered it to the main paper with extra sticky tape (red tape).


Before sticking down the mat I trimmed a few jumbo labels to tuck underneath.
Then over the top of the photos I added some of those amazing Pink Paislee Take Me Away Wood Veneer Painted Shapes, the large one of which was topped by some Hooray Thickers. 

Two more shapes were glued down at bottom right - the house makes me think that Lucky is having fun in her new home.... .

then I added some Nuvo drops - the blue from the kit and also some green drops and some crystal drops that are similar

I've realised that I made a mistake on the layout - Lucky was born in 2002 rather than 2013 so I'll have to work out how to correct that.

It isn't easy doing a page like this but it is cathartic and it is nice to have the end of her life scrapped as she appeared in so many other pages as well

More July/August Kits

Hi! Leo here today :)

Gosh this month is getting away from me I did plan to a do run through of all the kits each day but I've been busy with the new Christmas kits and it's just zooming by this week so today I've got a run through of all of the remaining three kits.
First up let's take a look at 'Hooray'.


The paper a-sides like in Cake Walk are really fun and bright and a mix of everyday patterns and a hint of the party theme that runs through all the kits. The B-sides in contrast are neutrals great for using as backgrounds if that's what you like to do. :)


 You get a full pack of the new Pink Paislee Take Me Away veneer embellishments. These ones have painted details. I liked these from the Take Me Away collection as the collection as a whole is very femanine but thse veneers have lovely bright pops of colour that will work with so many themes and especailly good for documenting the summer months. You also get these cute little house wooden embellishments in a minty green. There is some minty green matching pom pom trim in the kit and it's only when I'm looking back through these photos I've noticed I've not got that here but you can see it on the kit page.


This kit has some fun custom touches. This is a strip of labels to cut out and there are colours to co-ordinate and contrast with every bit in the kit. These are great for adding in bits of journalling or a date stamp. There's a good size too so not too small to be able to actually write on which sometimes with some of these kinds of labels that are included in the packs of die cuts I struggle with doing.


The alphabets in the kit are a good neutral so you'll be able to use them on any of the papers. They have solid 'middle' bits too which will help them to stand out when you use them on the more heavily patterned papers:

Another cute addition are the resin frames from Freckled Fawn. They have a random doodleness to them and the pack has two colours, one a bright yellow and one a little darker, both these colours are through your kit too. These could be great for frame small photos or highlighting areas of journalling or just using as a layered embellishment with some thing smaller inside the frame. They do have a plastic film covering on them when you take them from the packet so rub around the frames a bit and you should see it start to lift away from the plastic so you can then just peel it back.


These are really fun in Hooray. They're tile cards you can use as titles/journalling spaces or layering embellishments. These are also great for building up grids on your layouts, more on that below.


The main kit has these fun booklets with step by steps inside and page sketches on the front. This is the grid idea you can use with the tile cards. The photos used in the sample were taken from a mobile phone, if you've ever printed photos right from your phone sometimes they have a weird long thin format and cutting them into squares like this is a different way of using that kind of long thin size without having to crop them as much as you do to print at 6x4, (these are printed at 3.5x 7).


Last but not least in the Hooray main kit you also get a bottle of Nuvo drops to play with. You can make fun little drops/dots of colour with these that dry hard. The ones I played with have dried in about 2 hours so a lot less that the recommended on the bottle 24 hours but I guess it all depends on where you are and if those conditions are good for drying :)
You don't have to stick to dots you can paint with them too by joining together dots. I had a play doing a heart and a flower for you here. :) One tip I should pass on is to clean the end of the nozzle after you've used them as it's easy to wipe off when it's wet, not so easy when it's dry so keep it clean and clear while it's wet, just a bit of tissue does the trick.
This navy blue colour was picked out for the kits as a good neutral and it will stand up against all those colour in the kit too. We did have more colours in the extras shop and they're going down well so I will add some more to kits in future. These things come in metallic and glitter too, I mean come on how can we not get into that fun-ness!


OK that was Hooray. There are a handful of kits available for single purchase and they're only available while stocks last out, check out the kit page in the shop here.

Next up is the pocket card kit.
PiƱata Custom Cards Kit

Starting with the 4x6 size cards. As with all the kits the colour story is bright and colourful but to contrast that you have black, white and navy.


 Lots of the cards have a hand doodled and hand painted feel.


Some have brighter colours, these all have hand painted looks. Part of the inspiration was the Rio Olympics too.

Embellishments include these fun puffy stickers you can add quickly and easily either directly on your cards or as they're good an sticky you can stick them on the pocket page protectors which is a fun way to embellish over photos without damaging them.


You also get a full pack of the new Dear Lizzy Saturday chipboard tags. Numbers are great for daily scrapbooking or you can relate them to how many people are featured in pictures or any other kind of number in your month/week or just numbering your weeks through your album, (there are 10 tags so enough for every week from August to September). I must say I expected them to be sticky backed so was a bit surprised they weren't but you can stick them down with a bit of glue or tape. We could write a 'Dear Lizzy' letter so see if there are other suggestions to attach these. ;)


You also get these super cute resin words made by Freckled Fawn. They're sized for your cards so you can use them on top or put them in a pocket on their own if you prefer that.


Now last but not least let's look into the embellishment kit 'Dancing on the Ceiling'. 

This kit continues with the party fun influences but there's a bit of a more sophisticated twist to this one as there's a little more black and white that the colours. This is the kits I've been using for photos so it's a little bit scrappy looking without the packaging and I may have *cough* pilfered a clip for my planner already.


The embellishments have a cute way of working together with the doodle/hand paintiness you can pair. The black/white/gold combo you can use independently or work it with the colourful stickers.


The paper clips match the stickers too:


You get a lot of washi tape in the kit, three rolls which are all part of the same pack. I debated if to get this pack as it's a fair chunk of the kit budget to have as just washi but in the end the patterns won out, they'll go with loads of things so you'll get lots of use out of them. These are a nice proper 'washi' too with the tapes being slightly transparent and not papery.


More sophistication with the very posh new Thickers from the dear Lizzy Saturday collection and very cool puffy star stickers from Freckled Fawn. The next picture shows more of the very pretty Yes Please stickers from My Minds Eye and the fun pinstripe button embellishments. If you have wedding photos to document from the summer months all these black/white/gold elements will come into their own.

Now this wouldn't be a Quirky Kit if it got too serious so a curvball of fun-ness has been thrown in with this super cute trim. It's seam binding so you can use it along edges of paper, just like you'd use it to bind a seam in sewing. Or else just use it as you would ribbon. That navy's popping back up here too ;)

More trim in this super fun coral ribbon printed with green stars. If you have the main kit along with the embellishment kit this is the exact same colour as your card stock colour, that lovely glowing coral that's half way pink and half way orange. I put in lots of this ribbon as, to run with the party inspiration through all the kits you could use this for gift wrapping.


That's all folks! Check out the website for all the kit details. New subscription places for the next kits start on September 1st. The next kits have a botanical/autumnal influence and each kit is named for a British native tree. Look out for Oak, Willow, Scots Pine and Hazel coming October 2016! In between kit time there's also the new Christmas Card Making Club kits and classes. There's a new kit every month starting from next week and classes to run along with each kit to give you a kick start to creating your Christmas cards for 2016. In December the class will change to a minibook class and you'll be able to use up all the leftover bits to create your December mini book, cool huh! Check out all the details here.

I'll be back here on Saturday for a fun class using these kits.
xx Leo


A walk through Cake Walk!

Hi!

Well the new kits are out and are arriving at their new homes. To start off this month I thought we could take a look through each of the new kits. Today I've got Cake Walk, the new Lite kit so let's take a look shall we :)


The papers in Cake Walk are Pink Paislee Take Me Away #01 and #16, Photoplay Fun with friends 'Rosettes' and Amy Tangerine Oh Happy Life 'Sure Thing'. The a-sides, (below) are all fun and bright patterns with designs you could cut out to embellish with if you wanted to.


The paper b-sides are all neutral so great for using as backgrounds to build your layouts on top of if that's what you prefer they're a lot calmer too with the more subtle tones so if the bright patterns weren't working for you, you get the opposite on this side.


The alphabets in Cake Walk are the easy to use puffy stickers from Freckled Fawn. This grey colour is a good neutral and it works in a way that it's pretty when mixed with the lilac and pink tones in the kit and then mixed in with the greens and blues it's more masculine. 


Also in Cake Walk are label sheets. These have been designed to work with everything in the kit. The coloured ones are super easy to cut apart with scissors. They're handy to use as sub titles or journalling starting points. They're just the right size for 3x4 cards too if you're creating pocket scrapbook pages.

The other label sheet is a bold black with a stamp effect font for the messages. Stamping white on black is super difficult to pull off so this gives you the same look but in a quick easy format! You can cut them out in thin strips or thicker strips.


You could also cut them out in shapes. This is a really easy way to make an arrow kind of shape. Fold roughly in half without creasing too bad and cut off each end at opposite angles. Open it out to get your arrow shape.


The butterfly stickers in the kit offer another bold contrast with the black designs on clear. You can apply them right on the papers. Try out layering up your paper pieces first and then adding a sticker or stickers over the top of the different layers.


Or to give them a 3D look apply them to paper and cut out folding up the wings a little.


There are cute little laser cut wooden embellishments in Cake Walk too. You can leave them wood or colour them with paints or inks. This is a chalk inkpad, (VersaMagic).


All the embellishy bits built up together.


One last bit is the cute postcard you can use for journalling or a recipe, it could be used on a page about something someone else made for you if you're not the one who does the cooking ;). The new season of Great British Bake Off is starting at the end of August too so I had to put something to do with baking in the kit!

This month they'll be classes for subscribers with all four of the new kits so make sure you check your kit messages to get the hand outs. I'll post them up here on the blog too.

Check back in for a look though the main kit Hooray next!
x Leo