Custom Card Layout Using the amazing Equilateral Kit

I'm so excited to be on the Quirky Kits Design Team and I hope I can bring you lots of inspiration.

You'll find me on YouTube as ScrappyNerdUK and if you want to follow along then here is a link to the YouTube video also - https://youtu.be/kMfTG-aS_Vs

My first project was to work with the custom cards kit and I used the Equilateral kit for Feb/March 2017. I absolutely loved the colours in this kit. The pinks,greys and greens really complemented each other.

I am trying out a new format of monthly pocket pages rather than weekly to cut down on the number of albums that I fill. I'm not sure whether this will work for me but i'm trialling it to see.


I printed my photos in black and white to really make the cards the feature of this layout. I added in a few extra embellishments to complement the kit and I was really pleased with the final result.


For those who do not like to add a lot of journalling on their layouts, i would definitely recommend the Tim Holtz tiny word stickers to add some pre formatted words that can really complement your photos. I did a small amount of journalling around the heart on that gorgeous 3x4 card and its great to try out different styles of journalling - even trying out different handwriting styles.


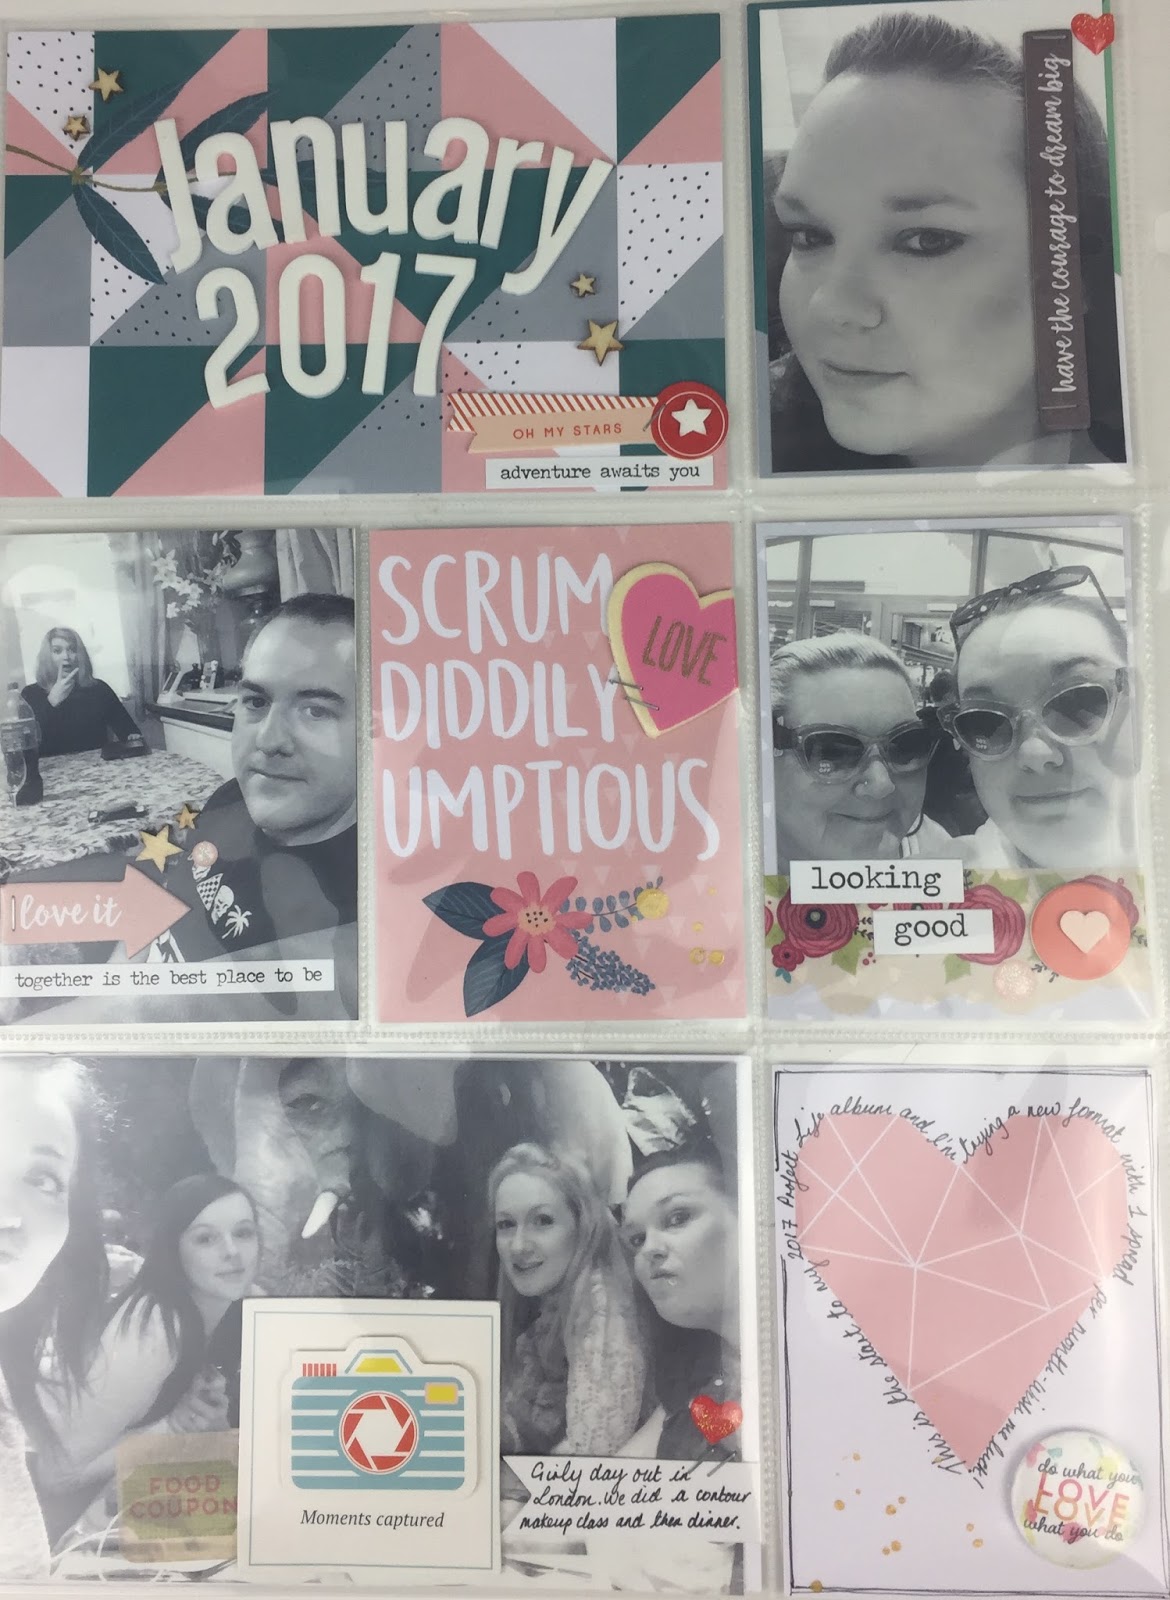
And here is the finished result. I added a few wood veneer stars, a flair from my stash and some Thickers and this layout was finished within 20 minutes.


Speedy layout

When I have some crafting time, and particularly when a Quirky Kit comes to the door, I like to print out a range of photos and then choose which subject I am going to scrap. So it was this month with the wonderful Prismatic kit. 
I lined up some photos and was just choosing what papers to go with it when bam, my eye alighted on the Echo Park Just Be You 'Follow Your Heart' paper, which I knew would be an awesome background to another photo that I had in my pile, one from Valentines Day this year.

It is a beautiful paper on its own, so didn't need much adding to it, meaning that this layout was a really speedy make
  to make it look like I spent ages arranging pieces of paper I outlined them all in black pen. I did cut a couple of the other papers as mats, plus the branding strip (it was hard to lose the lovely pattern on the other side).

My title uses the two different kinds of word options in the kit this time
the Pink Paislee mirror acrylic sticker embellishments
and the American Crafts Teal Glitter Thickers. I'm so pleased to see so many vowels in this pack!
 all that was left to do was to add a few little bits - some of the lovely sequin confetti, a squidgy rubber shape, a cut apart label for the journalling and a few of the Echo Park stickers.
  Bish, bash, bosh. So quick and I love it.
And now back to doing the layout I meant to do before I was distracted!

Thursday Challenges


Every Thursday for the next five weeks they'll be a new challenge to follow to get you creating with your Quirky Kits. The first challenge starts today and is as follows:

- Create a project inspired by or featuring your favourite song.
- It must contain at least two heart embellishments
-It must use the colour green
- You can not use cardstock

If you have photos already to use try thinking of ways to incorporate song lyrics or title into the page or something else from the song to inspire your choices for what you pick out. If you don't have photos to use how about using the cover art for the song or the artist or a photo of the time period if it's a song from the past. Maybe it's your favourite song right now or you can interview someone else to ask theirs and switch it to a layout about their favourite song. You don't have to make a layout it can be any kind of papercraft project you want.

What ever you're making have fun!
Link up what you've made if you want to leaving a comment here or on the Crafty Templates Facebook page, group or on Instagram tagging your post with @craftytemplates 

xx

My lovely MAMIL

middle aged man in lycra that is!
I just about finished off my Lagom main kit with this layout. Hardly any paper left but still lots of lovely embellishments as you get so many with a kit. 
As the "gorgeous" outfit featured is black and blue I decided to inject a bit more of those colours into the layout by adding Blueprint Sketch distress ink into some white embossing paste on a craft mat and then spreading it on to heavyweight white cardstock through a stencil
I then decided it needed more black as well so outlined every single little square with black pen.
I turned one of the gorgeous icon squares into a gift by wrapping some of the ribbon that decorated the kit around it.
I layered up papers behind the photo, adding black outline to everything because I like it (and in this case it matched the stencilling). I added the December from the cut apart sheet which I also used for journalling. When I had finished writing there was a bit of a gap so I used some of the dots from the Amber thickers which also tied that side of the layout to the extra long title
The title proved a bit of a challenge as I had run out of "r"s. Upside down "j"'s kind of work don't they?
Et voila...


Accordion Mini Album


Hey guys, I hope you're all excited for the new kits, what I can tell from the extras shop looks great. My last project using these kits is an accordion mini album I made for my best friend's 17th birthday. It only took a morning to make and it's such a nice way of highlighting some of my favourite memories with her over the past year. (Warning: many creepy smudged out faces in this post)
Here's how I constructed it:
1. I cut 4 strips of pattern paper 4"x 12" 
2. I scored on alternating sides of the paper every 4" (these measurements can be adapted depending on what size you want.)
3. I stuck the strips together with washi-this might not be very strong
4. I added an extra square as a front cover
And here it is, remember it's double sided: 

 I went for a very simple cover and interior to keep the making process fairly quick and highlight the photos.
 The flair is quite chunky but I love a bit of gold!
 Watch out for irrelevant coffee puffy stickers just because they're cute.
 I cut a journaling card into a rough circle shape.

 Imagine some really crazy faces in the picture on the right, haha.
 I used a mini heart punch with leftover pieces from the journaling cards I fussy cut.
 Thanks so much for taking a look! I think this works so well as a gift idea and my friend was really happy to receive it, so maybe have a go with any kit leftovers.