Natalie - Sweet Autumn Days

Hi everyone!

I'm back today with my 2nd layout using the Sept/Oct kit. 

Firstly I want to apologise for the quality of the photos in this blog post - it's very difficult to take photos in natural lighting now the sunlight hours are so short!

Supplies used:

Main Kit:
- PFS Indigo Hills 2 Mesa Paper x 2
- PFS Indigo Hills 2 Puffy Stickers

Extras Shop:
- CVS Midnight Die Cut Titles 

Previous Kits:
- PFS Orange puffy alphas

Own stash:
- Yellow alphas
- Ephemera pieces x 2


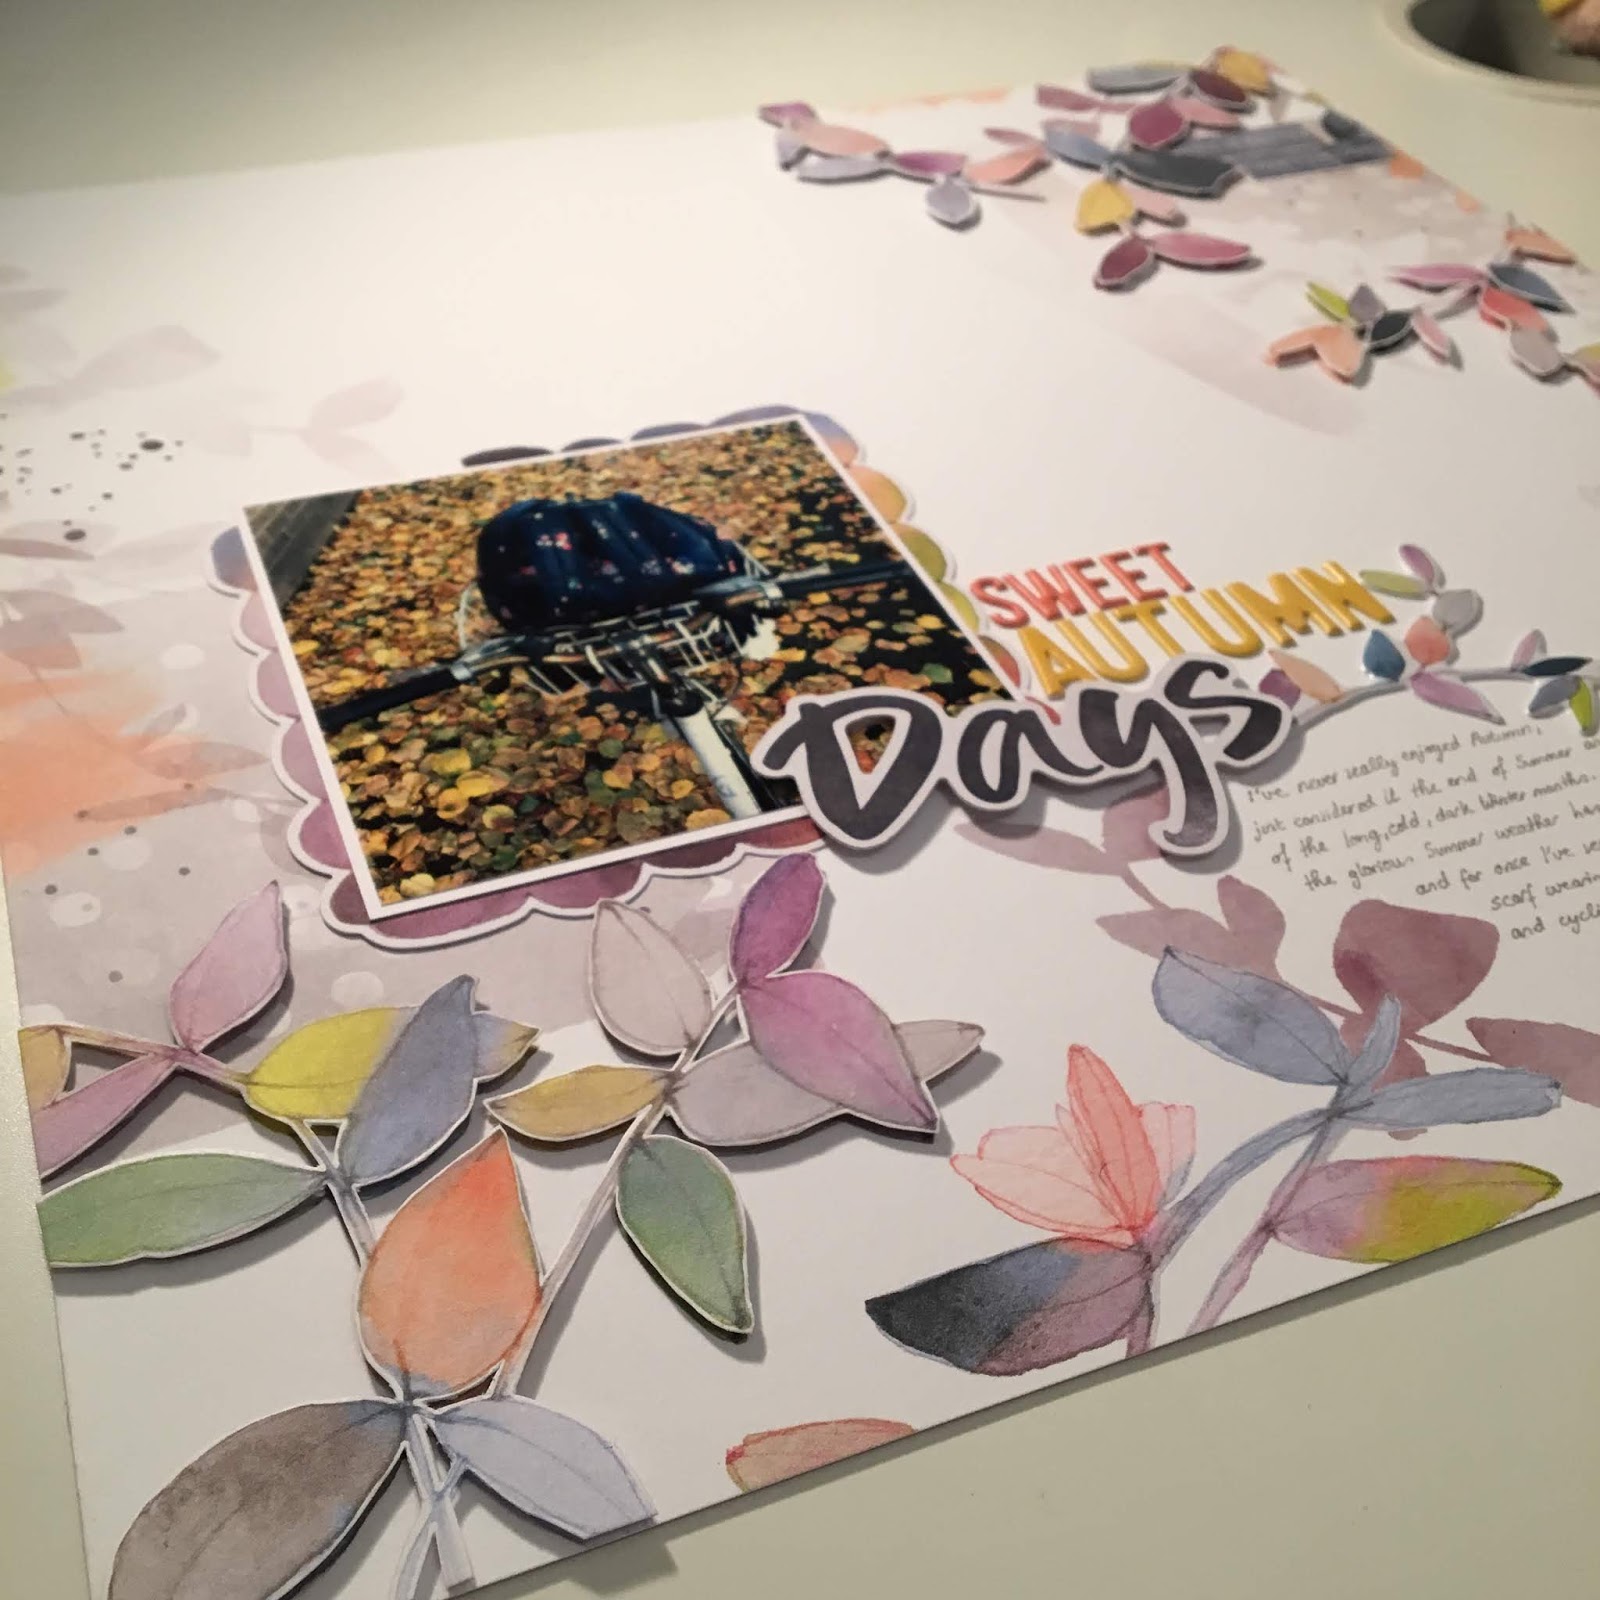
I started this layout with the Mesa paper from the main kit. I knew I wanted to make an autumnal layout with the paper so I looked through my phone for any recent photos of leaves. 
I printed my photo at 3.5 x 3.5 inches square and mounted with white cardstock. However when I placed the photo on the paper it covered some of the leaves and made them look very flat.
So I decided to fussy cut the leaves from a spare piece of the same paper to add some dimension to the page. Which surprisingly didn't take as long as I was expecting, especially when you have a good Netflix show to keep you company!


As you can see I only fussy cut the main branches. If you only have one copy of the paper you can fussy cut the branches and add them to another background. 


I added a frame around the photo from my own stash. Then I worked on my title. I knew I wanted to use one of the beautiful CVS die cut titles from the Extra Shop as part of my title, and I placed this on foam pads to add more dimension. I then added two more words in co-ordinating colours, to help bring out the oranges and yellows in the paper and the photo.

To ground the title I added a puffy leaf sticker from the Indigo Hills sticker sheet in the Main Kit. 


I wanted to add some journalling but I was torn as to whether to type it, add it to the back of the layout or hand write it. In the end after discussion with a few scrappy friends I decided to handwrite my journalling. And I'm really happy I did, as I think it finishes off the layout perfectly. I drew faint lines with a pencil to help me stay straight, and they easily rubbed off without leaving a mark. I used a Graphik grey pen which I think is perfect for adding journalling when you don't want to add harsh black text to your layout.


And that is my layout complete! I hope it has given you some inspiration. 
And once you have fussy cut the leaves it takes no time at all to put together!

See you soon with another layout,

Natalie x

Sunday Sketch Challenge #5

This is the final of the sketch challenges! To look back on each one check out the previous posts: Last week we had sketch #4 which you can view here. Sketch #3 is here and then there's sketch #2 here and sketch #1 here. You have until next week to complete all the challenges and upload them, (by Sunday pm at the latest to qualify for the extra goodie in your kit box) if you're playing along just for fun there's no deadline.

Once you've finished your creation upload it to your platform of choice.
For Instagram tag @craftytemplates and mention it's for Sketch Sunday.
For Facebook add it to the Quirky Kits Group - they'll be a post for each sketch there to share it to.
For blog add a link to your project from your blog in the comments below. 
Or if you'd prefer to keep your project private you can email them directly to Leonora@craftytemplates.com
 

Ready to get creating?
If you've never used a sketch before all you need to do is follow the layout below as a starting point for the positioning of your page elements, (photo, title, papers etc.). What those elements are and how much you use them is entirely up to you though. You don't need to follow the same colours in the sketch.

Sketch Sunday Sketch #5

 
Layout sample:


Enjoy Life | ScrappyNerdUK (Claire) | September/October 2018

Hiya friends.

I thought I would pop on and share my layout that I created on the Facebook live last week on the Quirky Kits Facebook Group.

I chose to use black cardstock to really help my layout pop and was determined to use that hexagonal piece of patterned paper from Kaisercraft that came in the Main kit.

I sat and fussy cut the words from the other Kaisercraft paper (I love fussy cutting as it makes the kit go so much further!) and I used these around the hexagon and this doubled up as my title also.


I pulled some ephemera from the last kit to really stash bash and incorporated it with the Heidi Swapp stickers from the main kit. I added in some puffy stickers from my stash also as the colour of the hearts matched perfectly with the colours use in the layout.


I layered some ephemera and stickers both to the left of my photo and to the right. I also chose a photo with a black background to match the black cardstock that I used from the kit. I then added in some more pops of black by using some tiny word stickers (from my stash).

I think it's important to remember that a kit is only a base of where you can work from. If you have other items that work well with your layout then don't be scared to include them also. It's best to get them used up on layouts that they'll work on. Remember that there are no rules in scrapbooking.


And here is the final layout. I love how the gold foil pops against the background and I felt accomplished as that hexagonal piece of patterned paper was really a challenge for me....but I did it!!

I'll see you all here again very soon with another layout from this months kit.

Claire x

Sunday Sketch Challenge #4

Every Sunday look out for the Sunday Sketch challenges. They'll be a new sketch posted up for you to create a project from every Sunday. Complete all the Sunday Sketch challenges to be eligible for an extra goody in your next kit box!
Once you've finished your creation upload it to your platform of choice.
For Instagram tag @craftytemplates and mention it's for Sketch Sunday.
For Facebook add it to the Quirky Kits Group - they'll be a post for each sketch there to share it to.
For blog add a link to your project from your blog in the comments below. 
Or if you'd prefer to keep your project private you can email them directly to Leonora@craftytemplates.com

Last week we had sketch #3 which you can head back to here if you didn't manage to complete that one yet and then there's sketch #2 here and sketch #1 here if you still need to catch up with those too. You can complete the sketches in any order. Once we get to the last one all the challenges will be open for one final week, (so it'll close on the 24th).

Ready to get creating?
If you've never used a sketch before all you need to do is follow the layout below as a starting point for the positioning of your page elements, (photo, title, papers etc.). What those elements are and how much you use them is entirely up to you though. You don't need to follow the same colours in the sketch.

Sketch Sunday Sketch #4

 
Finished layout sample:


Red | Guest Designer Laura Rumble | Twilight Moon Kit

Hi guys, Laura back with another guest designer layout.

I was struck by the gorgeous autumnal colours featured in the patterned papers.  What better way to show them off than with leaves and acorns?  It also meant I got to play with my new toy, a Gemini Junior.  It turns out I quite like die cutting!  I also fussy cut a few of the leaf sprigs from the Pink Fresh Mesa paper.


I based my layout on a sketch I had drawn up earlier this year.


I fixed the leaves in place with a little glue and then ran the layout through my sewing machine using a couple of different coloured threads.  My favourite part of my guest designer package was the Custom Cards - so much so that I have signed up.  I pulled a few of my favourite cards to layer behind my photo and to cut into a heart shape embellishment.


In the Pink Fresh Mesa paper there are a few pops of acid yellow that really zing amongst the other colours.  I added in some tangled thread and a few sequins from my stash in the same colour.  To finish I added a title with the bold black alphas included in the kit.


Here's the video so you can see my process


Thanks for stopping by

Sunday Sketch Challenge #3

Every Sunday look out for the Sunday Sketch challenges. They'll be a new sketch posted up for you to create a project from every Sunday. Complete all the Sunday Sketch challenges to be eligible for an extra goody in your next kit box!
Once you've finished your creation upload it to your platform of choice.
For Instagram tag @craftytemplates and mention it's for Sketch Sunday.
For Facebook add it to the Quirky Kits Group - they'll be a post for each sketch there to share it to.
For blog add a link to your project from your blog in the comments below. 
Or if you'd prefer to keep your project private you can email them directly to Leonora@craftytemplates.com

Last week we had sketch #2 which you can head back to here if you didn't manage to complete that one yet and then there's sketch #1 here if you still need to catch up with that one too. You can complete the sketches in any order. Once we get to the last one all the challenges will be open for one final week, (so it'll close on the 24th).

Ready to get creating?
If you've never used a sketch before all you need to do is follow the layout below as a starting point for the positioning of your page elements, (photo, title, papers etc.). What those elements are and how much you use them is entirely up to you though. You don't need to follow the same colours in the sketch.

Sketch Sunday Sketch #3


Layout Sample:


To create the title on the page I cut the words from white card stock then applied foam tape to the back. I then arranged a mix of Custom Cards and patterned paper off cuts on my background patterned paper sheet to show behind the words before fixing the cut out cardstock over the top aided by the foam tape.


Our Perfect Memories

Hello everyone! I am here with my first layout using the September/October Quirky Kit.
Below you will find a list of all the items I used and then step by step of how I created this pretty layout.

What I used:
From the Main Kit:

  • Kaisercraft Misty Mountains Die Cut sheet
  • Kaisercraft Misty Mountains rose gold foil 12x12 sheet
  • Pink Fresh Studio Indigo Hills 2 Puffy Stickers
  • Vicki Boutin Field Notes - Collect and Document 12x12 sheet
From the Embellishment Kit:
  • Pink Fresh Studio Simple and Sweet gold puffy alpha
  • Pink Fresh Studio Indigo Hills 2 die cut foiled journaling cards
  • Pink Fresh Studio Indigo Hills 2 enamel dots
From the Lite Kit:
  • Pink Fresh Studio Indigo Hills 2 - Ridge 12x12 sheet
From the extras shop:
  • Kaisercraft Misty Mountains Die Cut pack
Here is how I created my layout...
I started off by finding a 12x12 patterned paper that matched the Kaisercraft Misty Mountains die cut sheet, so I chose the PFS Indigo Hills 2 Ridge paper. I felt the beautiful sunset ombre colours really complemented the flowers on the die cut and also the dress I am wearing in the photograph.
I then backed my photograph on the orange side of the Vicki Boutin paper from the main kit, leaving about a quarter inch border all round.
I then cut out my title from the words on the Kaisercraft Misty Mountains foiled 12x12 paper, that read Perfect Memories, and matched these up with the PFS Simple & Sweet gold puffy Alpha's from the Embellishment kit. 
After creating my title, I focused on where and how I wanted to put my journaling. I browsed through the PFS Indigo Hills 2 Journaling cards pack and and chose a navy blue and gold foiled one, to bring out some of the blues on both the die cut and backing papers. 
Once I'd written out my journaling, It was time to embellish. I used one of the puffy hearts from the Indigo Hills 2 puffy sticker pack, 2 navy enamel dots and one lilac from the same collection, and the butterflies, heart strip, and flower pieces came from the Misty Mountains die cut pack, which I purchased from the Extras store.
Here is the finished layout. I love how all these colours compliment each other perfectly. I can't wait to create my other layouts using this beautiful kit. I'm also loving all of the layouts you're sharing on the Facebook group! It great to see the wall full of colour and inspiration.
I will be back with my 2nd layout on the 24th November so be sure to look out for my sneaks in the FB group :D
Until then...Happy Scrapping xxx