
Do you have a Quirky Christmas kit? Looking for ideas to put together your December mini book? Well here we go with the next few steps. I did include a step earlier on where I cut up two sheets of cardstock into extra pages but you don't need to catch up with that just grab a couple of sheets of 12x12 cardstock to use. I used a white and a kraft colour sheet. OK here we go with the first few pages ideas I've put together for my December mini book. I've started with the cover piece.
- The cover base is a sheet of the silver foil cardstock from the kit cut to 5.5 inches square covered the back of it, (the grey board side) with a sheet of the Basic Grey paper.
- Take a piece of the silver foil cardstock and cut it to 1.5 x 5 inches then cut a V in the end to make a pennant piece. Glue this piece to the cover so it's about 3/4 of an inch away from the bottom edge.
- Cut a piece of the red mini pom pom trim and glue it underneath the silver pennant piece. Cut a piece of white pom pom trim and sew it down, (or glue it down if you don't have a sewing machine) to the bottom edge of the cover. While the sewing machine is out stitch around the edge of the cover.
- Next take the piece of gold trim and wrap it around your fingers to make a doubled up loop. Place it down carefully on your cover so it's over the top of the silver pennant strip of card then add a blob of glue to each of the left and right sides of the loops that are on the silver card.
- Take the 'December' fabric layer embellishment from the kit and glue it over the top of the silver pennant so it covers over where the gold trim is glued down too.

Next I added one of the American Crafts tags to the front of the mini album. I first stamped 'TWENTY THIRTEEN' with a text stamp and then stitched around the edge of it.
The tag was then added to the ring on the album before the cover piece.
Here's what we've got so far when it's added to the clipboard mini album.

For the next page I've started with one of the 5x7 inch pieces of white cardstock I cut out in the earlier step on a previous post as well as one of the leftover strips, (cut it to 5x1 inch) with a sheet of the Basic Grey paper and the Santa belt ribbon.

Trim the paper to 5 inches wide and glue it to the back of the white cardstock. Glue the white card strip over the remaining space.

Glue the Santa belt ribbon across the join making it 1 3/4 inches from the bottom edge. Put more glue along the raw ends of the ribbon to seal it.

Next take some PVA glue or Glossy Accents and apply a line of it along the bottom edge of the page. Let the glue almost dry until it's still only just tacky, about 5 minutes drying time should do it.

Take a the sheet of gold leaf and very carefully press a piece of it to the glue. If it's sticking to your fingers too much put a little talc on them to stop it.


Let it dry completely and then rub the loose leaf off with a paint brush. Apply another little layer of glue over the top to seal it in place.

On to the next page and this time take the transparency page from the Clipboard mini album. If you're not using the mini album you could make your own page with a transparency or piece of acetate cut down to 5 1/4 x 7 1/4 inches. Peel the covering film from the transparency page.

Place a piece of the Basic Grey paper behind the transparency and trim it down so it's the same width. Make sure the top of the paper is aligned with the top of the transparency then take one of the large tags from the kit and apply glue to the back of it. Place it along the edge of the paper and place the transparency page back over the top just using it as a guide so you make sure the tag is placed so that the bottom edge of it matches up to the bottom edge of the transparency page.

Take the transparency away so you're left with just the tag and paper.

Cover the back of the paper and tag with a piece of kraft cardstock.

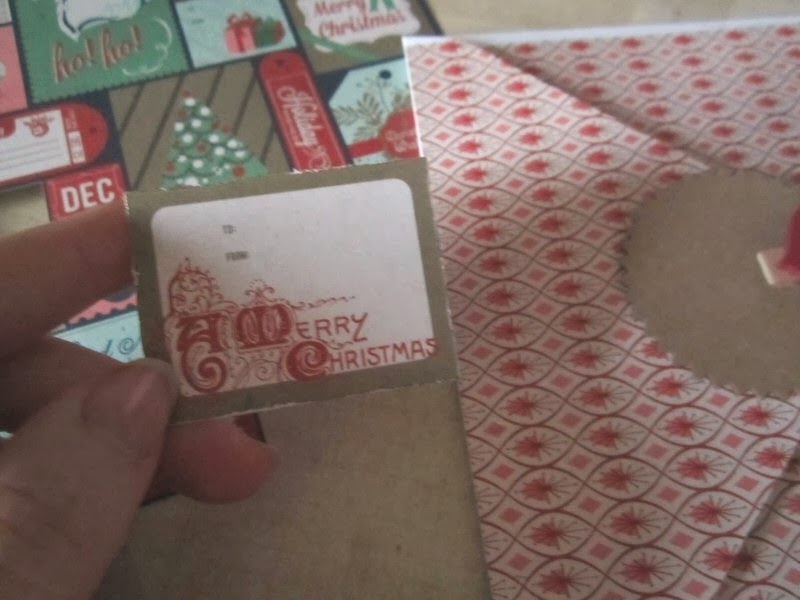
Take the transparency page again and attach one of the Flair embellishments from the kit to it so its above the printed message on the sheet.

To cover over the back of the Flair use the smaller card circle die cut from the kit and glue it with Glossy accents, (or Doublesided tape will work too) to the back of the transparency.


Next I've made a pocket page with one of the envelopes from the kit. First start out by taking two sheets of the same pattern from the Basic Grey paper pad in the kit. Cover both sides of the envelope flap with the paper, it's sligthly smaller than the envelopes so just make sure you glue it on so there's equal gaps at each side. Keep one of the off cut pieces if paper where you've cut out the flap.

Cut out a second piece of patterned paper so it fits inside your envelope and slide it inside.

Trim the edges off the leftover paper piece from earlier so it's the same width as the envelope.

Glue it over the top of the envelope making sure the edges of the paper match up to the edges of it on the envelope flap.

Take the larger diecut circle from the kit and glue it to the envelope flap. Place one of the American Crafts pegs from the kit over the edge. This looks decorative and makes a nice handle to use to open up the pocket on the page.

To add a little extra decoration I've cut out one of the tags from the patterned paper sheet and added a little glue to the back then tucked it underneath the circle.

To make the pocket into a page I've taken a sheet of 5x7 inch white cardstock and glued the envelope to it then punched in the holes in the top of the page.

Finally in this session I've made another little tag embellishment to slot into the pages.
I've started out with the two Word Flash Cards from the kit.

Glue the cards together back to back then fix and eyelet to the top along with one of the Flair stickers.
Next I've gilded the eyelet just to make the colour more in keeping with the album. You could use up lots of embellishments from your stash this way giving them a completely new look.
First I've applied Glossy Accents to the eyelet and left it to dry until just tacky.


Finally I've sealed on the gold leaf with another coat of Glossy Accents.

OK so here's what I've got so far for my mini album. Starting with the front cover page.


I'll pop back to upload the next page ideas on Sunday, (24th).
x Leo
Looks lovely Leo
ReplyDelete