Natalie - Love You

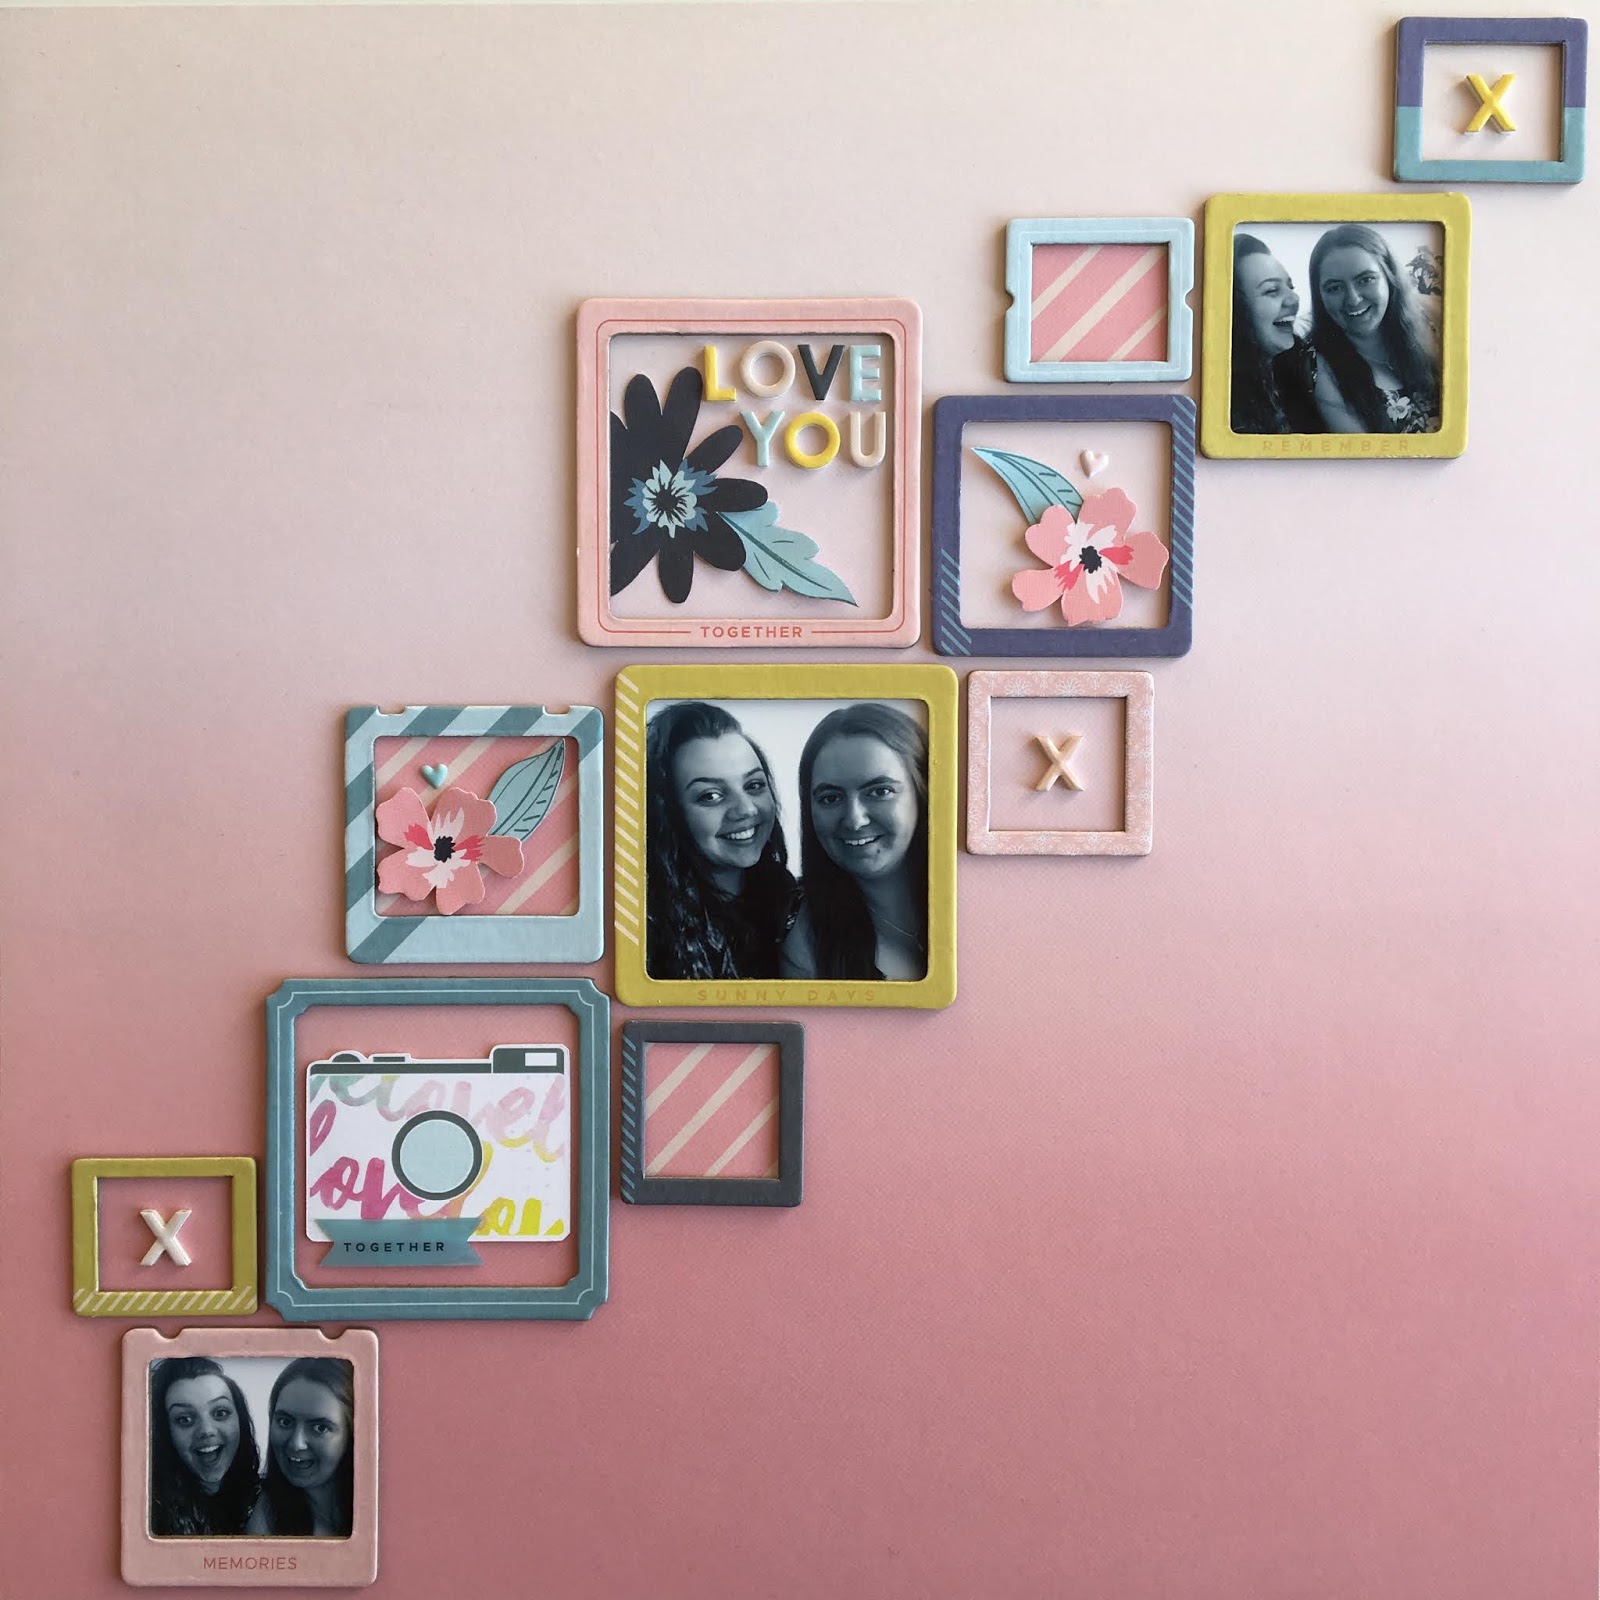
Hi everyone! I'm here today with my first layout " Love You" using the new kits!


Supplies used:

Main Kit:

- Pinkfresh Studio Everyday Musings Chipboard Frames
- Pinkfresh Studio Everyday Musings Layered Stickers
- Pink Paislee Paige Evans Whimsical Paper 17 (Stars and pink ombre)
- Pink Paislee Paige Evans Whimsical Paper 14 (Flowers and stripes)

Extras:

- Pink Paislee Paige Evans Whimsical Mini Alphabet Thickers
- Pink Paislee Paige Evans Whimsical Puffy Stickers

Previous kit:

- Camera ephemera piece was from a Pretty Little Studio pack from a previous Quirky Kit last year.


This is a super simple layout, but I really enjoyed using so many chipboard frames on one layout.
I started with Paper 17 using the B side for the pink ombre, and I picked the blue, yellow and pink frames from the frame set. I decided on a diagonal design and then tried to distribute the colours evenly.


Next I started looking for matching embellishments. I fussy cut some of the beautiful flowers from paper 14. And I used the pink stripes on the reverse to back 3 of the smaller frames, to add some extra interest. 
I found this camera ephemera piece from Pretty Little Studio, which was in a Quirky kit last year and matched the pinks, blues and yellows perfectly.


Next I went looking for some photos to use on the layout. Sometimes I start layouts with a certain photo in mind, but sometimes I just start with a design idea, as with this layout! I chose 1 larger photo, and 2 smaller ones, and converted them to grayscale so they wouldn't clash with the layout colours.


Using small photos and grayscale really helps when the photos are not the best quality, just like these selfies I took on my phone.


I used the Paige Evans Mini Alphabet Thickers for my title, and picked matching colours to the frames (which despite being from a different collection, matched very well). I added foam pads under the flowers and leaves to give some dimension. And added some tiny puffy hearts. 


In 3 empty frames across the layout I added 3 Xs in different colours. The "together" banner was from the Pinkfresh Studio layered heart stickers in the Main Kit, which I disassembled and included. 


I may go back to this layout and add some journalling. You could also add a hand drawn border around the edge of the page, if you wanted to contain it a bit more. 

I hope this layout gives you some inspiration to use the chipboard frames.
If you don't have a full pack like I did, you can use just a few in a cluster. You could also use the frames to just house your embellishments, and have your photos separate. 

Natalie x

Choppy Nice Weather

Hi Leo here!

With these lovely brighter evenings we've been having this past week it's given me a little more time for scrappy fun. Here's another layout I've finished up.
If you find yourself with your kit box open and not knowing where to start this is a perfect kind of layout to go with. 1 - it's really easy to complete, 2- you can use any photo using this technique without worrying if the patterns 'go with' your photo.
OK to start with I've cut out squares of patterned paper using a square punch. You can cut them by hand or with a paper trimmer just as easily. As well as sheets of patterned paper I pulled out a few of the pocket cards from the Custom Card kit to use as extra patterns and to embellish with.


Next I've cut the squares into triangles just cutting them in half with scissors. This red pattern is one of the Custom Cards. I had a lot of red in my photo so I've added just a little more red to my paper bits. You may want to pull out a different one depending on the colours in your photo/s. If you're not sure what colour is predominant in a photo squint up your eyes and look - the colour that you can see the most is your predominant one. The whole idea of this layout is to break up the pattern paper into smaller pieces that make the focus of them the colour and not what the pattern is. Keeping that in mind you can make your pieces any shape you want to - play around with squares, circles etc.


Next I started to glue down the triangle pieces. I started with the bottom row getting the positioning right, (I'm not working on them being perfectly positioned just evenly spaced out). Then I started with the another layer over the top and continued until I'd filled up my background cardstock.


After I'd glued them down I added lines of stitching with my sewing machine.

Next I trimmed another of the Custom Cards into a square to use on my layout as an embellishment.


I also layered another of the Custom Cards behind my photo with a Thickers sticker from the main kit over the top of both.


To finish I added a few more of the main kit stickers and that's that!


Hope you have a go! Tag me on the FB group or on Instagram @craftytemplates if you have a go - I've love to see what you're making breaking up your papers!
xx Leo

On A Page - layout challenge #2

Are you ready for your next 'On A Page' challenge? If you've not read about the new challenges you can catch up with the first one here.

How it works:
I'll post a new challenge up every week, (four in total). Each new challenge will be posted here on the blog and also in the Facebook Group for you to follow along with.
Complete all the On A Page weekly challenges to be eligible for an extra goody in your next kit box! The closing date to complete all four of your On A Page challenge projects will be Monday 18th March 2019. All projects must be new projects made specifically for this challenge. You can use any stash you choose but it's a great opportunity to dig into your kit box and not leave it unused! 

Ready for the second challenge?

The second 'On a page challenge' is - all about the edge. I want you to make your page all about the edges in this next challenge. Focus your design on the outline of your page keeping the majority of your embellishments right to the edges. You can still add something in the middle area - in fact it makes a great focus for your title or photo or journaling.
Ready to get creative?
Here are some images dug up from Pinterest below with layouts that focus on the edges to kick start you if you need some ideas:


Once you've finished your creation upload it to your platform of choice.
For Instagram tag @craftytemplates and mention it's for the On A Page Quirky Kit challenge.
For Facebook add it to the Quirky Kits Group - they'll be a post for each new challenge there to share it to or else mention it's for the On A Page challenge when you share it so I can find it.
For blog add a link to your project from your blog in the comments below any of the On a Page challenge posts, (like this one).
Or if you'd prefer to keep your project private you can email them directly to Leonora@craftytemplates.com

For this challenge I'm going to leave open ended what your finished project is so you can create a scrapbook page or a mini book or a pocket page or a card or a travellers notebook page etc etc. I'll leave it up to you what you choose to do. I've also left out any prompts relating to the photo/s so if you have specific photos you want to get scrapped these prompts aren't going to stop you using the photos you want, just push you with a helping hand on the things to pick out, make and do.

Have fun!
xx Leo


Fun with 'filling in' the blanks

Hi Leo here!

I've been puttering around with some of the new kit goodies this week. I've got two more on the go but this one is the layout I've finished first:


I started out on a different layout using the cut file from the Lite Kit, more on that one in a later post! The cut file is an outline that I was filling in with photos and paper and it set me off onto wanting to create more shapes I could 'fill in' with papers. I decided on some stars to work with the birthdays theme of my photos on this layout. I also made some number shapes.

All I did was use the 'offset' feature in the Silhouette software to make an outline around a simple star shape then the 1st and 2nd numbers were just typed then selected and the offset tool used again to make the outline around each of those.  The 'distance' bit is just the thickness of the outline so you can set that to whatever you'd like it to be on your shape, then if you want rounded corners or straight ones.

Those I then cut out and I've glued them over the top of patterned paper pieces then cut out around them to fill them in. The stars would be pretty easy to create without a cutting machine.


As well as using the frame pieces I also used the cut out middles. I ran some old scissors around the edge of these to distress them a bit. It just helps to 'lift' them a bit on the page too.

At this stage I'd glued down all the stars on to my background paper. I've not glued them completely flat, I've added glue in the middles and let the edges pop up a little bit. The smaller star I've left as an outline piece, I didn't fill it in with paper.


Next I added my photos. I matted each one onto white cardstock and used 3D foam pads on the backs to attach them to the layout. I also added 3D foam pads to the '1st' and 2nd' embellishments I'd made.


After all my created page elements were added I grab my kit stickers stash and began to add those all around my layout. I picked out the 'Party' and 'Celebrate' Thickers from the main kit pack.


I also picked out the 'chipboard chat' stickers in the main. I've used more 3D foam pads to attach them to keep them level with the photos.


I've added some of the little alpha stickers from the pack in the main kit too:


I added a few more of the Whimsical stickers from the sticker book and some glued down scattered sequins to finish.


Now I'll get back to my original layout! I've been fussy cutting the flowers from the Whimsical paper in the main kit for it and it got a bit boring, hence the detour into a different layout. I even started a third layout that might end up getting finished before that first one I started!
xx

New Kit = New Challenge Time! 'On A Page' Challenge One

Hi Leo here, happy new kit time!

Here are the details for the first of the new weekly challenges. The new challenge is called:

On A Page

For this next set of challenges you'll be tasked each week with a new focus element to create on a page. If you've ever found yourself shuffling around bits of paper and embellishment not knowing where to start or how to settle on what to stick down, these challenges aim to help you to channel your focus and give you a starting point to jump into creating your pages.

How it works:
I'll post a new challenge up every week over the next four weeks. Each new challenge will be posted here on the blog and also in the Facebook Group for you to follow along with.
Complete all the On a Page weekly challenges to be eligible for an extra goody in your next kit box! The closing date to complete all four of your On A Page challenge projects will be Monday 18th March 2019. All projects must be new projects made specifically for this challenge. You can use any stash you choose but it's a great opportunity to dig into your kit box and not leave it unused! 

Ready to see the first challenge?

For your first On the Page challenge you need to create a heart motif from patterned paper as your page element BUT it can't be made from just one piece of paper. You need to come up with a way of creating your motif with multiple, (at least two) paper patterns.
I've included some page samples below to help kick start you too. Your heart doesn't need to fill your whole page like some of these samples do though - it can be any size.


Once you've finished your creation upload it to your platform of choice.
For Instagram tag @craftytemplates and mention it's for the On A Page Quirky Kit challenge.
For Facebook add it to the Quirky Kits Group - they'll be a post for each new challenge there to share it to or else mention it's for the On A Page challenge when you share it so I can find it.
For blog add a link to your project from your blog in the comments below any of the On a Page challenge posts, (like this one).
Or if you'd prefer to keep your project private you can email them directly to Leonora@craftytemplates.com

For this challenge I'm going to leave open ended what your finished project is so you can create a scrapbook page or a mini book or a pocket page or a card or a travellers notebook page etc etc. I'll leave it up to you what you choose to do. I've also left out any prompts relating to the photo/s so if you have specific photos you want to get scrapped these prompts aren't going to stop you using the photos you want, just push you with a helping hand on the things to pick out, make and do.

Have fun!
xx Leo