
I just found out that this past week it's National Stationary week. They have weeks or days for everything now, (it's Scrapbooking Day on May 3rd, mark your calendars!). I think my favourite may be Donut Week but Stationary Week has to come a close second. ;)
OK on to the point of this post.... with it being Stationary Week I got the idea to have a play around with the new kits and make a stationary suite and I ended up with this fun 'box file' filled with cards.

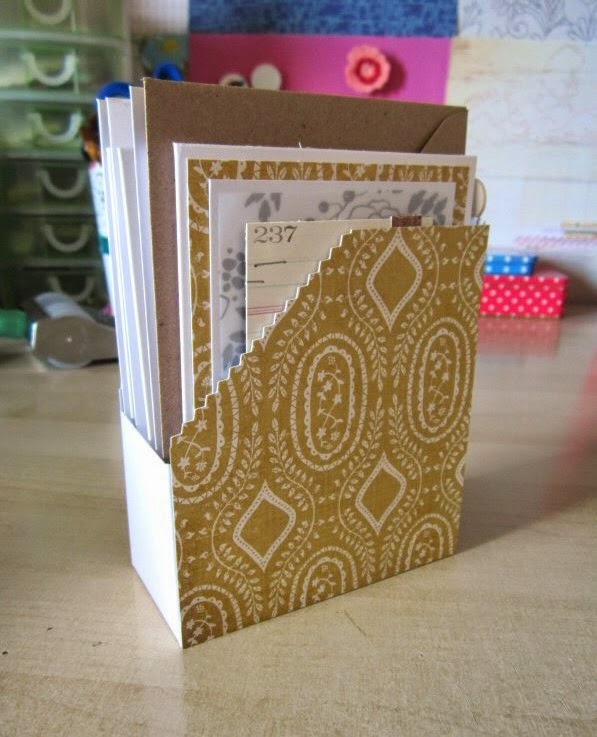
It's super easy to make and I stuck to using just one sheet of 12x12 cardstock for the box so that's all you need plus some doublesided tape to stick it together. For the scoring I used my paper trimmer with the score blade in.
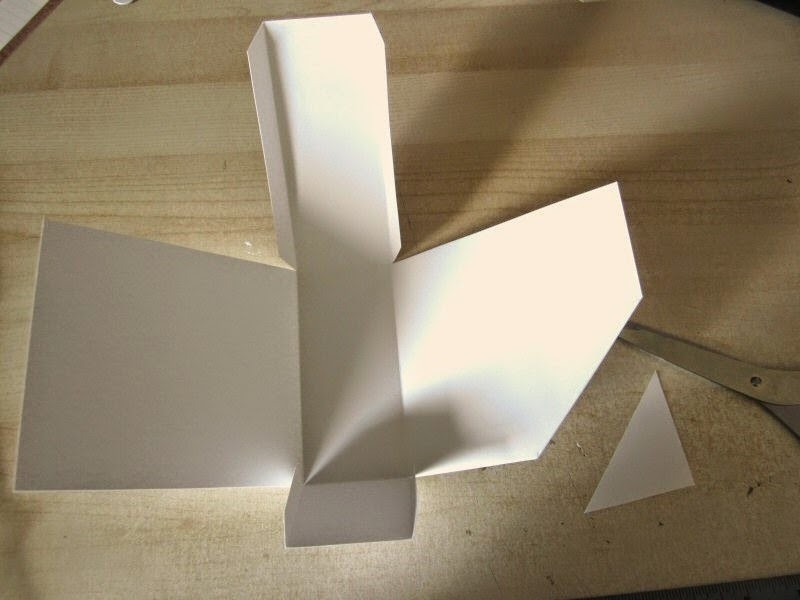
To make the 'file' gift box.
Take a 12x12 sheet of cardstock and score lines down it at 5
inches in from one end, then from that score line make another one at 4.5 inches. Turn it 45
degrees, just so your score lines are now going across your sheet then score a line at 5 inches then at 2 inches so you’re left with 5 inches again
up to the edge of the sheet. When you're done it should look like this:

Cut away the bottom two sections leaving a little strip on
each side of the middle section for folding like this:

Do the same with the top two sections:

Then you’re left with this:

Fold up all the remaining score lines to form your base box shape.
Before you glue the box together you need to cut out the
sides a little to create the box file look. This is the stage you can add your decorative touches to make your box unique, maybe using fancy edged scissors to make a
decorative cut edge,(like I did with the finished one at the top of this post) or a punch or just leaving the edges square and cutting out
a shape from the sides instead. You can also choose to decorate your box at
this stage by covering the sides with patterned paper.
I’m just going to cut off the corners for this one. I've
measured 2 ¼ inches from the edges and then joined them up to form the corner to cut off:

Then just cut along the line. Do the same for the opposite side.
Once you've finished your edges add double sided tape to the
flap pieces and then fold up all the sides to stick your box together.

Now you just need your cards to put inside. Here are a few that I made with the current kits.

This one used a cork sticker and piece of WRMK Metallic Sheer from the main kit and the 'So Lovely' and 'Rosemary', papers from the Lite kit. I've also used my own die, it's a Memory Box one.

I've cut out the top left piece of the 'So Lovely' paper, it's roughly 2 1/2 x 4 1/4 inches. I've used the cork edge from that paper to cut out a pennant and then layered that together with a cork sticker and fixed it on the top right edge of the paper piece. The bottom edge I've rounded the corners and then cut out the greeting with my die. That was then fixed on top of the Metallic Sheers paper using foam pads.

I've glued that whole piece onto a scrap of white card then covered a A6 size card blank with the Rosemary patterned paper and glued the card panel on top to finish.


This next one I used one of the cork stickers from the main kit to stamp with. to create the card background.


I've glued the wooden shape to the paper and then cut out around the edge. Keeping going to build up the paper layers.


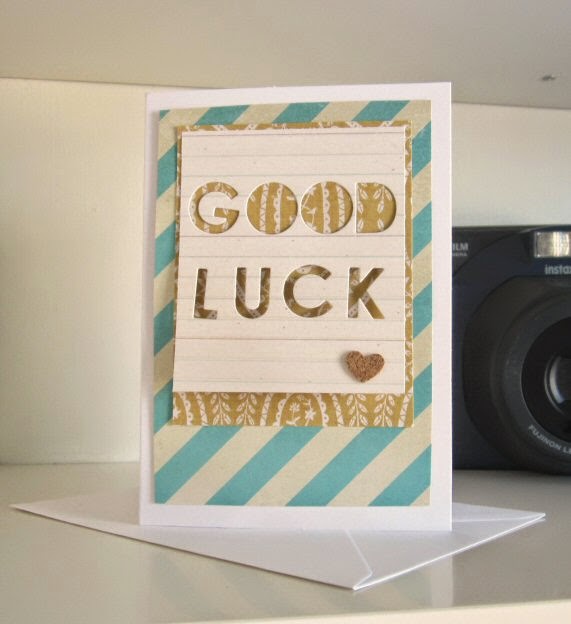
Here's two more I made using the papers from both kits.

(Inside this one I wanted to put find the Gin!) The envelope for this one I've lined with the same paper too. It's all made with the 'Sweet Sour' paper from the main kit with little cut off bits of the Rosemary paper.
With this one I've cut out the greeting from more of the 'Lovely Day' paper from the Lite kit using more of my Memory Box dies then attached that using a strip of glue at the top to a piece of the Rosemary patterned paper, (to leave the bottom edge loose like a note) and then glued that to a piece of the 'Dictionary' patterned paper from the Lite kit. and cut the whole thing out with scissors then glued it to a card blank.
Once you've made your cards you can pop them inside the box along with the envelopes and you're all finished. If you're giving it as a gift you could also wrap the cards in cello bags and add a tag to the box, wrapping some ribbon around it etc. to dress it up a bit more.
The finished box will also fit your 4x6 size Project Life cards in so you could even set to making your own little stationary suite for Project Life scrapping, making flat 4x6 cards to fill your box with.
Have fun!
x Leo
No comments:
Post a Comment