
I recently had a tidy out of scrapbooks and my craft space/ desk and I've found photos scrapped on layouts that I wanted to change around. This photo was on an 8x8 layout and I'm putting all my heritage photo layouts in a new 12x12 album so I decided to make a full 12x12 page for it. It's quite a small photo so I didn't want to do too much to it. It's on its own to go at the start of my grandparents section so it needs to have a page of its own. I also didn't want to add too much to the page to keep the photo the focus so putting all this together it made it the perfect project to use the miniature embellishments on.
I started with the Basic Grey 'Rue' paper from the main kit and cut out some of the circle shapes on the reverse of the paper. I then cut into the middles and glued the cut edges together to create a little slight 'cone' shape.


Once it was glued I've then pressed into the middle and it makes the middle 'pop' up to make these cute little paper shapes. They're kind of like large paper cupped sequins.


Another miniature embellishment idea on this layout I used was to make some leafy/foliage embellishments. I started off by hand cutting out the leaf shapes from paper. If you didn't feel confident just straight hand cutting something out you could stamp or print something out first to use and then cut that shape out

I've covered the whole shape with Glossy Accents and then sprinkled over glitter.

These I've used layered up with one of the wooden shapes from the main kit.

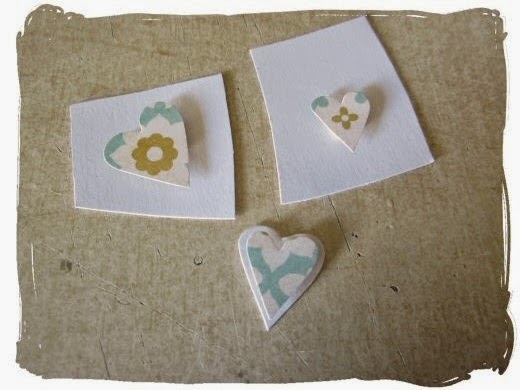
More miniature cut outs I've made are little hearts cut from patterned paper. This paper I've used is the Basic Grey 'Rosemary' one from the Lite kit. The heart shapes I've then glued onto white cardstock with 3D foam pads and re-cut them out around the edges to give a double layered effect.

Finally I've made a glitter enamel dot effect embellishment using drops of Glossy Accents covered with glitter. Leave the dots to dry once you've added the glitter and then tap and finally brush off the excess with a dry paint brush to get rid of the loose glitter.

On my layout I've mixed them up with enamel dots stickers from the Lite kit and some of the embellishments I made.

Finally here's the finished layout with all the completed miniature embellishments.

Hope it's given you a few ideas to try or inspired you to have a go at making your own completely different miniature embellishments.
Have fun!
x Leo
No comments:
Post a Comment