
This weekend Paperchase have a special offer for us with 20% off your order when you shop online. All you need to do is enter code PAPERTREAT20 at checkout to get the discount.
OK onto part two of planner making. This time I'm looking at what you can use in your scrapbook/papercraft supplies to customise/make your planner with. I've gone through my supplies from all my bagged up Quirky Kit bits and pieces left over and pulled out the kinds of bits and pieces I think would work well in planners.


- Patterned paper off cuts are always handy and I don't like throwing away some of my favourite patterns even if they're only little bits but the little bits are perfect for little planners!
- Mini cards, these were all cut down from the sheets of paper that have the mini cards on them, we've had a lot of these over the year in kits.
- Tags
- Pockets
- Mini alphabet stickers
- Rub Ons
- Washi tape
- Little embellishments
- Stickers
- Clips and charms
There's so much in your scrapping stash you can use in customising planners. The only rule I think I'd stick to is to not use anything too bulky because you want your planner to last though the year so you don't want to be taking up too much space with bulky embellishing.
I started off with a 6x8 inch piece of card from some packaging and made a template of where the holes on the binder are. This was just a case of drawing a line a half an inch from the edge then butting the card edge up to the rings until it was central then I made lines with a pen where the rings sat against the card and where the lines crossed I punched out the holes.

With the template I can then use it to mark where the holes need to go on each of the page I make:


 I went ahead and made a whole bunch of pages at a time. Some is cardstock and some is scrapbook paper. The nice thing about ring binders is you can take out pages or change them around later on so it doesn't really matter what you put where.
As well as regular flat pages I made a couple of different ones too like a fold out one like this which I edged with washi tape where it folds out:


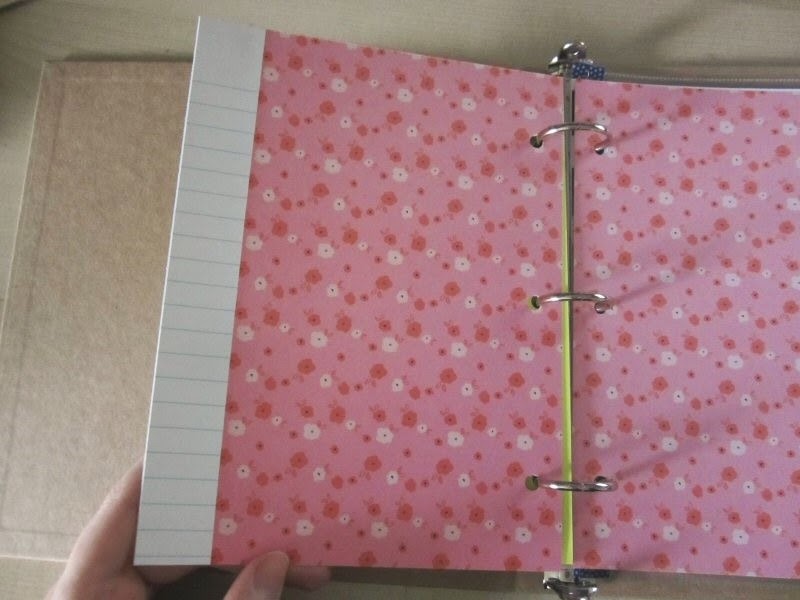
This one is scrapbook paper with note paper edges just to make it look different.
This one is a pocket I made with printable acetate. I printed on the words and then cut it in half, (it was an A4 sheet) then I stitched it around the sides and bottom so it made a clear pocket where I can stick in loose bits and pieces.

Then I also had a go at cutting down page protectors to fit inside. this one has two 6x4 pockets and I used washi tape to cover over the original holes then punched in new ones using the page template I made. I also sealed the cut edge with a bit of washi tape too.

If you didn't want to make your own inside bits there's lots of stuff out there in the scrapping world you can buy to use. I had a go with these Simple Stories Sn@p chipboard page dividers. The holes you can either cover and re-punch out or if you're using a 6 ring divider I did find that the holes match up you just need to punch in a couple extra on each side. These are the 6x8 size for A5 planners/binders but they do come in other sizes if you were using a smaller planner. When I put these in the Paperchase kraft ring binder the tabs stick out on the edge of the binder and with the outside being kraft it actually looks really cool. I've not taken a photo of that yet but will show what that looks like in the next adventures in planner making post.

That was working in the ring binder now I've got a few customising bits and pieces I did in my A5 planner. Inside the planner I got from Paperchase, (the one I bought has sold out online now but you can browse through all the other planners here, make sure to take notice of the sizes because they come in pocket and personal sizes, the one I'm using is A5 sized) it has the dividers already made but they're all plain white so perfect for altering!
I started out with some paper, (this one was in the Sept/Oct Quirky Kit) and fixed it to the divider card with doublesided tape, placing it on the sheet so it butted up to the straight edge leaving the tab showing:

I've then trimmed it around the edges and re-punched the holes:

Flip it over and cover the other side and again re-punch the holes and that's as simple as that, instant cusomised index tabs.

I wanted to add a bit more so I used a mini envelope as a pocket and I can put clips or stickers or something inside it:
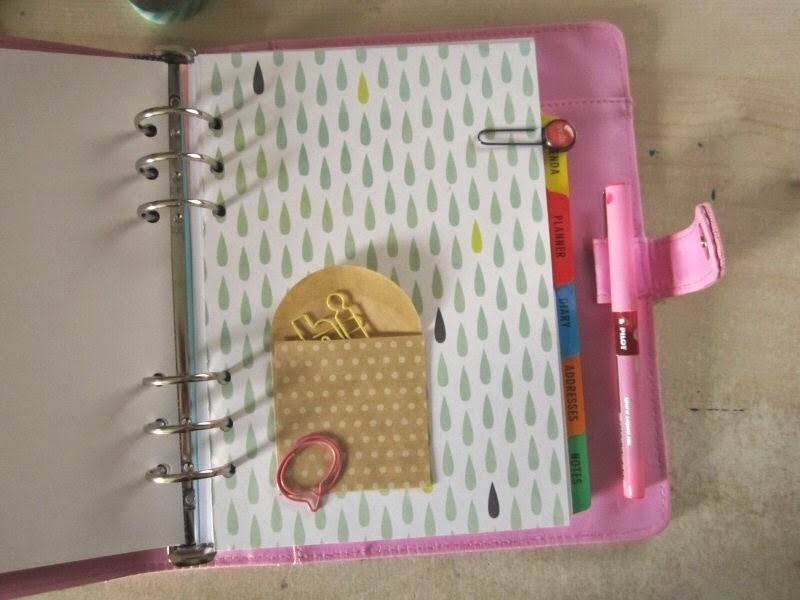
The rub ons make great planner embellishments because they're flat and you don't want to make your planner too bulky so I added a few of those too. These Crate Paper rub ons were in the July/August Quirky kit.


OK a bit more embellishing! Inside the planner are things like these lined paper sheets. I'm forever writing to do lists so I for sure wanted some inside my planner and I picked out this really cute American Crafts DIY 2 self inking stamp to make a header and then just added a bit of washi tape underneath. easy peasy but it just adds a bit of extra cuteness to something everyday.

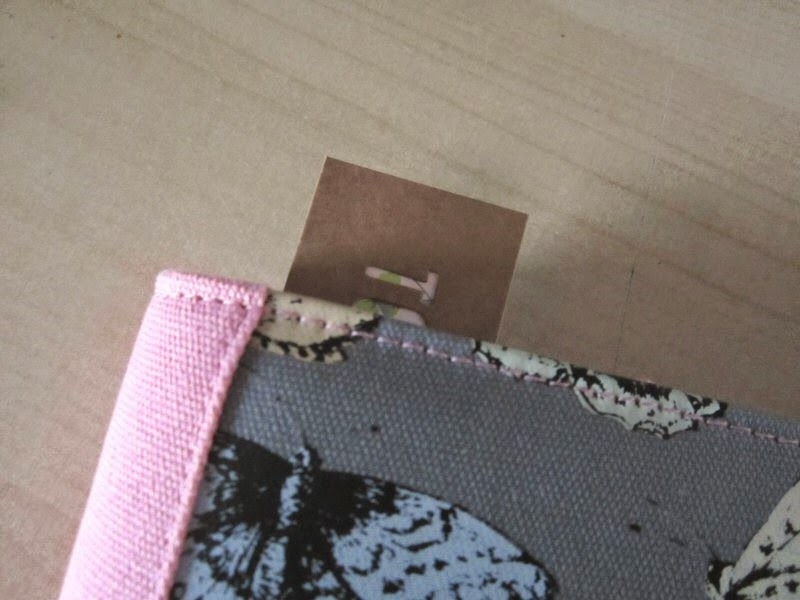
Another thing I wanted to show was a way to use tags as place finders in your planners. I used this one from the July/August Quirky embellishment kit and added a scrap of paper behind it:

Then all I've done is clip it on the top ring and when it's closed....

Last thing for today, a little cute planner charm. Again everything here was from my Quirky Kit stash. I used some twine, (Jan/Feb Quirky kit) and threaded it through the Maya Road charm, (March/April embellishment kit) and then threaded that through the hole in the zipper and tied in a couple of knots to seal it on there. Super easy and super cute! You could make charms with things like flair badges too if you glued two together with some twine in between or some of the larger wood veneer shapes we've had in kits or the Prima metal flowers from the last embellishment kit would be super cute too.

OK I'll leave it there for today but I'll be back very soon with more adventures in planner making!
x Leo
No comments:
Post a Comment