I was actually tidying up my desk when my eye fell on a sketch that was one of a number of card sketches I had printed up as card making inspiration and thought "hey, that would make a good layout". So I stopped tidying (any excuse) and started scrapping.
Here is the sketch
and here is the layout
If I had another piece of matching card stock it would have been much easier to cut a diagonal strip from that, add all the circles and then cut off the overlapping edges and then stick it down to the bottom sheet. But I didn't. However it proved quite a satisfying play time punching out all the circles and going round them with my black sharpie and then trimming and placing and re-outinling them again. Honestly. The whole thing is pretty bright and in your face but then, so were the late '80s...
Once all that was done everything else came together quite quickly. The ribbon and the birds were more scraps that nearly were thrown away instead. The photos were mounted on foam pad strips to give a bit of dimension and I used some more sequins from stash to add a bit of sparkle. The sequins in a strip are from a Quirky Card kit that must be from about 5 years ago!
I punched a larger circle from some spare cardstock and used that as a frame for my journalling which ended up at least almost circular!
These Quirky Kits have once more proved to be fabulous in the kind of range of pages they have helped me produce and challenged me to use things I normally wouldn't. Thanks again for all the inspiration Leo :)
Trends & Techniques - photo grid & mini tag collages
For this months' Trends & Techniques post I've lent more to the 'technique' side of things and had a go at a couple different techniques you could try out.
First I wanted to tackle multi photo layouts. When I look back through my albums the vast majority of them are single photos and I guess it's because it's so much easier to include just one or two photos on a layout, right? Well I wanted to think of a simple way to include multiple photos on one page and focused on the technique of using a 'grid' pattern. On my layout I used photos of various sizes but there's no reason you couldn't apply this to photos of the same size. It's a simple case of taking a strip of paper or cardstock as your background and fixing down your photos in a 'grid'. It takes the guessing out of where to place photos and I think I like the way it combines the multiple photos into one block so you can treat it like you would making a one photo layout.
Here's the way I started out my layout with the photos on a strip of paper placing them in a grid leaving equal amounts of space between each one:
From then on I went back to building up the layout. I wanted to build up a fun 'messy' background so I started off with pouring white ink on the background and brushing some of it around. The background paper I'm using is the Glitz one from the main kit 'Pocket Full of Posies'.
Once it was dry I glued it to a piece of cardstock to give it extra stability.
Next I used some of the leaves from the main kit a flower from the Lite kit and some of the gold thread from the main kit. Placing them around the layout it what will be the corners when I'm done building up the middle section.
Next I added patterned paper. Most of everything I used were paper scraps as at this stage of using my kits most of it is cut up into now. It's easier to work with the off cut bits and pieces sometimes and it takes the guess work out of building up your layout, just stick them on and if you end up not liking some part just cover it over with something else. :)
I wanted to add some embellishment details using one of the pegs from the main kit so I added a strip of patterned paper down the edge of the layout fixed down using 3D foam pads to give room for the peg to sit underneath the paper edge.
Another technique I wanted to have a go at was building up some mini collages in the mini tags from the main kit. These are another way you can use up paper scraps from your kits too.
If you have a go at using any of the techniques/ideas post a comment to show us what you've made. :)
x Leo
First I wanted to tackle multi photo layouts. When I look back through my albums the vast majority of them are single photos and I guess it's because it's so much easier to include just one or two photos on a layout, right? Well I wanted to think of a simple way to include multiple photos on one page and focused on the technique of using a 'grid' pattern. On my layout I used photos of various sizes but there's no reason you couldn't apply this to photos of the same size. It's a simple case of taking a strip of paper or cardstock as your background and fixing down your photos in a 'grid'. It takes the guessing out of where to place photos and I think I like the way it combines the multiple photos into one block so you can treat it like you would making a one photo layout.
Here's the way I started out my layout with the photos on a strip of paper placing them in a grid leaving equal amounts of space between each one:
From then on I went back to building up the layout. I wanted to build up a fun 'messy' background so I started off with pouring white ink on the background and brushing some of it around. The background paper I'm using is the Glitz one from the main kit 'Pocket Full of Posies'.
Once it was dry I glued it to a piece of cardstock to give it extra stability.
Next I used some of the leaves from the main kit a flower from the Lite kit and some of the gold thread from the main kit. Placing them around the layout it what will be the corners when I'm done building up the middle section.
I fixed them in place with stitching to work with the 'messy' background.
Next I added patterned paper. Most of everything I used were paper scraps as at this stage of using my kits most of it is cut up into now. It's easier to work with the off cut bits and pieces sometimes and it takes the guess work out of building up your layout, just stick them on and if you end up not liking some part just cover it over with something else. :)
I wanted to add some embellishment details using one of the pegs from the main kit so I added a strip of patterned paper down the edge of the layout fixed down using 3D foam pads to give room for the peg to sit underneath the paper edge.
I'm going to use the peg to fix embellishments to the layout, first I've added the paper flower and a leaf.
As a final extra layer I added one the woodgrain patterned bag to help pick out the white in the background and the photos and I moved the green paper around a little to accommodate it.
As the last paper layer I added the strip of paper with my photos on.
I've used the peg to attach the tags down the side of the layout.
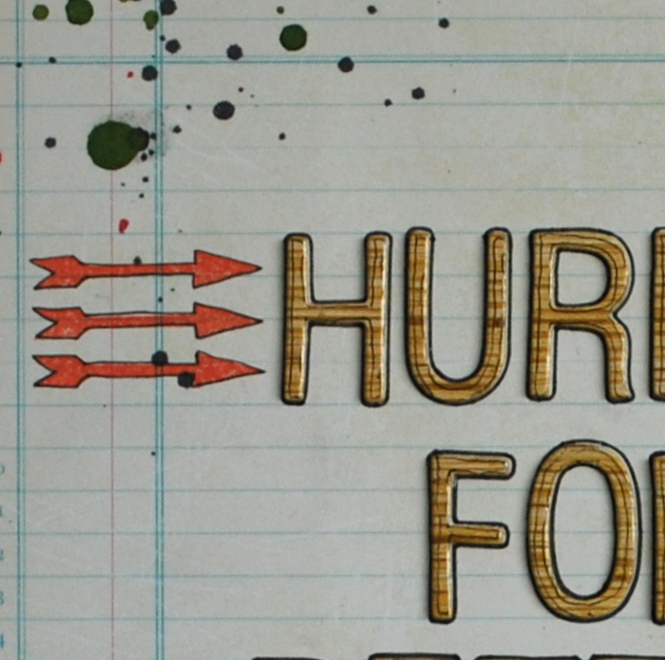
All that was left to do was add the title. I added extra glue, (Glossy Accents) to help stick down the stickers better.
Finished layout:x Leo
The dustbin style of scrapping
aka why throw that scrap away when you can just add it to your layout?
I am really supposed to keep my scrap area clean and tidy as it is a corner of our bedroom. (Not that the rest is that clean and tidy mind you) but sometimes I go from one project to another without really tidying up in between and so some little bits end up on my table that should really go into the bin.
But with this page somehow some of them ended up on the layout instead!
I added some grey cardstock to the kit (one of my favourite staples) and started layering up papers behind my photo. I embossed the first mat with a Cuttlebug Embossing Folder and added some washi tape around it as well.
The "love you more" portions of paper are the tear off strips from the bottom of the 12x12 Dear Lizzy paper and the white circles are some of the off cuts that were just on my desk!
I also challenged myself to use some of the paper flowers. I'm not really good at using paper flowers. So many other people seem to gather them together and make them look awesome. Not me. Mind you I am not good at arranging real flowers either... Anyway I was inspired by my daughter's flower hairband and decided to ink some of the white flowers - two were smooshed in yellow ink and one in yellow and red.
I added some little punched hearts and added some real holes and some pretend stitching. I stuck the wooden speech bubbles directly on top of my photo. As before I halved the clothes peg and this time added some of the gold ribbon around it. I echoed this by adding more of it around a large punched heart and by sprinkling some tiny gold sequins from my stash across the page
See what you can do with your leftovers as well :)
Pinteresting take two
I thought I would have another go at the Pinterest Pointers that Leo produced. And would you beleive it? It didn't turn out the way I was expecting! That was due to the fact that I couldn't find my doily stamps which would have looked lovely on the woodgrain. And as I was too impatient to pull out ALL my stamps in order to find them, decided to try something different. As I was going to be using some of the frame paper I was inspired to use a set of Waltzing Mouse label frame stamps instead. And here is the result
although I used detail white embossing powder it has a slightly more off white look. I rather like it though and to be honest this fitted in much better with my page about my boys than doilies would have done
I used the whole sheet of ledger paper as the background and splodged three different mists in green, black and (a teeny bit of) red. Too much red looks like you have cut yourself on the page. I trimmed various toning papers and played about with them a bit until I was happy with the placement and outlined them twice with black pens. I cut a strip of the chevron paper and added black lines to echo the Dennis the Menace shirt a little more. I love the pegs but don't love how they stick out so much so took off the metal bit and stuck one half down on the page (means I have another half to play with as well!)
I had run out of "n"s so had to improvise with a cut up "w". This is the second "w" I used as you have to be careful where you trim it down otherwise it is a backwards "n". She says wisely after the event. I double outlined the thickers too but they are thin and slidey and so I wouldn't bother doing that with this type again!
After adding the journalling (hurray for printed lines as well) I knew it needed something more and retrieved the leaves from the kit. Keeping the three with long stems in the little paper coil helped with sticking them down (I used glue dots). I also added some Imagine That stamps with red ink which I outlined with a thin black pen.
and added a touch of Stickles to the heart in the middle of this image which was stamped onto a circle cut from more of the woodgrain paper.National Scrapbooking Day - Scrapbook your Creative Space
Happy Scrapbooking Day!
As it's a day to celebrate all things scrapbooking and creative I thought we could have a little Quirky Kit challenge to 'Scrap You Creative Space'. Where do you do your scrapbooking/crafting? How do you set out your supplies? Take a snapshot image of your space right now to make a scrapbook page and catalogue all the bits and pieces of you space in your journaling.
Here's the page I put together using goodies from the main kit 'Pocket Full of Posies'.
Here are a few ideas you could pull from the layout to use on other projects.
I made a mini chalkboard embellishment using one of the frames on the Amy Tangerine paper from the kit and a scrap of black cardstock. I sketched on it using a Chinagraph pencil.
I added the background at an angle using the washi tape in the kit to fix it in place then trimmed it to the edges of the cardstock. I fixed the open edges down with some machine stitching.
This scrap of Crate Paper paper I added colour to using Promarkers to work with the whole 'creative' sketchbook theme of the layout.
Are you scrapping or writing about your creative space over this weekend? I think it's a great way to commemorate Scrapbooking Day. If you have a go leave a link in the comments to where you've uploaded your project or email it to me at enquiries@craftyprincess.co.uk and I'll pop them up here on the blog to share.
Happy scrapping!
x Leo
As it's a day to celebrate all things scrapbooking and creative I thought we could have a little Quirky Kit challenge to 'Scrap You Creative Space'. Where do you do your scrapbooking/crafting? How do you set out your supplies? Take a snapshot image of your space right now to make a scrapbook page and catalogue all the bits and pieces of you space in your journaling.
Here's the page I put together using goodies from the main kit 'Pocket Full of Posies'.
Here are a few ideas you could pull from the layout to use on other projects.
I made a mini chalkboard embellishment using one of the frames on the Amy Tangerine paper from the kit and a scrap of black cardstock. I sketched on it using a Chinagraph pencil.
The bottom strip of this Dear Lizzy paper I used to make a little extra embellishment down the edge of the page.
This scrap of Crate Paper paper I added colour to using Promarkers to work with the whole 'creative' sketchbook theme of the layout.
Are you scrapping or writing about your creative space over this weekend? I think it's a great way to commemorate Scrapbooking Day. If you have a go leave a link in the comments to where you've uploaded your project or email it to me at enquiries@craftyprincess.co.uk and I'll pop them up here on the blog to share.
Happy scrapping!
x Leo
Cardmaking Corner
I was just posting this up on my own blog but thought I'd pop it on here too. I'm sure lots of you do this too but once I'm finished playing with kits I bundle all the leftover or unused bits and pieces together in a box to use on other projects. It's a great way to use up paper scraps and it gives you ideas to mix up papers/embellishments you wouldn't have put together otherwise. :) I also tend to leave out bits and pieces from when I've been working on scrapbook projects and put them together for cards.
My last two cards for Daring Cardmakers I've been using up Quirky Kit leftovers this way:
*It's national scrapbooking day tomorrow and I've got a Quirky Kit challenge for you to scrapbook your creative space. Where do you scrapbook or how do you set out your supplies? Take some photos and pop back here on Scrapbooking Day, Saturday May 4th so see my page and share your creative spaces!
x Leo
My last two cards for Daring Cardmakers I've been using up Quirky Kit leftovers this way:
I've mixed up goodies from the last three kits (Nov/Dec, Jan/Feb and March/April) on both cards.
How many mixed up kit leftovers can you get on one project?
*It's national scrapbooking day tomorrow and I've got a Quirky Kit challenge for you to scrapbook your creative space. Where do you scrapbook or how do you set out your supplies? Take some photos and pop back here on Scrapbooking Day, Saturday May 4th so see my page and share your creative spaces!
x Leo
New Subscription Places Now On Sale
The new subscription places to start your Quirky Kit subscription with the May/June kits are now up in the shop. The main kit for May/June is 'Candy Floss Cart' and the Lite kit is 'The Ice Cream Stall'. Both kits have got a fun fresh summery colour palette with muted and bright candy colours and I've picked out papers and embellishments to reflect current trends such as ombre, watercolour effects, chalkboard and geometric patterns. I've also added feather motifs to both kits as a contrast with to the geometric patterns. As usual they'll be papers and goodies through both kits including goodies from Elle’s Studio, (Serendipity) Studio Calico, (Sundrifter and Atlantic) Kesi- Art, LilyBee, (Pinwheel and Sweet Shoppe) Echo Park, (Here and Now, Perfect Summer and Yellow Submarine) Pretty Little Studio, (Nature Walk) and more!
New subscribers you can check out the full details and subscribe here for the main kit and here for the Lite kit. Current subscribers, remember your subscriptions are rolling so you don't need to do anything. :)
I'll add the sneak peeks over the next three weeks of the goodies in the new kits as they all arrive. Here's a first sneak peek, these cute stickers are to be part of the main kit:
x Leo
New subscribers you can check out the full details and subscribe here for the main kit and here for the Lite kit. Current subscribers, remember your subscriptions are rolling so you don't need to do anything. :)
I'll add the sneak peeks over the next three weeks of the goodies in the new kits as they all arrive. Here's a first sneak peek, these cute stickers are to be part of the main kit:

x Leo
Subscribe to:
Posts (Atom)