Mixing and matching

With all the Quirky Kits I put together I try to make up the kits to be as usable as possible for lots of different page styles and subjects so I figured for my first play with the kits this month I'd do two contrasting styles of pages with the kits, one soft and kind of pretty and the other with bold more masculine feel.

I started out with a colour scheme in mind sticking with the softer tones of the greys, blues and yellows from the kits. With the first layout I've picked out the My Minds Eye papers from both the kits along with a little of the Studio Calico Yearbook paper from the main kit.


I cut out one of the speech bubbles from the Ready Set Go paper and one of the journalling spots from the 7 dots studio paper and added one of the Pink Paislee Photograms and an Elle's Studio tag also from the main kit. The mini alphabets from the Lite kit complimented the softer style of the page so I used those and I used the Prima stamp from the Lite kit in a soft grey ink, (Versafine Smokey Gray) to add a distressed effect to one corner. I used some Studio Calico colour mists, (white and Clay) to carry on the distressed look across the page to guide the focus across the page. The paper doily was left over from the 'Observations' main kit from June and it echos the doily patterns on the My Minds Eye papers.

For the next layout in contrast to the first I picked out the bolder colours focusing on the golds/oranges and green/blues.


I started with a white cardstock background and added a layer of the Mustard cardstock. I used the 7 dots studio paper in reverse, (the green side) with the Prima stamp over the top in black ink as a layer along with the  paper, a piece of the Yearbook paper, (using both sides) and a piece of the Punchinella, all from the main kit. For the title I cut out two of the speech bubbles from the 'Think Good Thoughts' paper and layered them up along with a heart I doodled onto one of the orange coloured speech bubbles and cut out. The tag from the main kit added the final layer and I threaded some of the ribbon from the main kit through then fixed it in place with glossy accents. The arrows I doodled onto scraps of the Ready Set Go 'To Do List' using both sides of the pattern.

So yeah, two different looks from the same two kits mixing and matching and using a colour theme to help pick out the elements. :)

Hope you're having fun with your kits. If you're a UK Scrappers forum member this week is Cyber Crop week and I've set one of the challenges which will be going up on Tuesday, (30th) at noon. There's no set class as it's a photo challenge but I have used Quirky Kit goodies for the sample and I'll do a write up on what I've done/used for the layout here on the blog on Tuesday too. Pop along and check out the Cyber Crop info here, http://www.ukscrappers.co.uk/boards/forumdisplay.php?f=461

Happy scrapping!
x Leo

Diamond Life

I do love using lots of different patterned papers on a layout and this Quirky Kit makes the doing even sweeter by combining various manufacturers to give a harmonious but not matchy look to a page. See how many papers I managed to use on this page
Actually not as many as it seems as the base paper already had some patterned sections on it and some of the papers are double sided but still - not a bad haul (and it includes the journalling spots which come from the 7 Dot Studio Hopefully "Play with me" paper.) I also snuck in a circle made from the Pink Paislee Photograms packaging as it matches with the paper.

I used a Dienamics diamond border die in order to add lots of pattern in relatively small doses and combined Black Soot Distress Ink and black pen edging to give emphasis to create a colourful but definitely not girly page.

One of the words on each journalling spot has been highlighted by writing it on another matching one and sticking it over the top of the same word already journalled. This might be because I managed to spell a word wrong by not concentrating and decided that it needed to be hidden!

See if you can guess which one...

That's some bad hat Harry

So ends each episode of House (amongst other things) and is also the Facebook title I gave this photo of Carys in her brand new hat. Her unrestrained joy and the sizing on the label of the hat were stories that needed to be told. And my Quirky Kit came up trumps in helping me tell it.

The first thing that I put into the page kit for this layout was the black and white bakers twine as it reminded me of the ends of the hat. But it was almost the last thing to go onto the page so more of that later.

I began by splattering some drops of Mister Huey Inky Black mist on the page. I unscrew the bottle and flick the end of the mister part to create some drops, which I prefer to a full on black look. While that was drying off I die cut some of the papers using some MFT Die-namic dies. The orange paper is wider than any of the dies so I used the largest one to scale up the proportions using a ruler and pencil. In the end I decided I wanted the piece to be even bigger and so chopped it up and added some other paper in between using the paper tape across the edges. Again, all the papers have black Sharpie pen around the edge. I put each piece onto scrap paper and run the pen down the edge. Most of the pen mark stays on the scrap piece but a little goes on to the paper creating a nice sharp edge. Be warned - every now and then the pen shoots off in another direction though so be prepared to have to use more paper or cover up your mistakes. It's worth a try if you like using lots of papers but don't always want to ink the edges.

One of the Pink Paislee frames was tucked under the photo and the title/speech bubble layered over the top. I added a cluser of tags to the top left hand corner to stop the layout looking too bare.
Then it was back to the twine. I layed it out on the page and when it was how I like it, I traced the line out with glossy accents, a little at a time, pressing the twine down firmly into the glue. It was so easy and yet looks quite effective so I expect I will be doing this again very soon!
I do love the way these kits get me trying new things. I hope they inspire you too.

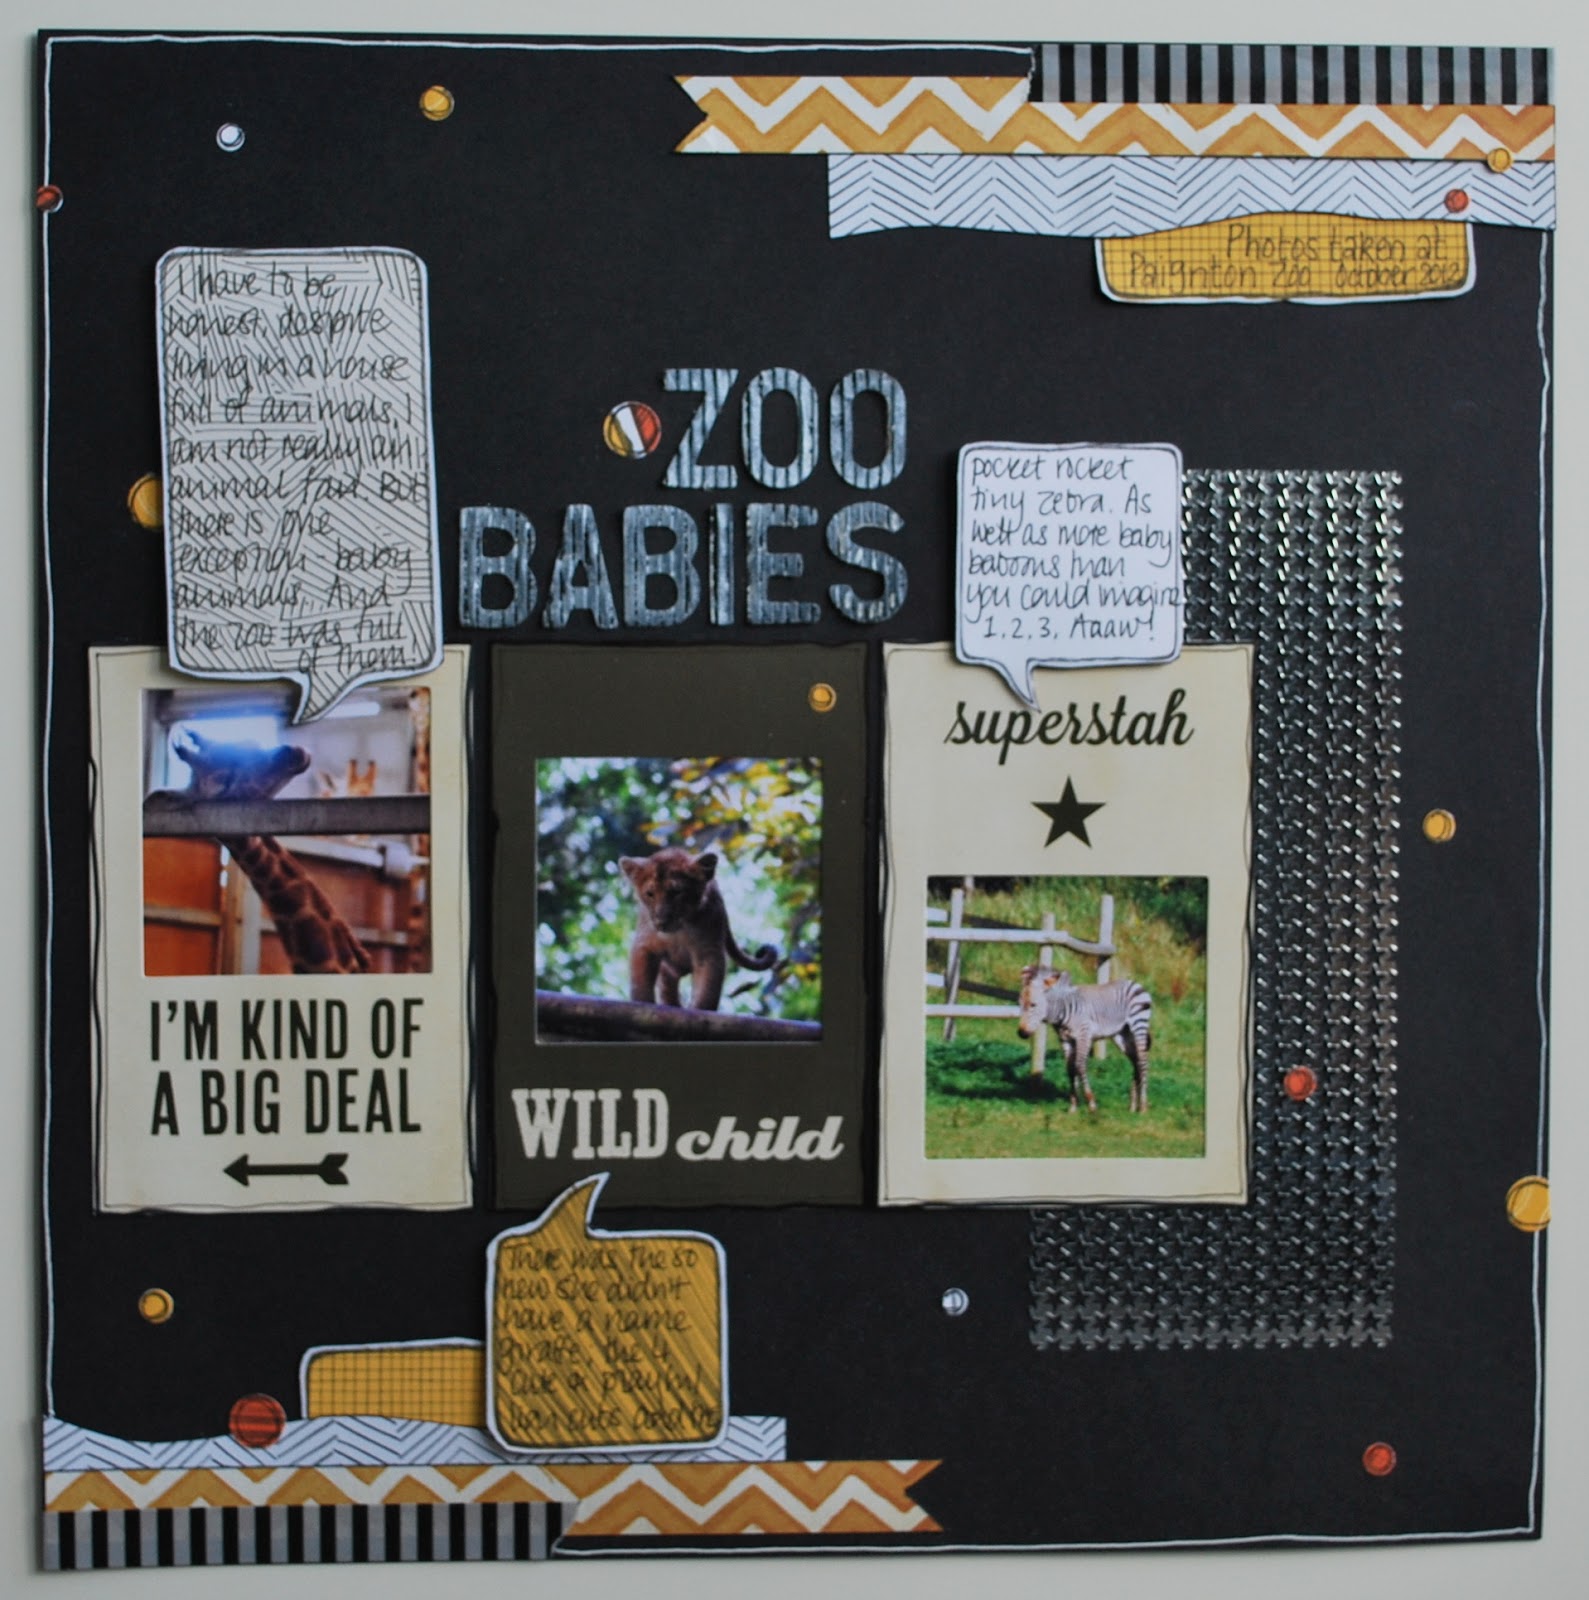
Back to black

Considering I wear black as a basic staple about 90% of my time, I hardly ever scrap using black as my base. So Leo has stretched me again with the black cardstock in the I'm with the band Quirky Kit.
And I have to say that I really like the result!
Helped by photos of some rather cute animals of course...
I used three of the Pink Paislee photograms (there are half a packet in a kit so you might not get the same ones, but there are lots of fab phrases to choose from). I had printed the photos at 3x2 each and it meant that they were easy to frame. As they are little stars I thought some of the punchinella would show them off. I stuck the punchinella to the back of the "Superstah" frame so that no adhesive would show through the back of the stars. I added some outlining to the frames and cut out some of the "think good thoughts" paper ready for journalling. I arranged the cards across the middle of the page and added strips of paper and washi tape at top right and bottom left of the cardstock, having first outlined the edges with a black Sharpie pen. I added a white border with a gel pen and wished I had done this before sticking down the papers as it is never easy to make a line look like it goes under the papers.

The journalling was added to the speech bubbles papers which were added to the page on foam pads to give some dimension.
I pondered how I was going to make the black letter stickers show up on the black paper and decided to use Picket Fence Distress Stain on them. It did give a nice distressed look but for more colour white acrylic might have been better. And I also wished I had taken them off the backing sheet first as some of the other letters are now not as black as they were! (As you might notice on the next layout)
Finally I punched out some circles using an EK Success Swiss Cheese border punch and a very small circle punch. These were outlined with black pen before sticking them onto the layout.


Delving In

Hello everyone. I am so thrilled to be back as Guest Designer for Quirky Kits. And what a fabulous box of delights I was sent by Leo. I love the fact that as I carefully take everything out from the bag there are always things to gasp over and always something just that little bit quirky to get me wondering just how will I use that? And that usually seems to end up being part of one of my favourite layouts. Will it be the same this time? You'll have to wait and see.

I thought I would try something a little bit different with this kit. I have lots of different photos printed up ready to scrap, in various sizes. So I took the contents of "I'm with the band" along with a handful of photos and spread everything around until I had various page kits on the go. It looked something like this


Everything bar the alphabet and the washi tape all chopped up, kitted out and ready to go. Some of the bags don't have too much in them, so anything left over from a page kit will be thrown into one of the other bags. I will probably take a break to begin using the Lite kit (I do like to keep them separate to start with) and then add some of those pieces to the emptier page bags as well.  I  started with the fullest page kit and am now working my way through. So far I am rather liking this way of scrapping and might have to try it again as the pages are coming together so quickly.

So here is layout number one. The one not in a bag...

All the gold and yellow colours in the kit were perfect for a page about my parents Golden Wedding. Then I noticed the strip at the bottom of the "Think Good Thoughts" paper with the days of the week on it and decided that I would theme the page around the number of days they have been married. But it was the only navy element in the kit so I had to think about how to bring it in to the layout. I also loved the punchinella stars but because they were silver not gold I wasn't sure what to do.
And then I had the bright idea of using the punchinella as a mask for some blue distress ink and the whole thing started to come together.

The stars don't make for a totally clean masked look but I was pretty pleased. I then used the punchinella with gold glimmer mist and once I had sprayed it, turned it over and pressed the residue of the spray onto the cardstock as well.

I inked and layered my precut chunks of patterned paper, adding a punched border to the bottom one. I tucked two circles cut from the 7 Dot Studio  paper, the MME "All about me" die cut and a hand cut heart within the layers of paper and stuck it all down to the cardstock.
(Mmmm I love paper layers!)

I stamped some words using American Crafts Roxie letters and coloured some in with a gold gel pen. The filled in words were stamped with Tattered Jeans Distress Ink.

I added the title with the "Noted" stickers. Having a numerical title is great as it leaves lots of letters for all the other layouts I have planned! 


New Kits Going out this week...

The brand new Quirky Kits are currently being posted out this week. The main kit is 'I'm with the band'. It's a fun celebration of the current fashion trend for bright colours mixed with grungy textures with a little punk rock flare. It's a great accompaniment to the coming celebrations of Halloween and bonfire night as well as everyday scrapping too :)


The Lite kit this time is all about textures and a nod to the grunge look encouraging you to 'Get into the grunge'...


This month we're joined again by Lythan as your guest designer on the blog whose project ideas and inspiration will appear here throughout the rest of the month and you can also once again follow the current Pinterest board for the current kits here, http://pinterest.com/craftytemplates/september-october-kits-inspiration/
x Leo

New Summer Quirky Kits

The new summer Quirky Kits have all been shipped out. I've included a little contents list bellow. Look out for inspiration and ideas popping up over the next couple of weeks. I'm also going to set up a Summer Pinterest page for some summer themed inspiration for us too. :) x Leo

Main Kit: 'Tell Me More, Tell Me More'


Bazzill White Cardstock 12x12
Bazzill Piglet Cardstock 12x12
Bazzill Dark Sand Cardstock 12x12
My Minds Eye The Sweetest Thing ‘Love Bouquet’ Patterned paper 12x12
American Crafts Shoreline ‘Pelican Bay’ patterned paper 12x12
Pebbles Sunny Side ‘Content’ patterned paper 12x12
Studio Calico HeyDay ‘Silly’ patterned paper 12x12
My Minds Eye The Sweetest Thing ‘Noteable’ patterned paper 12x12
Echo Park Sweet Day ‘Pretty Polaroid’ patterned paper 12x12
Studio Calico HeyDay ‘Tangerines’ patterned paper 12x12
American Crafts Thickers Alphabet stickers ‘Boardwalk’
Studio Calico Mr Huey’s Mask ‘Hexagon’ Mask
Elle’s Studio Bright and Vintage Pennants
Elle’s Studio Lil’ Snippets: Hello Summer
My Minds Eye Tangerine ‘Hello’ title card
Papermania Happy Days designer Diecuts x 6
Studio Calico HeyDay Wood Veneer diecut wood pieces x 4
Bottle cap embellishments, 1 pink, 1 black
Bottle cap dome sticker tops x 2
May Arts Diagonal stripes wide trim x 40cm
Cherry Print Bias Binding x 70cm
Pink net fabric 12x12” piece
Black net fabric 12x12” piece

Lite Kit: Summer Lovin'
Bazzill cardstock in ‘Kraft’
Bazzill cardstock in ‘Tropical’
My Minds Eye The Sweetest Thing ‘Love Fond’ patterned paper
Studio Calico HeyDay ‘Crush’ patterned paper
Echo Park Everyday Eclectic ‘Chevron Woodgrain’ patterned paper
Pebbles Sunnyside ‘Tickled Pink’ patterned paper
Studio Calcio HeyDay ‘Dew’ patterned paper
Echo Park Everyday Eclectic ‘Cameras’ patterned paper
Echo Park Everyday Eclectic Alpha Sticker sheet 12x12
My Minds Eye The Sweetest Thing Tiny Word Stickers ‘Honey’
Elle’s Studio Summer Pennants
Sass & Belle turquoise lace
May Arts Chevron Stripe Yellow trim