Mad about skulls

Hello everyone! Can you believe we are halfway through the year already? My partner even shared a post on Facebook the other day (25th June) and it said in exactly 6 months time today, you will be sitting down eating your Christmas dinner!!! Yes, sorry I just mentioned the C word, but we won't talk anymore on that subject because the May/June kits landed with you well over a week ago now and they are soooo summery, and with this heatwave, it was like Leonora had predicted it and made us the perfect kit to go with all our sunny snaps!
As yet I've not gotten around to printing off my summer snapshots, so I have used the kit to do a layout of my partner which we took over the national scrapbooking weekend. He was actually meant to do this layout with these pictures and enter it into a competition, but he chickened out so it was left to me to make something with them 2 months later!...
So without further ado, here is the layout, what I used and how I created it.

From the Main Kit:
  • 1 sheet black 12x12 cardstock
  • Crate Paper Wild Heart Sticker Sheet
  • Crate Paper Here & There postcard 12x12 patterned paper
  • Heidi Swapp Pineapple Crush Palm Beach 12x12 patterned paper
From the Lite Kit:
  • Kaisercraft Sea Breeze cardstock alphabet
From the Embellishment Kit:
  • Pink Fresh Studio The Mix#2 ephemera pack
  • Pink Fresh Studio The Mix#2 puffy star stickers
And here's how I created the layout:

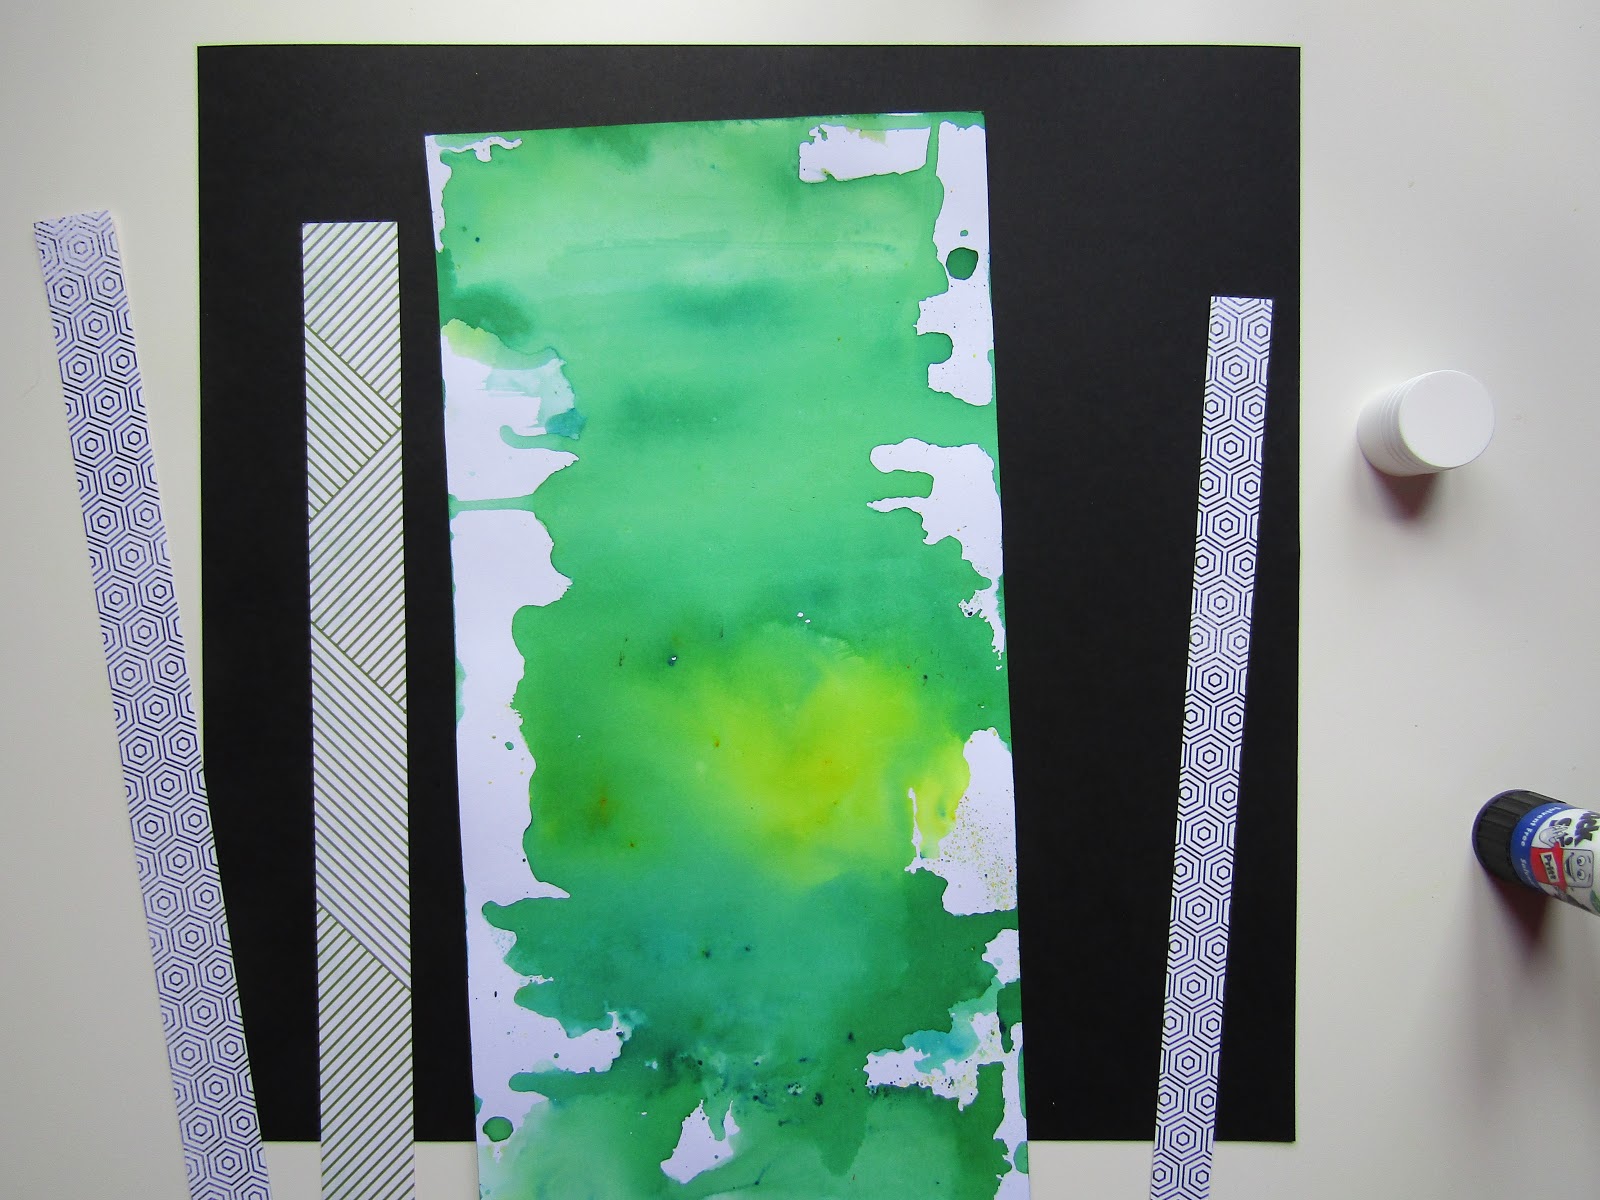
I started by cutting a piece of the Heidi Swapp Palm beach paper to 4.5 inches x 12 inches and stuck it to the bottom half of my black cardstock background. I trimmed my photos leaving a small white border around them, which then tied in with that paper.

I then cut out 3 of the postcards/envelopes from the Here and There paper also from the main kit. I cut the red border off the top and bottom of one of them and used these as coloured accents on both photos. The green envelope I used on the bottom right hand corner of my photo for the rest of the title and the date sticker from the Wild Heart sticker sheet. The 3rd postcard I put at a slant under the left photo, for the first part of my title.

All that was left to do then was to embellish it. For this I used the Pink Fresh Studio The Mix#2 Ephemera pack and Puffy Stars from the embellishment kit and a few of the stickers from the Crate Paper Wild Heart sticker sheet. 


Voila layout complete. So a nice simple one to start with. I always feel overwhelmed when my kit first comes and I don't know what I want to use first. The problem is I want to use all of it first lol.
I wanted my main focus to be on the photographs, so I just chose 2 accent colours from my partners tattoo's so they stood out and "popped" on the monochromatic background.


I will be back in a couple of days with a Project Life spread for you. Don't forget to follow me on Instagram too @plcraftygal so you can see the layouts that don't make it to the blog.

Happy Scrapping, Everyone xxx


Chill Time - Patchwork Heart

Hi! Leo here again. It's feeling hot, hot, hot right now and I wish I was nearer the beach but making this layout has helped me get the beachy feels again!

I was inspired by a patchwork heart design and instead of fabric made one of triangles of paper then added layers of stickers and used up the paper bits I had from cutting out the papers as strips across the top and bottom. I also experimented with another Brusho using idea I had to use an old toothbrush to make 'flicky' 'splodge' pattern that kind of reminds me of sprinkles of sand!


To start with I sketched  light pencil line down the centre of my background cardstock. This was to give me a centre point to build my patchwork pattern out from.
 
 
Next I created the sprinkle Brushoed background by first sprinkling some Brusho crystals on a bit of plastic packaging and adding water to it then dipping in an old tooth brush and placing it hovering over my cardstock, gently flicking the toothbrush bristles to 'spray' the brusho paint across the card.


This is how I built the heart pattern. First I cut out 2 inch squares of patterned paper then cut the squares in half diagonally. I used a mix up of what I had, main and lite kit papers and I mixed in a couple of cards from the Custom Card kit.
 

 I used the centre line to add the first triangle and built the pattern from there matching up the edges of the triangles:
 
I then added a strip of the leaf trim from the lite kit across the middle of the heart using my sewing machine to fix it down:
 
 
I then used that line of trim as my anchor for my photos and some sticker layers.
 
 
I used the Crate Paper sticker sheet to add a frame to one photo and stapled a stitched star on there too.
 
The rosette sticker I added some more layers of paper too using dies to cut out the paper pieces and layer then up with foam pads.


 The camera I cut out from the 'Photo Op' paper in the lite kit.


 More stickers being added from the Wild Heart sticker sheet and from the phrase Thickers pack from the lite kit.
 
I still have lots of the Crate Paper Wild Heart Stickers left that would work with my layout but I didn't want to add anything else to the heart at this point so I grabbed the paper off cuts I had from cutting out the triangles and cut them out in strips to layer across the top of the layout then added more stickers over the top.

 
Just to balance it out and because I still had more paper bits to use I added some paper layers to the bottom edge too plus a cluster of stitched stars and some sequins fixed down with my mini stapler. I was going for a kind of rock pool cluster bit!


 Hope it's given you some ideas you can use in your own projects!
x Leo

Brusho Playing and Background Pattern Cutting

Hi!
Leo here again today with another layout created with my Brusho experiments. I've been playing around with different ways to use the Brusho from the main kit and really liked some of the pieces that resulted from the experiments so I created this layout thinking up ways I could incorporate them.

 
I did take photos as I was experimenting so here's how I made the Brusho bits. The first bit is the piece I used behind the frame with the runs. I started by sprinkling the Brusho on to the edge of a piece of cardstock.
 
 
Then sprayed with lots of water and lifted it to make it run and create the drips.


Next I did the same with the yellow colour along the bottom edge:

 
For the other piece, which I used on the background of my layout. I used the sheet of plastic packaging again like the first layout but with this one I used both colours together and sprayed lightly with a little water then I used a paint brush to add more water. It was actually a water brush so I added lots of water then 'brushed across to make the pattern and dripped the water on by squeezing the water brush to make large water drops come out:
 

Once I'd finished activating the Brusho I pressed a piece of cardstock over it to make the 'print'. I had lots of Brusho still on the sheet so I flipped it back over and added more to it by pressing it on again around the edges. If you use this technique and your paper or card is curling leave it on the plastic sheet and spray the back with water so it's wet on both sides and it'll dry flatter than if you leave it wet on one side. I found it 'clung' to the plastic sheet too so it helped to keep it flat.

 
So that was a few days ago and after that I came up with a way to use the experiment pieces. First I cut out a frame. I made this using an octagon outline shape and tessellating it to make the pattern then cutting it out. It took an hour to cut out so I combined that with catch up t.v! lol

 
I picked out the Heidi Swapp ' Palm Beach' paper from the main kit, (everything apart from the sequins and acrylics is from the main kit) it's the one with the black/white stripes. I cut out strips of the paper along with strips of my drippy Brusho experiment pieces.

 
I then cut them into squareish sections and fit them over the back of the frame, cut off the corners then glued them down.
 
 
I alternated the paper and the Brusho sections.

 
To build the layout background I started with a sheet of black cardstock and strips of the Heidi Swapp papers from the main kit along with the other of my Brusho painted sheets. Starting with the Brusho piece I glued them down so the paper strips were just tucked under the Brusho piece.


I added some stitching around the edge using my sewing machine.

 
Finally I glued down the octagon frame piece and then added my photo and a few of the Crate Paper Wild Heart stickers along with the acrylic pieces from the embellishment kit to make up my title.

 
The Pinkfresh Studio stitched stars I fixed to the layout using 3D foam pads.
 
 
So yeah, have an experiment with your Brusho even if you don't have a finished project in mind because you can always go back to pick out your favourites and use them afterwards or just cut out little bits you do like to use.
x Leo
 

Beach Day Getaway - May/June 2018 Kits

Hi! Leo here with my latest layout using the new May/June 2018 kits. Specifically with this layout I used the lite kit along with sequins from the embellishment kit and Brusho from the main kit so hopefully you'll get a bit of inspiration if you have bits from those kits. :)

 
To begin with I created the background to the layout using the Sea Green Brusho from the main kit and some white cardstock. I used the packaging from the Crate Paper speciality sheet to create the background. You could also use the packaging from the Thickers in the Lite kit in the same way.
First I sprinkled a little of the sea green Brusho on to the plastic.
 
 
Then added some water to it, about 4 sprays. If you don't have a spray bottle to re-use you can splash some water on with a paint brush.
 
 
Then I tipped the plastic sheet up to make it run a little bit.

 
Next I took a sheet of 12x12 inch white card and pressed it over the top of the plastic sheet.
 
 
And this is what I got when I lifted it off. S it's kind of like a mono print. One good thing about making a background this way around that I found is that my card didn't warp as I never added the water to it. One tip I can pass on though if you do add the water to your card is to wet both sides of the card and that way it will keep flatter as it dries out.
 
 
While my Brusho background dried I created a sequin pocket.
First I cut out a triangle template from a piece of paper, I made a 3x3 inch square first then cut off the edges to make the triangle shape. I placed the template on some plastic, (from an old page protector) and stitched around two sides with the sewing machine.
 
 
I kept the pocket under the machine while I added the sequins inside it using the last remaining open edge. Then stitched that up to seal them inside.
 
 
Once it was finished I cut it away from the plastic sheet.
 
 
I used the same paper triangle template to cut out four pieces of patterned paper, (these are all lite kit ones).

 
I glued them to the Heidi Swapp paper sheet in the lite kit  and cut them out to leave a border. I also did this with my photos. My photos started off life 3x4 inches but I cut them down a little bit more.

 
Now my background's dry it was time to start piecing together the layout. I added the photos first then started to add the triangles leaving spaces to add my title bits.
 
 
The 'beach day' piece was cut out from the Here+There Photo Op paper in the Lite kit
 
 
I used the Thickers from the lite kit to add titles and a few of the leafy bits.
 
To make sure the sequin pocket was fixed to the page I added some more stitching.
 
 
As a last finishing touch I decided to add some stamping using the stamp set from the March/April main kit, mainly because I still have my bag of bits from that kit out on my desk so I thought why not! I also really like the contrast of black in on this lovely blue/green Brusho.

 
Hope you're enjoying your new kits as much as I am!
x Leo