Ok so you may have seen a project life style layout done by myself before. I do not do project life per say, but when I get a lot of photographs on one subject, instead of making 10 layouts about the same thing I like to do a pocket page spread...and trust me these are fun!!
I sometimes challenge myself when doing these kind of layouts to do a "grab 5" I learnt this technique from Adele from Inkie Quill on Youtube (she's fab!) So what I do is grab the photo's and glue etc I need (these don't count as your 5) I then pick a pack of embellishments, a pack of thickers/letters, maybe some enamel dots, maybe a cut-a-part sheet or PL style cards (which Leonora is now selling, pick some up in the subscribers extra's store, they're fantastic) and some puffy stickers. Then you pick your patterened papers and your off! The only rule is you MUST use at least one thing from each of the 5 you chose.
Here's what I came up with:
Ok so I called this page day 2 because it was based around my 2nd day at Disneyland Paris last year. I used the sentiment thickers for this and embellished the title card with the Heidi Swapp puffy stickers both from the main kit and the arrow is from the Simple Stories Life in Colour ephemera pack.
And here's how that turned out.
For the other cards I used a tag so I could use my date stamp so I remember the day.
and some more of the ephemera. I cut a 3x4 piece off of the 12x12 sheet of white cardstock and used this for my journaling. (I'm glad I can write in a straigh(ish) line lol)
I didn't want to embellish these photo's too much as they were already very busy so I kept decorations to a minimum..but as they say, less is more!
I hope you like my layout, feel free to try the grab 5 and comment on this photo of how you get on. I'd love to see them!
Happy Scrapping, Zoe x
Poor old silver
Gold has really taken over the bling stakes in scrapbooking I know and as the Simple Stories Life in Color Ephemera die cut pack had pieces with silver as well as gold accents I thought I would give some love to the silver.
There isn't much patterned paper on this page - because as this is the 5th layout to come from my combination of main kit and embellishment kit, there wasn't much paper left! What you see is a combination of the cut apart sheet from Simple Stories (life in colour) and a Project Life sweet editions card where I added silver pen to the gold and some of the black swirls on the card. I made some little accents by painting some cardstock with aqua and silver paints and then cutting them out with circle punches.
I had planned out my page quite carefully and then, once I had decided on my title, on a complete whim decided to hand write it using a metallic silver brush pen. This meant I had to totally change what everything else looked like. I'm still not sure if it was a good decision or not! I grabbed all of my left overs and layered up the papers (the Project Life card has been cut in two, it was big but not that big!). I added the splash of yellow as well as some red accents because the downside of silver is that it can look a little cold.
The butterfly has no significance - it was just too pretty not to use!
I did add in the red sticky dots but apart from that everything has come from the Quirky Kits and I am calling my Austen kit officially killed. (I still have a lot of embellishments - those kits are so generous!)
Together...
Here I am with my 2nd post using the January/February kit and continuing on using the A4 sized layouts I have grown to love.
This was a photograph that was taken on a family holiday to Skegness. I was around 3 or 4 at the time and you can see me pictured in the pushchair. For this layout I used a sheet of plain A4 card stock and the pattered border on the right edge is a 1 inch strip I cut from one of the patterned papers from the main kit.
Of course I had to use some more of those gorgeous American Craft sentiment thickers to spell the word Together. My family did a lot together when I was little, but sadly not so much any more so it's really nice to capture and remember these moments for future generations...but also for myself. It's my history...it's my life.
To embellish the page I used some of the ephemera from the Simple Stories Life in Colour pack, one of the 3x4 cards from the Simple Stories Life in Colour cut-a-part sheet and a doily from my stash. (Sorry about the glare on the photo)
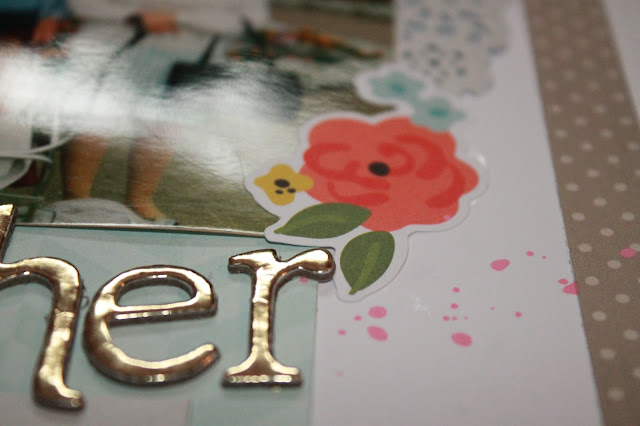
Finishing off the layout I mixed some paint from my stash with a drop of water and then flicked it onto my layout to create some splashes, covering up my photo to make sure it went where I wanted it to. Here is a close up shot of that gorgeous floral ephemera...for me you just cannot get enough floral...or ephemera full stop lol. I hope you like my 2nd 9x12 layout I'm creating for my childhood album, If you've yet to try this size...I really recommend it!
Happy Scrapping everyone!
Awesome idea
I had fun going through what I had left of the kit and chopping paper up without really thinking too much about it and then layering them all together. I didn't take a photo before adding glue like Leo did. It is a good idea as nothing is in the same place as it was when I planned it out! Ah well.
I did my usual trick of outlining the papers and drawing a line around the edge of the cardstock. I do think that it helps the eye to rest between patterns - although I have been trying to wean myself off it a bit, I don't think it will ever disappear from my bag of scrapping tricks!
I also rifled through the Simple Stories Life in Color Ephemera die cut pack for little bits and pieces to add in, as well as those fab glitterly polka dot hearts and some of the puffy stickers. The gold stars are from the Thickers alphabet set, as are the little thingies used to cover the holes in the tags (technical term there).
It all came together pretty quickly and I am pleased to have this memory recorded - and of something that we never actually saw in person!
Quirky Pocket Pages!
Good Morning Crafters!
A quick introduction my name Is Melanie, I'm 19 years old, I have been scrapbooking for almost 4 years and i am delighted to be apart of the Quirky Kits Design Team!
Right onto the fun stuff! As this was my first month the lovely Leo sent the pocket page cards my way and left me to produce my magic! So here I am ready to show you all what I came up with.
The cards I were given were not only really versatile and funky coloured but they were so easy to fit into my everyday life pages!
Using tiny letter stickers I had to change Top Five to Top Three which was fine becuase it tied in the black background and it stand out even more. Last but not least I used more of the TO-DO list pad and added a small peice on the bottom of the card just to stick to the Kraft theme I've ran through the whole page spread.
A quick introduction my name Is Melanie, I'm 19 years old, I have been scrapbooking for almost 4 years and i am delighted to be apart of the Quirky Kits Design Team!
Right onto the fun stuff! As this was my first month the lovely Leo sent the pocket page cards my way and left me to produce my magic! So here I am ready to show you all what I came up with.
The cards I were given were not only really versatile and funky coloured but they were so easy to fit into my everyday life pages!
This close up is of the first page of the double page spread. When I received the packet of cards I wanted to do something different instead of using them as they came, I suppose put my own touch on them. So these two cards I made by cutting apart the originals and backing them onto the To-DO list.
Relaxing days off - An overview shot of the left side of the double page spread. As you see there's me relaxing with my feet up and drinking my lovely Aloe Blossom Tea! I'm not a fan of drinking tea and coffee or anything hot, pass me the juice bottle anytime! However when you see something and your like hhmm, I really want to try that well hello Aloe Blossom Tea! The gold foiling on these cards are to die for, so elegant and sassy!
Sneaky closeup of the second page. The books eeekkk!! I love books so this card just fitted in so easy, and perfect timing too as both my favourite Authors have books out in the upcoming months so I also used the TO-DO list to leave myself a little reminder, not that I needed it, to pre-order them.
My favourite card to make was the finished effect of using the two above. First of all I cut the green section from the top of the number bulleted card and stuck it to the top of the black 3x4 leaving about a cm gap. Next I cut off the numbers 4 & 5 leaving 1-3 behind. Then Leaving a gap so you can see the behind card I stuck it together creating the desired affect below.
Thickers!!! My favourite part of any kit is thickers! I think I may have a slight obsession.. But I'm not on my own surely. On this page I haven't only included the pictures of the upcoming books but a status Mark Billingham actually replied to me on 🙂🙂🙂 exited was defiantly an understatement.
The 5 star review card backing was made by several 3x4 cards also adding a strip of the back of the to do list, this was also another very versatile piece of the kit. I don't usually write many to do lists so I used the back of it and backed many of the cards with it as its Kraft paper, and at the moment I'm trying to add more neutral tones to my work.
I have really enjoyed playing around and be in involved with this kit and I'm struggling to keep my excitement down for the next one! So many gorgeous things coming up!
MelanieJoanne❤️
New month, new kit, new format
Hello crafter's...its that time again...I am in love with this month's kit as it offers so much variety and versatility. I was flicking through lots of my older family photos which were all in storage containers and photo albums, no one ever really gets them out to look at them, which is a shame. My family wanted to take those photo's to capture that moment in time and it is now a part of our history.
So I decided I wanted to try my hand at making an 8.5 x 11 album. Money is tight for me at the moment...I have plenty of A4 albums laying about my house and also tonnes of page protectors...you really needn't buy the special ones they recently bought out. Pop to your local Wilkinson's or somewhere similar, they have lots of lovely goodies to offer.
But anyway I digress...here's my first childhood layout in this format, if you've yet to try this size...I strongly recommend it...I had soo much fun :D
So you may be thinking, she's not a child on this photo...You would be correct. I recently turned 30 and this is one of the photo's I took whilst I was getting ready for my birthday meal. I decided to make a front cover for the start of the album, so anyone who flicked through it would know the purpose of why it was created.
As soon as I saw the My Mind's Eye On Trend gold foiled paper I oooh'd and ahhh'd and maybe even stroked it a little. I knew I wanted to get as much out of the paper as I could. It was far too pretty to use as a full sheet (in my opinion).
So I started my layout by cutting an 8.5" x 4" strip off the card stock and adhered it to the top of the page to give it an eye catching wow factor. Underneath that I stuck on the camera embellishment from the Simple Stories Life in Colour Ephemera pack and one of the 3x4 cards from the same collection's Cut-apart Sheet. The every day and star embellishments were also from the ephemera pack...there was so much in there...and one can never have too much ephemera!!!
Can we just take a moment to absorb the beauty of that thicker's font...I am a sucker for cursive fonts and when we had the option to choose I hoped and prayed I would get that set. I chose the title Life and then used some of the stickers from the Photo Play Family Ties Alpha sticker sheet to spell out the word documented and then used some of the sentiment stickers which read "a record of my personal history" and "that is how memories are made. So many things in this collection inspired me to create this album and they really co-ordinate perfectly!
Here are a couple of close up shots so you can see the goodies I used in better detail.
Look out for more A4 layouts like this as I had so much fun creating them, and it also stretches (an already huge kit) even further!!!
Happy Scrapping everyone xx
La la love
I thought this card was perfect as a title for this page. I loved the singing that accompanied our lunches in Funchal town and the men who so enjoyed their work. Well worth recording!
I used one of the sketches from the Simple Sketches supplement, and used exactly the same paper at the back as it suggested (Lazy). I did add some stripes of different papers to the base paper though - can't keep too religiously to the sketch!
To use some more kraft I brought in one of the to-do list papers. As well as the big card from the Alcott embellishment kit I also like another card that said "what a treat"
I cut off the end and then couldn't resist adding the macarons on the card around the page. We didn't actually eat any of those but they look prettier than a toasted sandwich!
The music note was a left over from a previous kit. I managed to squeeze it in so that the glue dots anchoring it in place are not visible (go me). Obviously I made life easy for myself by writing the journalling after sticking it down and then deciding that it would look good to see some of the writing underneath the note.....
I fished out some of the oh so cute Simple Stories Life in Color Ephemera die cut pack from the main kit as well as the vellum heart from the embellishment kit. Some of the die cuts were raised up on foam pads for effect. I've left the labels purely as decoration but wonder how long it will be before I cave in and write something on them!
Subscribe to:
Posts (Atom)