Ways to use your Kesi'art colour mist

This months main kit 'Candy Floss Cart' has a bottle of Kesi-art colour mist to play with so I've done a quick demo of different ways you can use it on your projects.

 
Here are all the effects I covered in the video in more detail:
 
 
Hope it's given you some ideas to try out with your mist.
x Leo

Quirky Life Kits

If you've seen the questionnaire on the shop website you'll already know I'm working on a new Quirky Kit to compliment the 'Project Life' scrapping style. The new kit will be 'Quirky Life' and the first trial kit will be available to purchase around the end of next week. I'm also working on a special page on the website where you'll be able to purchase Project Life essentials to add to your kit like pocket page protectors, basic grid cards and albums. The Quirky Life kits will fully co-ordinate with the current main kit and lite kit so you can mix and match the kits together. They'll also be inspirational ideas using the kit right here on the blog. The first kit is coming together and I've arrange a little sneak peek to share today. This is only a small portion of what's coming up in the kit but you can get a feel for it already :)
 
The kit will be based around the 3x4 and 4x6 card basic sizes and include a selection of embellishments especially selected for scrapping at this size and of course will have the feel of the regular Quirky Kits. I'll keep you updated when kits are available to order.
x Leo

Going a bit dotty

I was positively giddy when I realised just how well the papers in the kit this month matched the photo that I wanted to scrap.
 The pink photo mat? Exactly the same colour as the cup that the icecream is in. The greeny yellow paper reflects the  colour of the little plastic spoon and the grey cardstock and paper - a wonderful match to the icecream. Yup, it is not a photo printing failure, the icecream really was that shade... Something that needed to be scrapped and so it made my heart very happy that the kit set it off so well. I am beginning to think Leo's powers extend beyond good taste to something psychic!

There are also a lot of dots and sprinkles going on. Feel free to yawn and say "boring" as almost all my layouts have dots and sprinkles at the moment but do you know what? I like them and I don't care if my layouts are obviously going to scream Summer 2013. That's just what I enjoy right now. (Plus a lot of them were in the kit so the boss obviously agrees!)

The big shiny spots are the glassine envelope
confession time: I had torn mine open in the excitement of getting to the contents and so had to think of a way to use it, as it features in the embellishment list. So I die cut circles from what was left (!). Initially I painted the glitter paste on and stuck it face down with the idea that the glitter would shine through. But it didn't so I had to carefully peel them off and turn them over.

I loved that spotted background paper but I also loved the other side so carefully gutted it. You will see the rest on my next layout. I covered it with some of the grey cardstock. Everything has been inked with Pumice Stone distress ink. The green/yellow paper strip was stuck down and some of the grey ribbon was glued on top. The word "elephant" was die cut from some of the grey patterned paper. I was initially going to stick the Amy Tangerine letters direct to the page but they got a bit lost so I mounted each one on some of the spare grey cardstock and stuck them on using foam pads.
All that was left was to add the journalling and lots more dots. The sequins are from the kit, as are the glass beads. I also added on some of my Liquid Pearl "blobs".
And another important holiday story is documented


May/June Pinterest Pointers


I've been tottering around the internet and Pinterest again looking out for inspiration for you. This month I've been looking out for ombre and watercolour looks. Hopefully there's something here to kick start a few ideas for you. I know once I get going looking for pins I straight after want to get the paper out and start to scrap! :) Check out this months' board so far. I'll add more to it through the rest of month too, http://pinterest.com/craftytemplates/candy-floss-cart-and-ice-cream-stall-mayjune-2013-/

x Leo

Sew There!

I've been playing with the set of Fashion templates from Crafty Templates this week and have a couple of cards to share.
Bubble Dress

I cut the template 3 times in different sizes
To make the "cutting board" background I used an image I found on the net, cropped, resized and printed it directly onto a piece of A4 card.  I then folded and cut it to achieve an 14cm card blank  square card.
I knew I had some paper featuring sewing patterns and notions somewhere in my stash - in fact I'm sure I have two different sorts, but despite a good old search I could only find the one, so have used it on both cards.
The little care label is another internet image, which I used Paint Shop Pro to change the wording on before printing.
The flower decorations are made with Card Candy and Stickles, I added some tape which has measurements on it and a couple of coloured-headed pins

Full Skirt Dress
This one has a bit of a vintage feel, I think so the chintzy, 
flowery paper works well
I cut the dress template twice, trimming off some of the upper section on the flowered print to reveal the plain "petticoat" layer beneath
I've used seam binding to make a scarf collar and tie, plus a gathered cummerbund
More of the Sewing patterned paper along with Ribbons, button, velvet ric-rac and a few flat-backed pearls to finish.

Find out all you need to know about Crafty Templates and Quirky Kits by clicking HERE!

That's it for this time
Happy Crafting

Don't do as I do...

This layout isn't quite how it was going to be
Mostly because I am very clumsy...
but I think I have just about salvaged it!
 
 It started quite well. You will have to take my word for it that the spray in the Candy Floss Cart kit is almost a perfect match for the front door in the photo (I think it may not have come out right because there is a photo of a photo. Or it might just be my bad photo editing skills!) So I decided to take a break from Florence and document this fab story

I used some Paperartsy grunge paste and a dotted mask. When that was dry I used the Kesi-art Pschhiitt ink spray as a mist,  then I splattered some drops and then I painted a few of the raised dots with the mist.

I layered up my papers and then decided to soften the red of the large patterned piece with some Gesso. Why I am not quite sure as it was a great match to the jumper before. I think I hoped that the red would stand out more and anyway it is lovely and strong on the vellum. I also sprayed the paper I cut to journal on with yellow mist and added a few dots of yellow mist around the place. 

Sticking down those narrow strips was hard. I did it the wrong way round. I should have started from the bottom and worked up. I got myself in a sticky tangle and there is more vellum showing than I intended. But it is all good.

I cut up the tags and added them to the right hand side of the journalling spot. Their right edges are raised with foam pads for some extra dimension. I also distressed the edges of the main piece of paper with my fingers.

Then came the major disaster: I have seen "proper" scrappers line up stickers on a ruler to get them straight and then lay them on the layout and it all looks perfect. I tried and failed big time, I just couldn't get them off the ruler and onto the layout the way I wanted to, so started taking them off the ruler one at a time. Only I hadn't checked where I had put the sticker/ruler combo down until I came to pick up the next letter which had now stuck to the photo. And when I tried to pull it off - some of the coating came off the photo as well. 
Hurray for cork embellishments that can just about cover up mistakes I say!
And of course - oh the irony - the title still isn't straight.
but I do love those stickers - they have a letterpress look on the white cardstock.

I cut up one of the Elle Studio tags to write the date and place. Here is another tip - don't just write on top of your layout where you might end up running out of space and leaving a black spot in the middle of your white space where it would spoil the effect of the layout to try and cover it up. No - lean on scrap paper you dozy mare. (that is a note to self by the way. And did you spot the black dot? Bet you do now!)

However one thing that went right was the little dots. I added some of the glass dewdrop beads from the kit and some yellow Liquid Pearls. I also added some of my DIY Liquid Pearl Enamel Dot type things - they are the red ones. You can see how I did it on my blog. OK you don't really need to bother as all you do is make big blobs on thick acetate and leave them to set!


Starting Lite

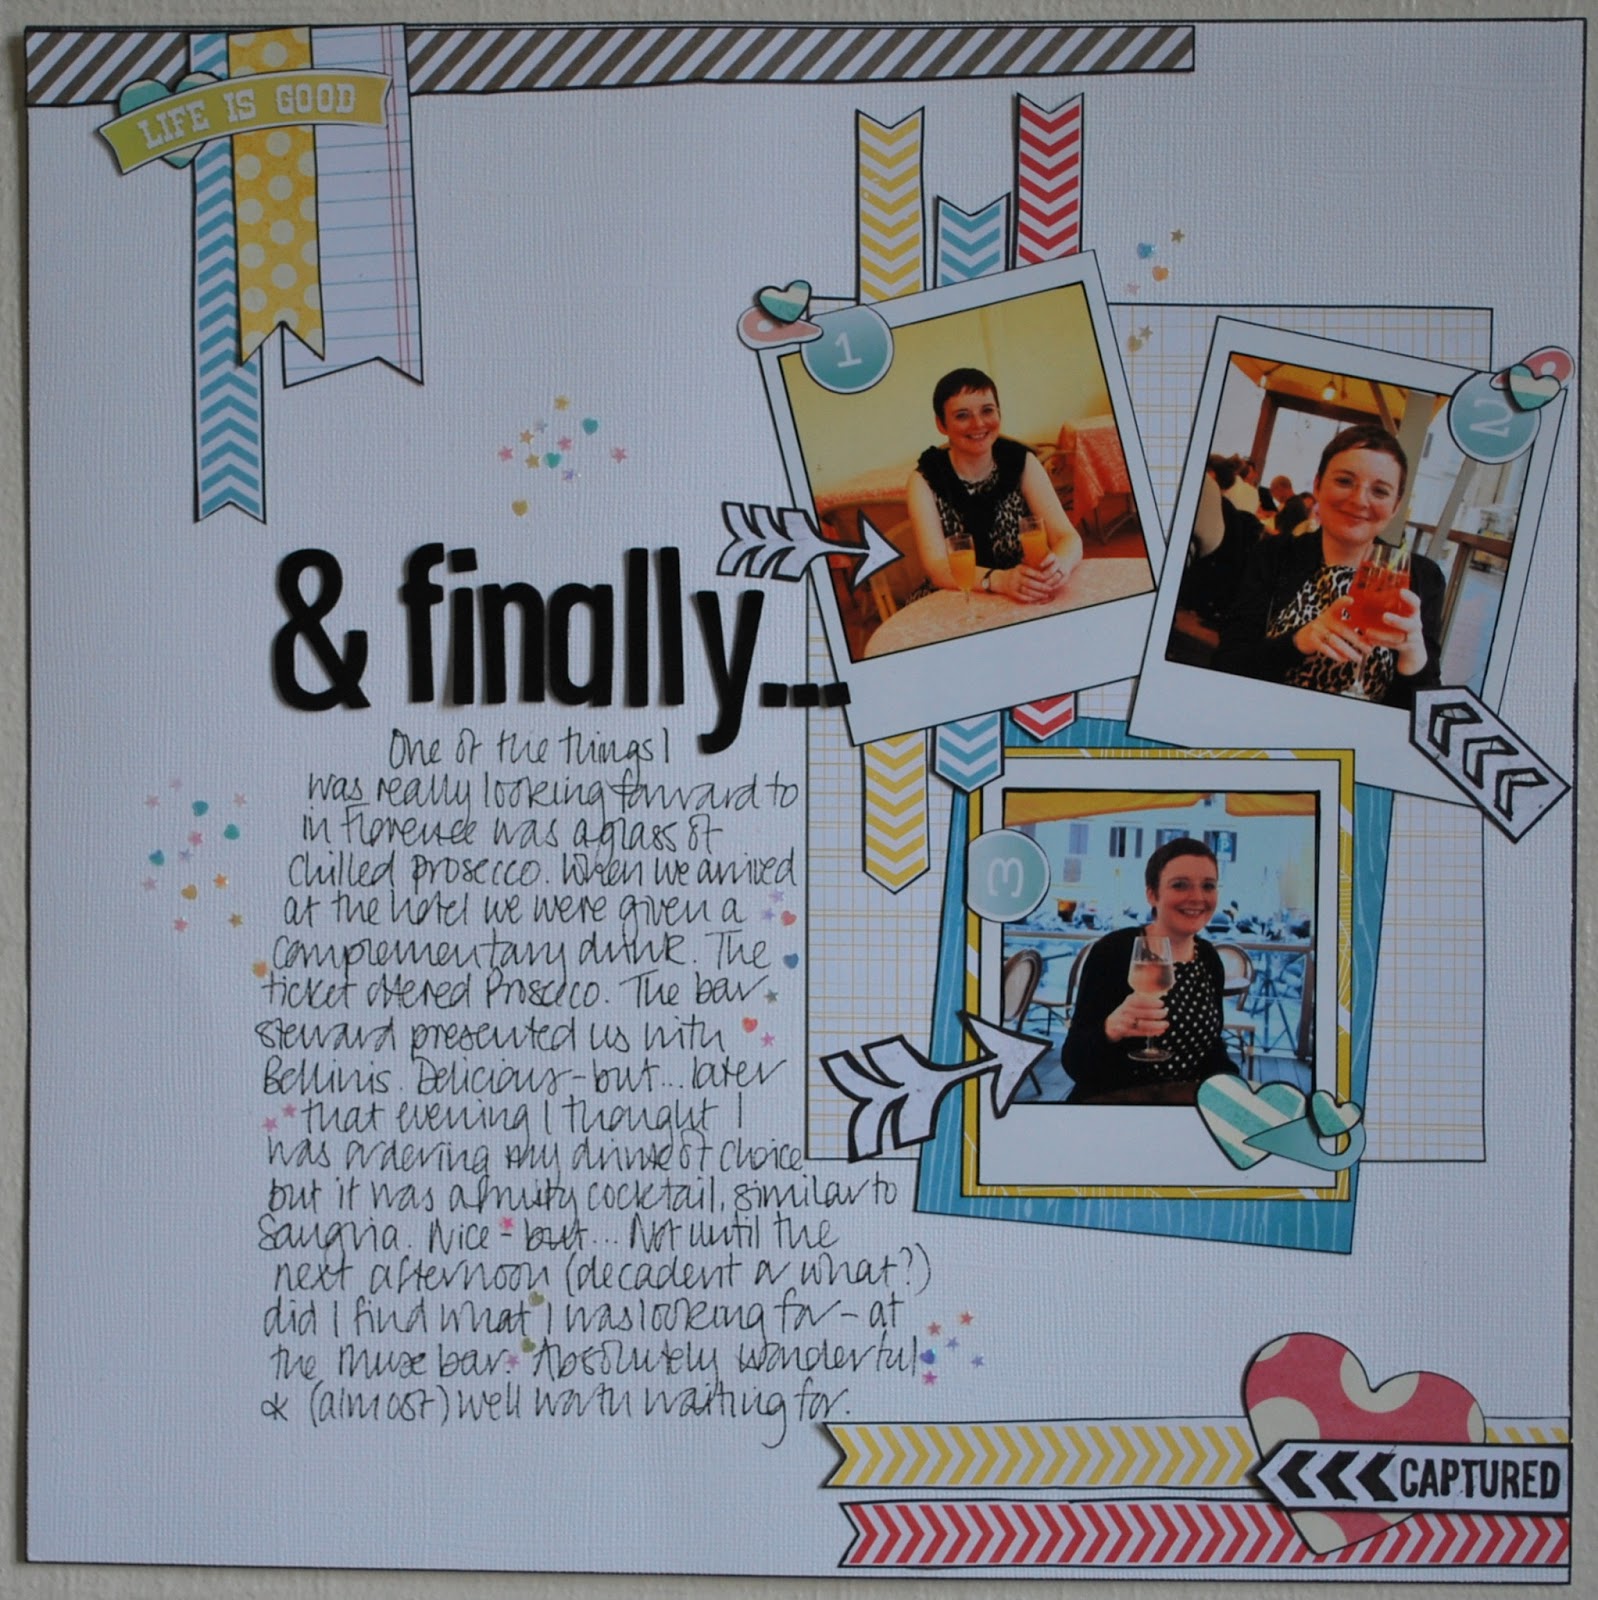
Normally when I get my box of lovely goodies I start with the main kit and then break open the lite kit but this month I decided to dive straight into the wonderful Ice Cream Stall

Firstly I printed my photos which I had turned into polariods using Picasa (its free!). I chopped up small elements of the papers, including the arrows from the Chalkboard Quotes paper. As I so often do, I outlined everything with a black Sharpie. I do find I like something to define my patterned paper edges and a Sharpie pen is, well, sharper. Always have some scrap paper underneath if you do this. I place my paper on the scrap and just draw a line down the side using the Sharpie pen. Half makes a lovely black line on your paper and half ends up on the scrap.

I cut the banner from one of the other papers and cut out the tags that were part of it. I often do this with printed on features like this as it makes them more dimensional. I punched out various heart shapes with different sized punches. I also chose some elements from the sticker sheet to outline. I do this by peeling them off and sticking them onto the back of the sheet so they are easy to remove again when you want to use them on your layout.

When I was happy with placement I stuck down my papers, stickers and photos. I knew I had a lot to say so made sure there was a big space on the left hand side. Initially I used the sticker sheet alphabet to make the title but it was a little too soft - I needed something more graphic so resorted to pulling out some old Thicker Sheets. Of course most of my old Thicker sheets are running out of vowels so a little bit of improvisation went on!

Once I had finished my journalling marathon I sprinkled some of the darling teeny confetti over parts of the page and used Glossy Accents to stick them down. Enormously fiddly but worth it!
 These kits have come just in time for me to record my recent trip to Florence and the colours are just right to showcase some stories full of love and sunshine. I do hope you are enjoying  the kits as much as I am - I bet you are!