But I Can't Skate - Natalie - Nov/Dec Kit.

Hi everyone,

I am back with my first layout using the new Christmas kits.

Supplies used:

Main Kit:
- Crate Paper Merry Days Frosty Days Paper

Extras Shop:
- Crate Paper Merry Days 6x12 sticker sheet
- Crate Paper Merry Days ephermera pack.

Last Kit:
- Pinkfresh Studio Indigo Hills 2 Gorge paper

Own Stash:
- Wooden alpha - we had a similar alpha which was half wooden, half gold in a Quirky Kit last year.
- Wood veneer 


I started off this layout with the gorgeous Frost Days paper in the main kit. I've had my eye on this paper ever since Crate Paper announced the line, so I was delighted it was in the kit this time. I had already decided I would scrap my New York Christmas photos with it, until we went ice skating in London a few weeks ago and these photos were just too perfect. It just means I'll have to buy another sheet! 


I started off using the full 12x12 sheet and 3 photos. I did not realise when I printed my landscape photos that because one was taken using the front camera and one using the rear camera the ratios were slightly off so the photos printed at slightly different sizes. 

I was finding it quite difficult to decide how to place 3 very busy photos on a busy background. I looked through my previous kit and found this grey/ white paper would work as an area to lay my photos on. 
When I have multiple photos of different sizes I often find a grid works well. 
I decided that the grid would look better on a 9x12, so I cut the layout down from a 12x12, leaving me with some spare paper to use on another project yay!


I added the ice skating girl sticker from the Merry Days sticker sheet in the middle of the grid to hide the space remaining from the oddly shaped photos. I placed the sticker on cardstock, fussy cut and then placed it on foam pads to help lift the girl off from the page.


To the bottom right of the photos I added a wood veneer embellishment from my stash and the phrase flag which is from the Merry Days ephemera pack (from the extras shop).


To finish off the grid I added my title in the empty space and another wood veneer embellishment. 


This is a very simple layout but it took me some time to work out a design that would allow me to showcase 3 busy photos and the beautiful busy paper. 

I will be back soon with my next project which is an accompanying Project Life spread to go with this layout, which I often do when I have way too many photos.

Merry Christmas and Happy New Year to you all!

Natalie x 

You and Me - Natalie

Hello everybody, I'm back with my final layout using the last Quirky kit, before I start using the beautiful Christmas kit!

Supplies used:

Main Kit:
- Pinkfresh Studio Indigo Hills 2 - Gorge paper
- Pinkfresh Studio Indigo Hills 2 - Meadow paper x 2
- White cardstock

Extras Shop:
- Cocoa Vanilla Studio Midnight Sticker Sheet
- Cocoa Vanilla Studio Midnight Word Phrases


I started off this layout using the wreath paper, I originally wanted to cut the whole wreath out. I started by using my craft knife to cut out the inside of the wreath and then decided that actually I would keep the outside of the paper. The mixed media splatters are just too pretty and as I'm terrible at mixed media myself, this paper is perfect as all the hard work is done for me.

I then tried a few different options for papers to back the circle I had cut out from the middle, and decided on this pale grey leafy paper, from the main kit. 


Using another sheet of the wreath paper I cut out some of the flowers and leaves and layered them on top of their counterparts to add dimension, using glue dots and foam pads. Because I had cut out the middle I was also able to add dimension to the single layered leaves. 


I added butterflies from the CVS Midnight sticker sheet. I first stuck them to cardstock and fussy cut around them so I could bend up the wings to add more dimension. I added 3 to make a visual triangle across the page.


I then added my photo (mounted just on white cardstock) and my title. I may go back and add some strips of journalling. I wanted to keep this layout fairly minimal though as the wreath and splatters are so busy.


I hope my layout gives you some inspiration, and I will be back with my first layout using the new kit soon! 

Natalie x
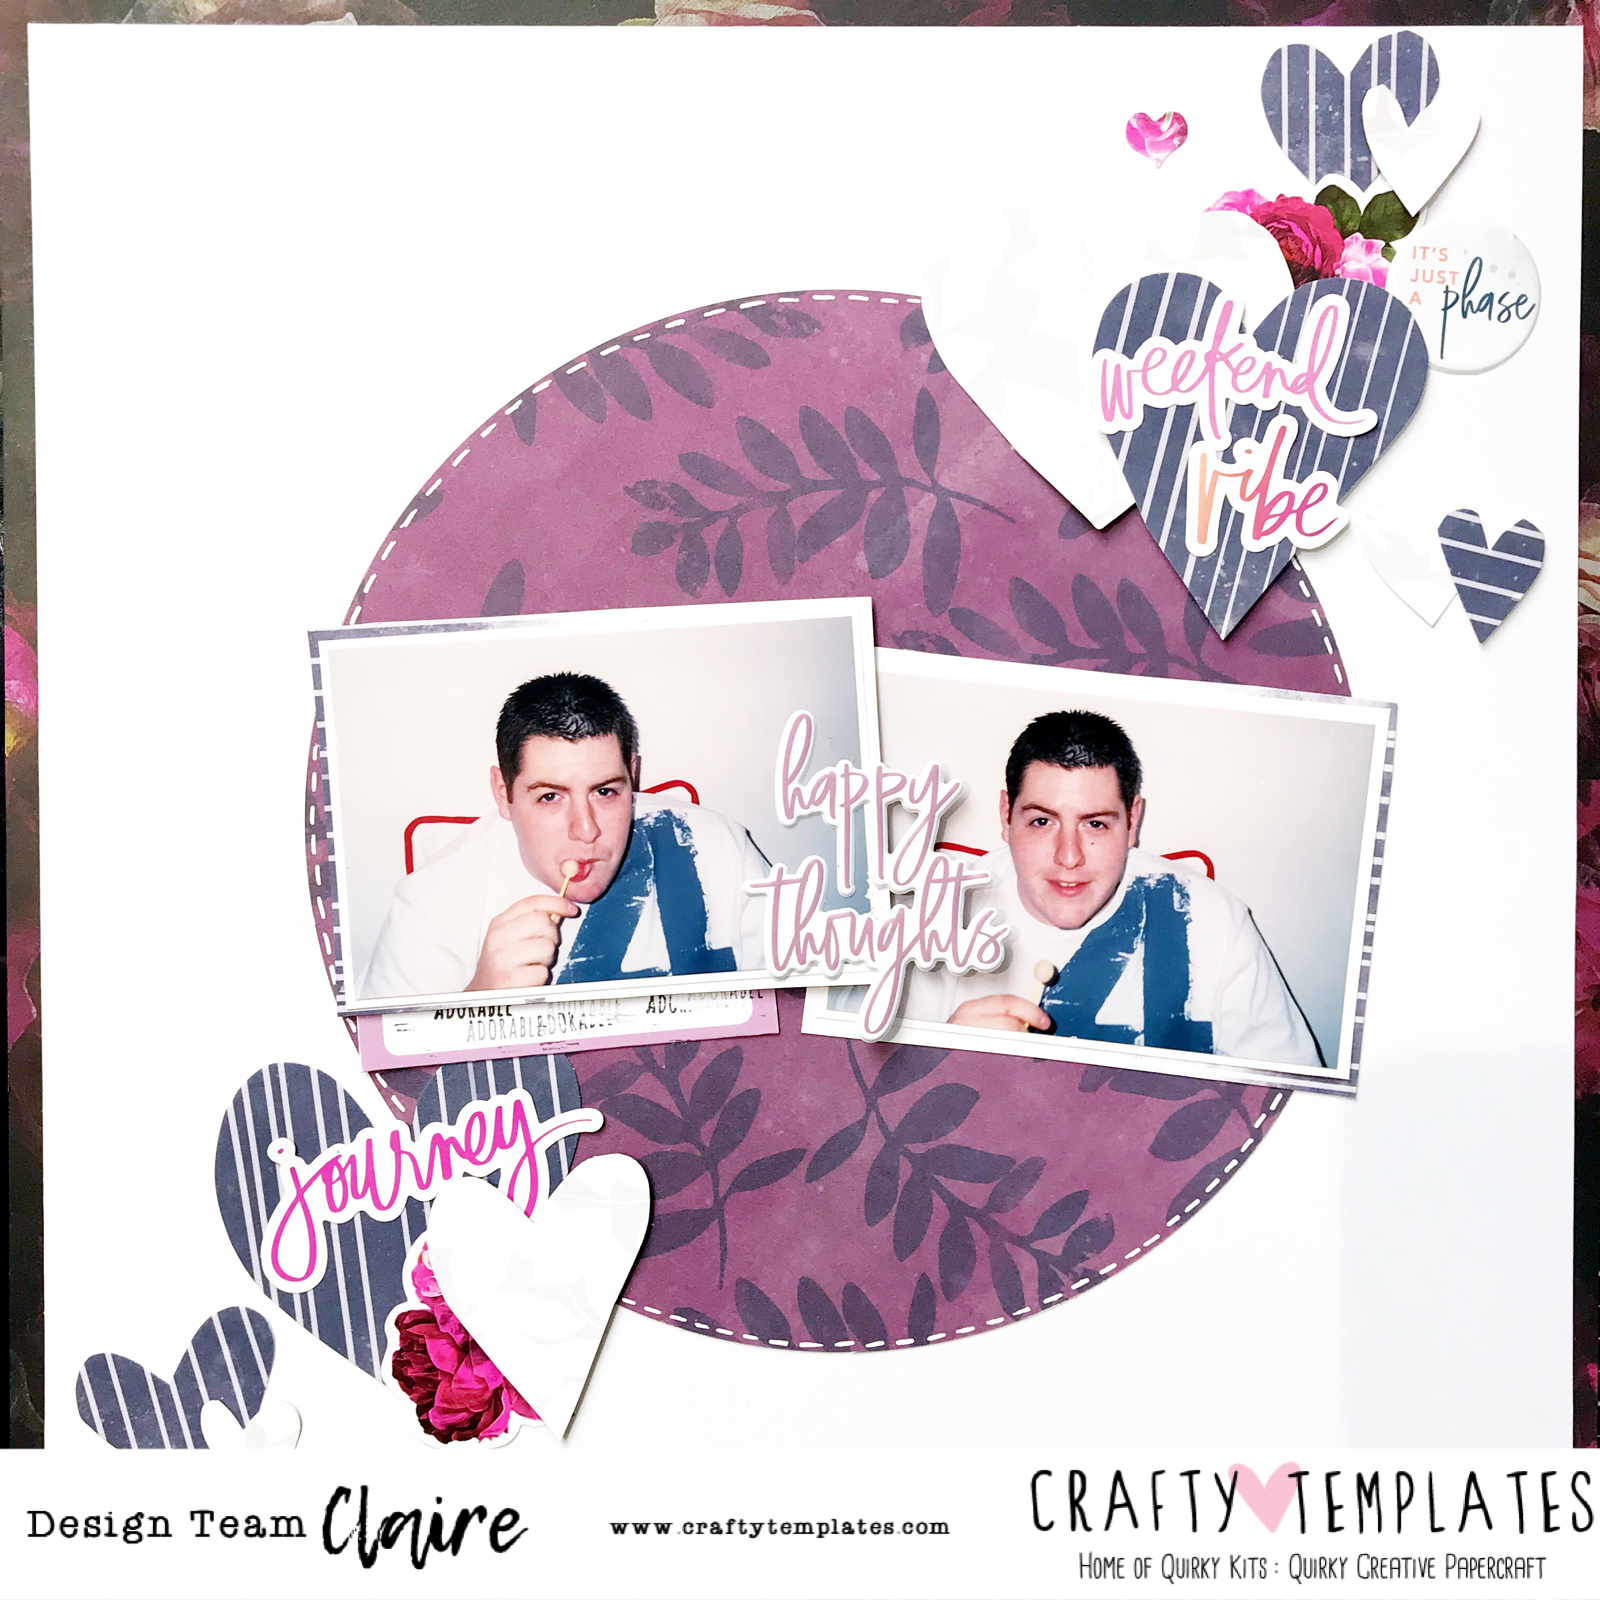
Happy Thoughts | ScrappyNerdUK (Claire) | September/October 2018

So this is the last layout from the current kit.....boooooo. But, the new kit is on the way......yay!!

I created this one during the Scrapalong Live over in the Facebook group. If you're not in the group then be sure to head on over and join in. I go live every 2 weeks with inspiration using the current kit (and sometimes bits from previous kits too).

For this layout I decided to channel my inner Amy Tangerine. At a workshop I attended, she encouraged us to embrace imperfection by cutting our own free hand hearts. This terrified me as I like everything to be perfect and straight. But, today I embraced the imperfect and just went for it.

I decided to use a sketch designed by Ashley Horton (below). This fit perfectly with the idea I had in mind for the hearts.


So I set about cutting into the scraps of paper (I think they were all from PinkFresh Studios). I cut a handful of hearts in differing sizes. I used 2 different coloured hearts to create some interest. I layered these to the top right and bottom left of my layout, overlaying the sides of the circle. I popped some up on foam and others I stuck straight down to the white cardstock.

I then added in some stickers from the Heidi Swapp stick sheet and this introduced a new colour to the layout. This is ok as I added multiple pops of this colour and I even added in a flower sticker...on a boy layout! I made the sticker go further by cutting it in half and tucking it in the 2 clusters of hearts. 
I decided at the last minute to cut a half inch strip from each the top and bottom and mount this onto the Heidi Swapp patterned paper (the beautiful floral one) and even added in some puffy stickers, one of which spanned across my 2 photos as my title. 


See you next time with the new kit!!


December Daily - Traveller's Notebook

Hello everyone I am back, a little later than promised, with my 2nd project using the September/October Quirky kit.
This time I am going to show how you can use non Christmassy papers and embellishments to make a December daily spread...in a travellers notebook!

Here are the items I used and how I created my spread

From the Main Kit:
  • Heidi Swapp Hawthorne 12x12 patterned paper
  • Vicki Boutin Field Notes Collect and Document 12x12 patterned paper
  • Pretty Little Studio Savannah Dreams Rainy Days die cuts
  • 1 Cut apart journaling label
From the Embellishment Kit:
  • Pink Fresh Studio Simple and Sweet Gold puffy Alpha
  • Pink Fresh Studio Indigo Hills Enamel Dots
From the Extras Store:
  • Kaisercraft Misty Mountains die cuts
From my own stash: 
  • Last years December quirky kit red glitter alpha
I started of the left page by cutting a rectangular piece of the Hawthorne paper and using the number one from last years December quirky kit. I cut a strip of the collect and document paper, cut a flag at one end, and adhered it underneath to form a banner. Underneath I used some of the PFS Simple and Sweet gold puffy alphas to write DEC.


I laid out my photos where I wanted them to be and matted them on some more of the Hawthorne paper. I tried hand journaling, but I didn't like how It looked so ended up typing up my journaling and matting it on some more of the Vicki Boutin paper to make it stand out from the page.
As one of my photographs were taken in the rain, I figured the Rainy Days die cuts would be perfect to place above the picture along with the "you got this" banner from the Misty Mountains die cut pack.

I finished this side by adding another one of the Kaisercraft diecuts and 3 enamel dots in the top right corner for decoration.

For the right page I cut up some strips of the Hawthorne paper following the lines of the pattern and lay them down to form a tree shape, cutting a small square for the base also. This time I decided against matting my photo's and just opted for leaving a thin piece of the white around the edge of them. I also used some more of the PFS gold puffy alphas for the title on this page.


I cut apart one of the labels that Leo makes for another journaling spot and layered that on a bigger piece of the Vicki Boutin paper, and finished with a flower embellishment from the Misty Mountains pack.

To finish off the page I added Pink Fresh Studio enamel dots so it looked like baubles on a tree :)

So that is my two page spread for December first. I really like the wooden paper for the tree, we live in a small flat so decided against getting a big green tree as it would take up a lot of light and space! Instead we bought a pre-lit silver birch tree that we can have up all year round...minus the baubles etc on it haha.
I hope you like it, I will be back on 12th Dec with my last project using this kit, before we start stalking the postie for the new kits. 

Happy Scrapping everyone! xxx

Forever and Then Some | Guest Designer Laura Rumble | Twilight Moon


I was determined to use Misty Mountains (that hexagon sheet from Kaisercraft) on this layout, my last share as a guest designer.  I failed.  It is still sitting on my desk taunting me!  I did, however, get most of the Heidi Swapp ‘Hawthorne’ patterned paper used up and I do love the result.


This layout is mainly mixed media and fussy cutting - the perfect combination if you ask me!  Here's the process video:


I made a good dent in the sticker pack using a circle for my title...


along with all of the hearts and all of the hexagons...


I didn't have enough hexagons so I used a craft knife to cut the backing paper away making a stencil.  I used a few different coloured pens to add extra hexagons to my mixed media background.  I stretched the hearts and hexagons further by cutting around the bleed on the backing sheet to make extra shaped stickers.


I grabbed some gold glitter alphas from my stash (Heidi Swapp again, I think) to add a subtitle and a little bit more gold.


Thanks for having me as a guest designer for this kit.  I've loved it - so much so that I'm now subbing to the custom cards kit. I hope you've enjoyed this kit too, more than that though, I hope that bloomin' hexagon paper isn't still taunting you!!

Natalie - Sweet Autumn Days

Hi everyone!

I'm back today with my 2nd layout using the Sept/Oct kit. 

Firstly I want to apologise for the quality of the photos in this blog post - it's very difficult to take photos in natural lighting now the sunlight hours are so short!

Supplies used:

Main Kit:
- PFS Indigo Hills 2 Mesa Paper x 2
- PFS Indigo Hills 2 Puffy Stickers

Extras Shop:
- CVS Midnight Die Cut Titles 

Previous Kits:
- PFS Orange puffy alphas

Own stash:
- Yellow alphas
- Ephemera pieces x 2


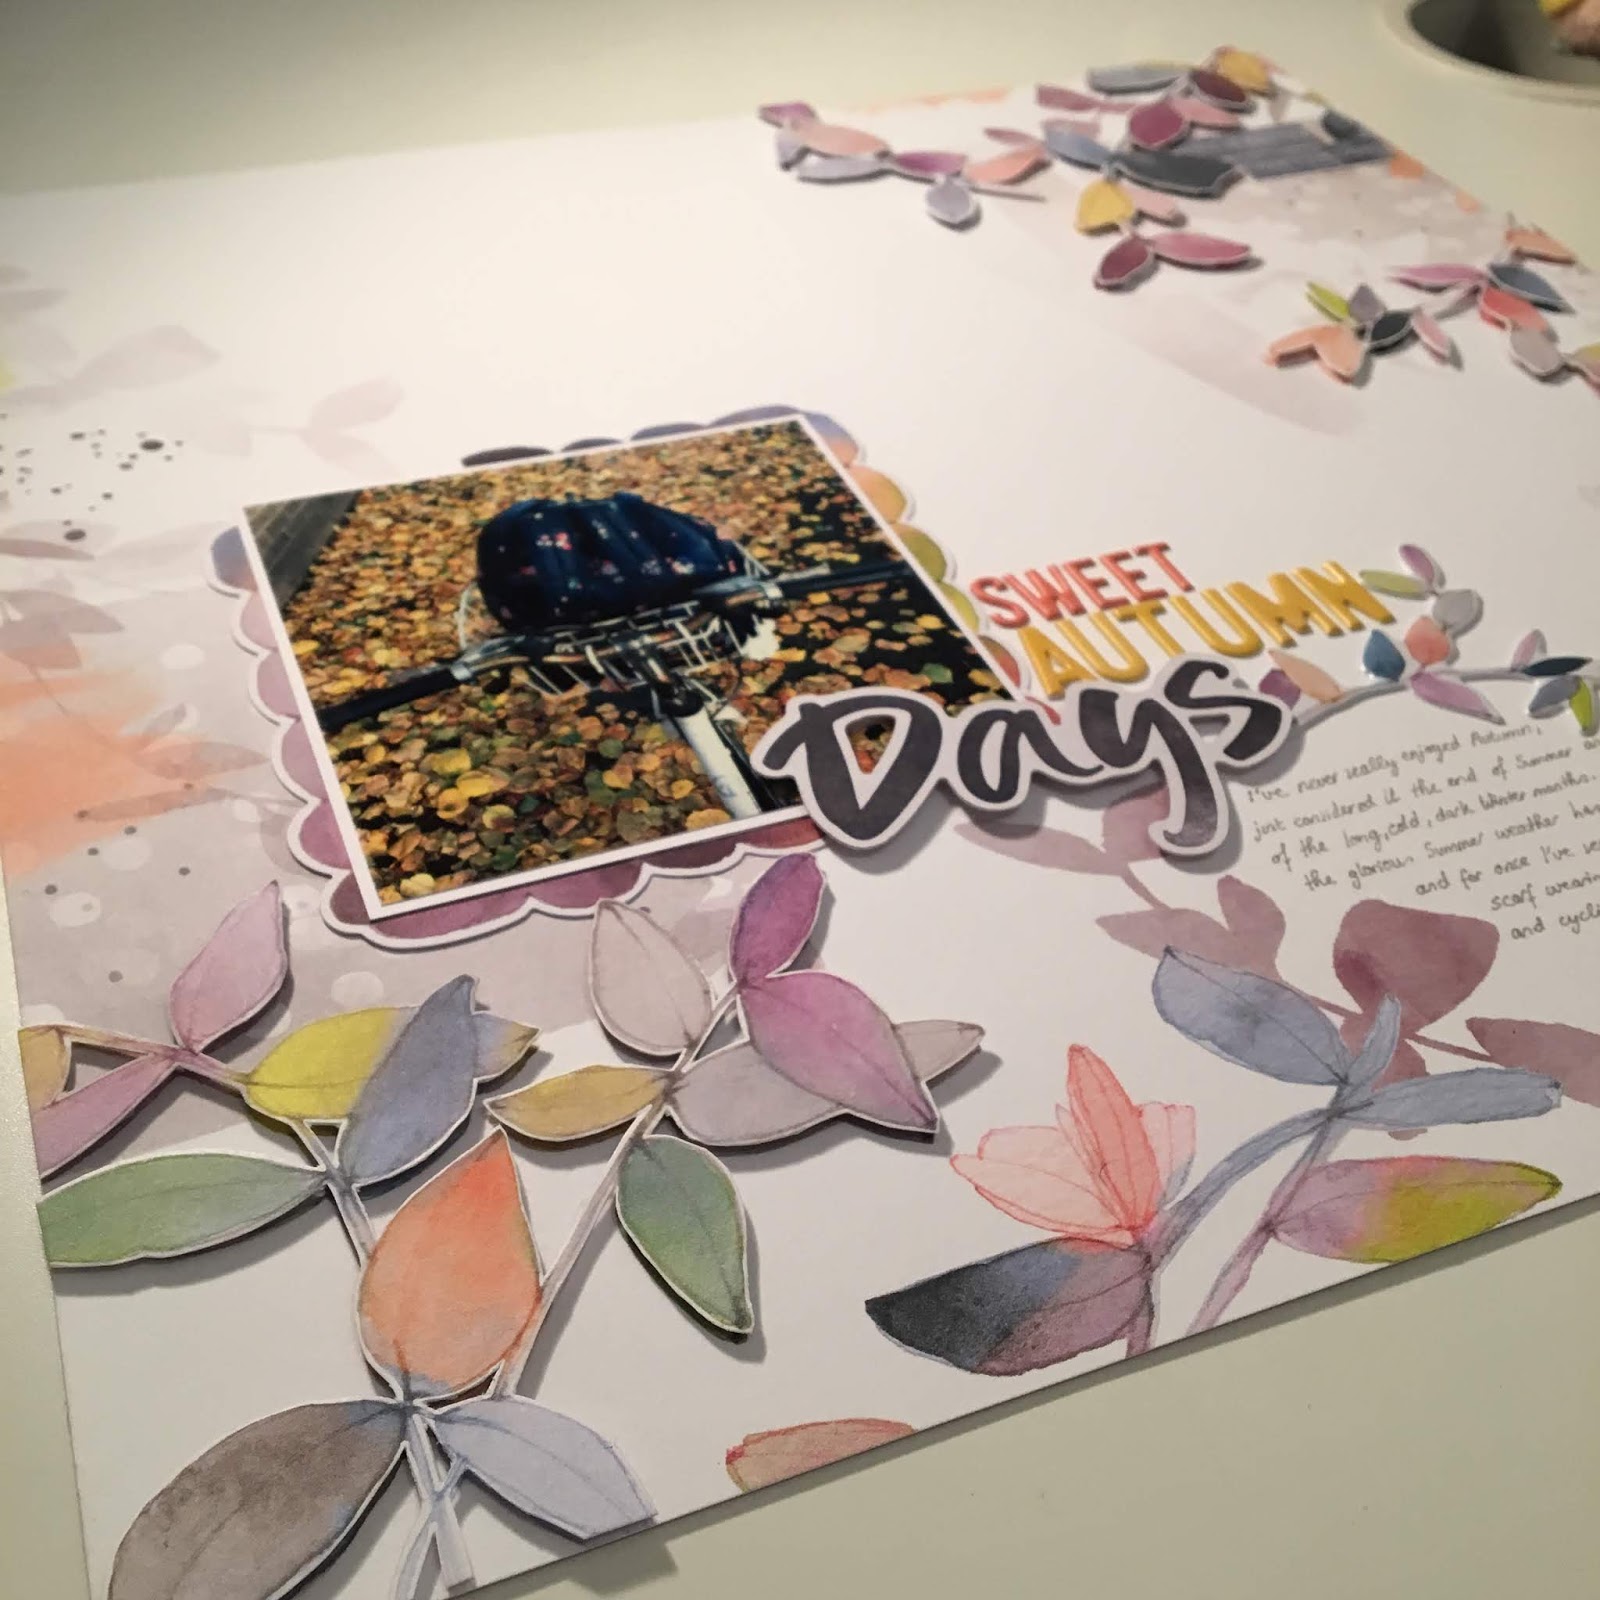
I started this layout with the Mesa paper from the main kit. I knew I wanted to make an autumnal layout with the paper so I looked through my phone for any recent photos of leaves. 
I printed my photo at 3.5 x 3.5 inches square and mounted with white cardstock. However when I placed the photo on the paper it covered some of the leaves and made them look very flat.
So I decided to fussy cut the leaves from a spare piece of the same paper to add some dimension to the page. Which surprisingly didn't take as long as I was expecting, especially when you have a good Netflix show to keep you company!


As you can see I only fussy cut the main branches. If you only have one copy of the paper you can fussy cut the branches and add them to another background. 


I added a frame around the photo from my own stash. Then I worked on my title. I knew I wanted to use one of the beautiful CVS die cut titles from the Extra Shop as part of my title, and I placed this on foam pads to add more dimension. I then added two more words in co-ordinating colours, to help bring out the oranges and yellows in the paper and the photo.

To ground the title I added a puffy leaf sticker from the Indigo Hills sticker sheet in the Main Kit. 


I wanted to add some journalling but I was torn as to whether to type it, add it to the back of the layout or hand write it. In the end after discussion with a few scrappy friends I decided to handwrite my journalling. And I'm really happy I did, as I think it finishes off the layout perfectly. I drew faint lines with a pencil to help me stay straight, and they easily rubbed off without leaving a mark. I used a Graphik grey pen which I think is perfect for adding journalling when you don't want to add harsh black text to your layout.


And that is my layout complete! I hope it has given you some inspiration. 
And once you have fussy cut the leaves it takes no time at all to put together!

See you soon with another layout,

Natalie x

Sunday Sketch Challenge #5

This is the final of the sketch challenges! To look back on each one check out the previous posts: Last week we had sketch #4 which you can view here. Sketch #3 is here and then there's sketch #2 here and sketch #1 here. You have until next week to complete all the challenges and upload them, (by Sunday pm at the latest to qualify for the extra goodie in your kit box) if you're playing along just for fun there's no deadline.

Once you've finished your creation upload it to your platform of choice.
For Instagram tag @craftytemplates and mention it's for Sketch Sunday.
For Facebook add it to the Quirky Kits Group - they'll be a post for each sketch there to share it to.
For blog add a link to your project from your blog in the comments below. 
Or if you'd prefer to keep your project private you can email them directly to Leonora@craftytemplates.com
 

Ready to get creating?
If you've never used a sketch before all you need to do is follow the layout below as a starting point for the positioning of your page elements, (photo, title, papers etc.). What those elements are and how much you use them is entirely up to you though. You don't need to follow the same colours in the sketch.

Sketch Sunday Sketch #5

 
Layout sample: